Backpacking Havasupai: What It’s Actually Like (And What I Didn’t Expect)
Havasupai had been on my list for years.
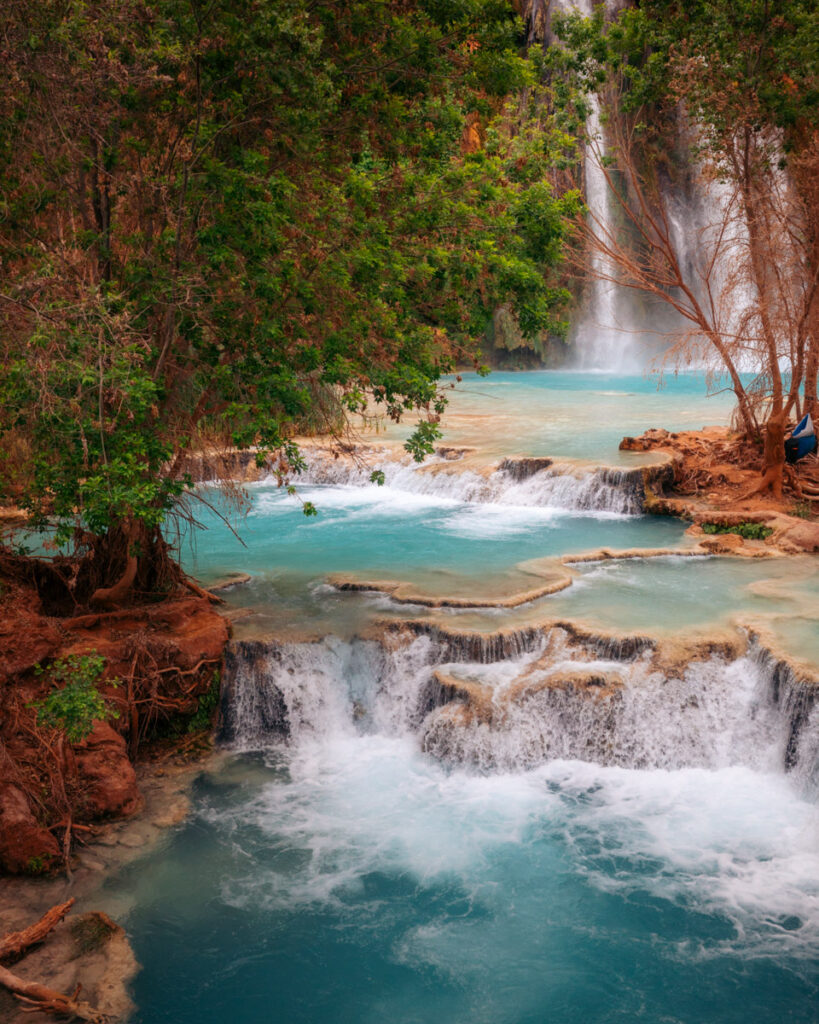
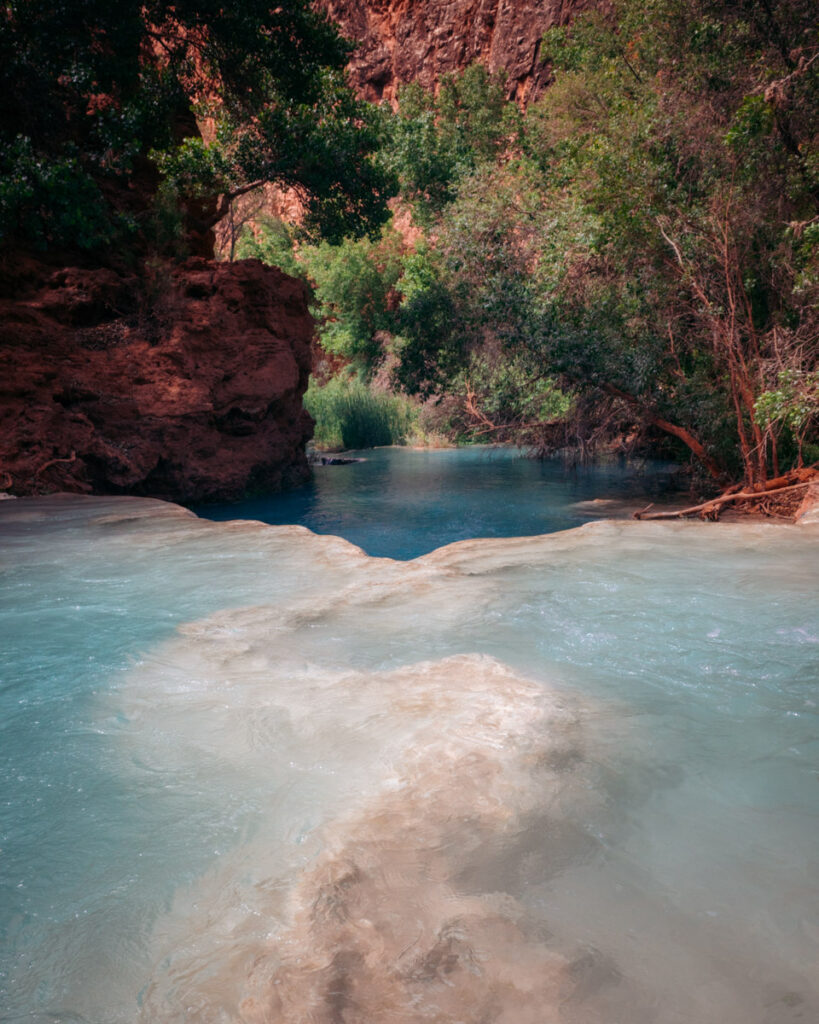
It’s one of those places you see over and over again—the unreal blue water, waterfalls tucked into red canyon walls—and you start to wonder if it can actually look like that in real life.
And in some ways, it does.
The water really is that color. The contrast is just as striking. And standing there for the first time, after the long hike in, it does feel like you’ve arrived somewhere special.
But if I’m being honest, it wasn’t exactly what I expected either.
There were parts that surprised me—not in a bad way, just in a way that made me think more about the experience as a whole. The campground felt more crowded and worn than I imagined. There was more trash than I expected to see in a place this beautiful. And the semi constant movement—helicopters, pack trains, people coming and going—gave it a more commercial feel than I was prepared for.

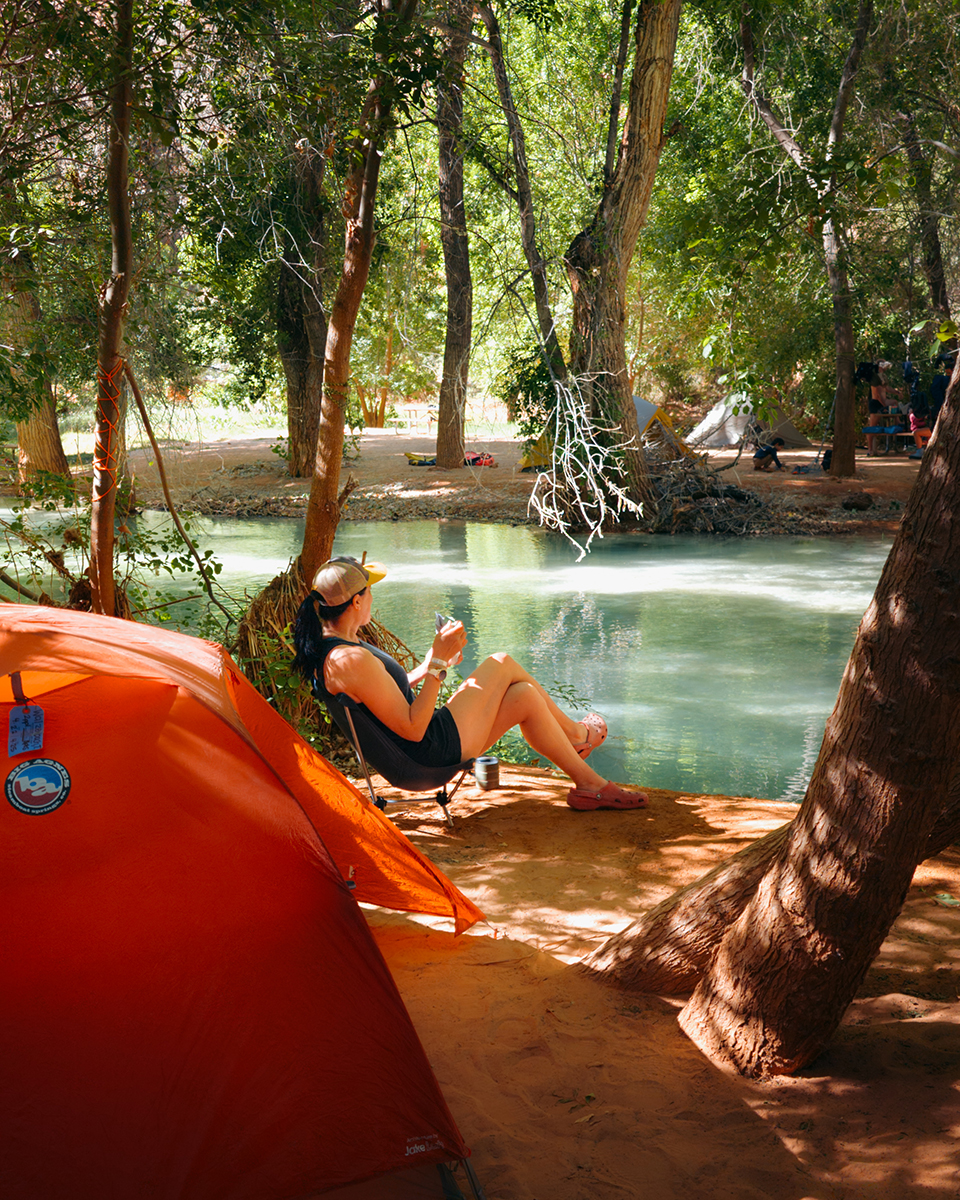
At the same time, there’s something really unique about being there for three nights. You’re not just passing through—you settle in, find your spot and start to recognize people. There’s this shared experience where everyone is off exploring the same waterfalls during the day and then returns to camp in the evening, trading stories and settling into life for a few days.
And there were moments that made me love it.
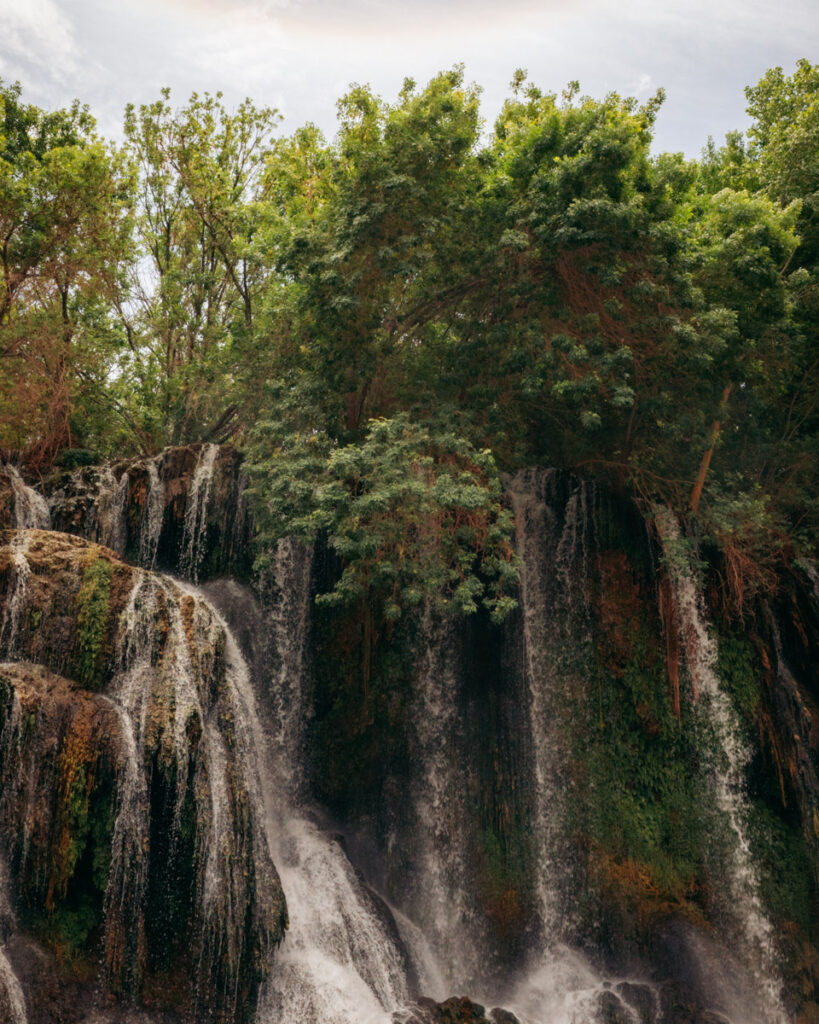
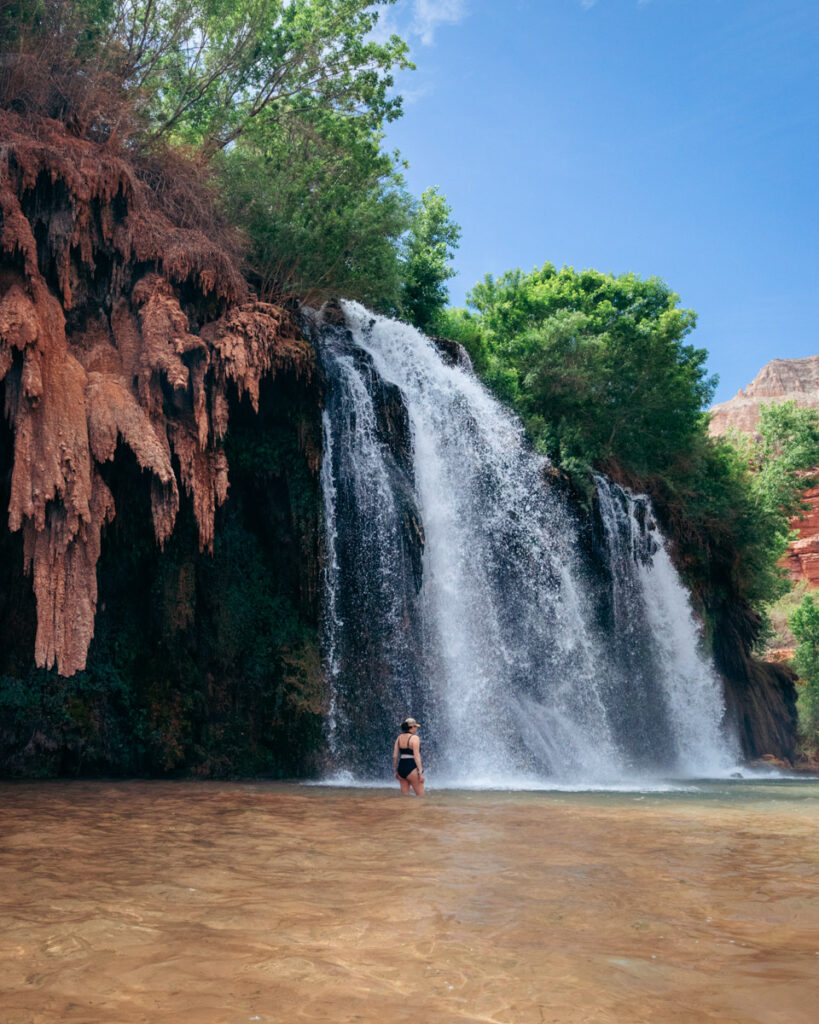
Quiet stretches along the creek. Finding smaller spots away from the main falls—places like Fifty Foot Falls that, for me, ended up being the most memorable part of the trip.
It’s a place that’s undeniably beautiful.
But it’s also a place that makes you think—about access, about impact, and about how we treat places like this once they become bucket-list destinations.
I’m really glad I went.
But I think it’s worth knowing what the experience actually feels like before you go.
This guide is everything I wish I had known—both the incredible parts and the ones that caught me off guard.
The Permit Process (What It Actually Looked Like for Me)
This part was… a little chaotic.
This year they introduced an early access lottery (for an extra fee), which in theory was supposed to make things smoother. But when permits actually opened, the entire system crashed. Like completely—no one could book anything.
They did acknowledge it and said they’d announce when things were back up, but from what I could tell, there wasn’t really a clear “it’s live again” moment. It just kind of… quietly came back online.
I actually only got a permit because a friend happened to check while she was at work, called me, and said, “it’s up—book right now.” I jumped on immediately and somehow had access to pretty much any dates I wanted.
Honestly, I think the crash ended up working in our favor. It spread people out and gave us a window that felt way less competitive than I expected.
That said, I wouldn’t count on that happening again. If you’re planning a trip, I’d still go in expecting it to be competitive and a little unpredictable.
How to Actually Get a Havasupai Permit
If you’re planning a trip, everything starts here:
https://www.havasupaireservations.com
This is the only place to book permits, and yes—it can feel a little chaotic.
Here’s how the process works (in simple terms)
- Permits are released once a year for the entire season
- You’ll either:
- Enter the early access lottery (extra fee), or
- Try to book when general reservations open
Either way, be ready for a bit of unpredictability. The system can get overwhelmed quickly, and availability goes fast (unless something like this year happens).
The one thing I wish I had known
Even if you’re going with a group, you’re not booking as multiple people at the start.
You:
- Select your dates
- Book the trip as the trip leader
- Add the rest of your group later in the process
I kept trying to add my friend at the beginning, and it just wasn’t working—which made it way more confusing than it needed to be.
So if it feels like it’s glitching… it might not be.
Just book the dates first, then add people.
A few practical tips
- Create an account ahead of time (don’t do this day-of)
- Be flexible with dates if you can
- Have a backup person ready to book in case you get locked out
- If the site crashes… keep checking back (it might quietly come back online)
Final note
Every reservation is for 3 nights / 4 days—you don’t choose a shorter stay.
The Journey In (What It Actually Feels Like)
We flew in the night before and kept it pretty simple. My friend got in earlier, picked up the rental car, grabbed a few last supplies, and then picked me up at the airport. From there, we drove out toward Kingman and stayed at one of the last hotels before the trailhead.
The next morning, permits open early (around 6am), but we decided not to rush it. We slept in a bit and just planned to hike in through the heat—which, honestly, ended up being a non-issue.
Picking up the permits was surprisingly easy. I had built it up in my head like I might have missed something or done something wrong, but it was very straightforward. We signed a form, got our wristbands, and were on our way.
They do go over a few rules at check-in—most notably that you can’t photograph the village, the people, or the pack horses. It’s something to be aware of ahead of time, especially if you’re used to documenting everything.
As for the hike in… this was one of the biggest surprises for me.
You hear a lot about how hard it is, and yes—the initial descent is steep for about a mile or so, and you feel it in your knees. But after that, the trail levels out and winds through the canyon for most of the way. There’s actually quite a bit of shade at times, and overall, I didn’t find it nearly as difficult or as long as I expected.
It took us about five hours at a steady pace, and most of it was honestly really enjoyable.
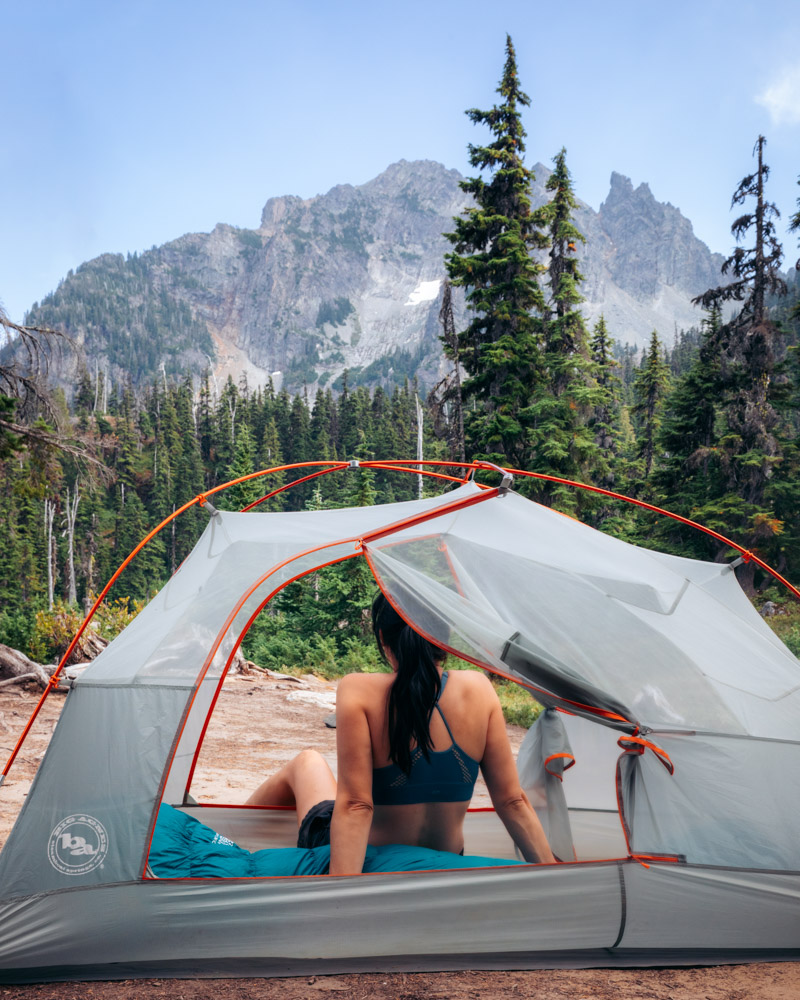
I was carrying my Hyperlite Mountain Gear Southwest 55, which ended up being a really good fit for this trip. With food for three nights (plus an extra buffer day), my tent, and a few comfort items, it handled the weight really well without feeling bulky. We split gear where we could—my friend carried the stove (just a MSR PocketRocket, which weighs basically nothing), which helped keep things balanced.
The only interruptions were the occasional helicopter overhead and the pack trains coming through, which can kick up quite a bit of dust. But even that wasn’t constant—it just comes in waves.
What surprised me most was how few people we saw. I expected it to feel crowded the entire way in, but for long stretches, it actually felt pretty quiet.
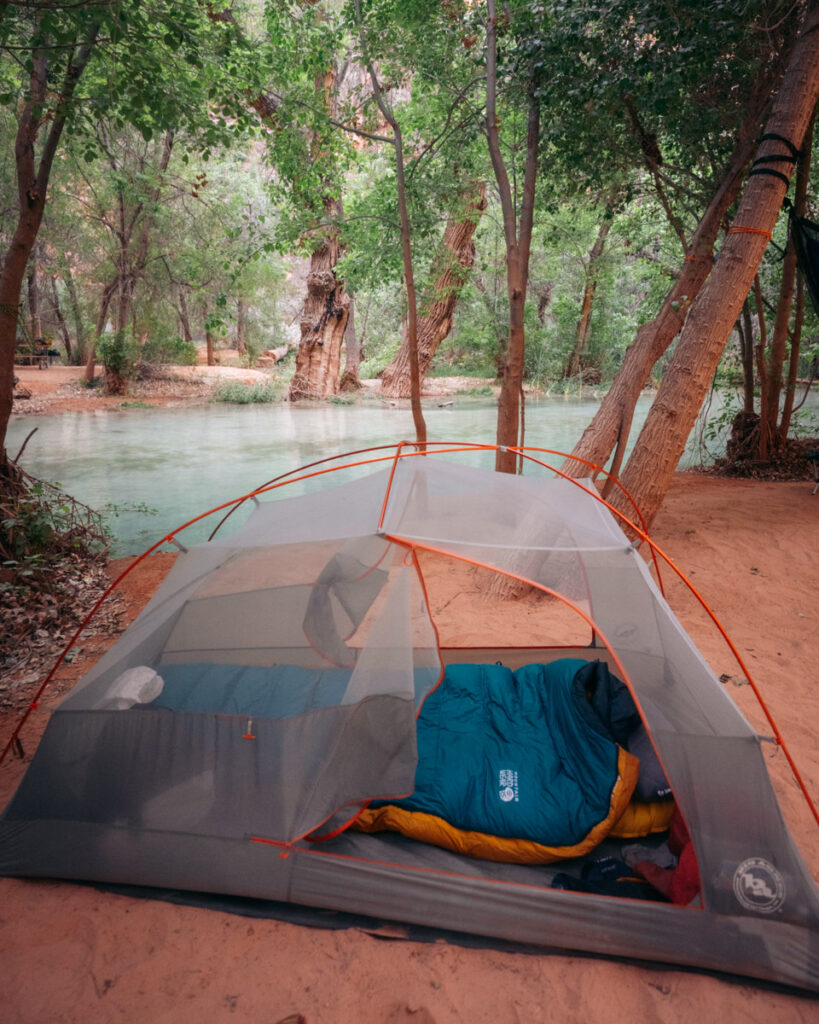
By the time you reach the campground, you’re about 10 miles in—and that’s when the real experience starts, figuring out where to set up and settling in.
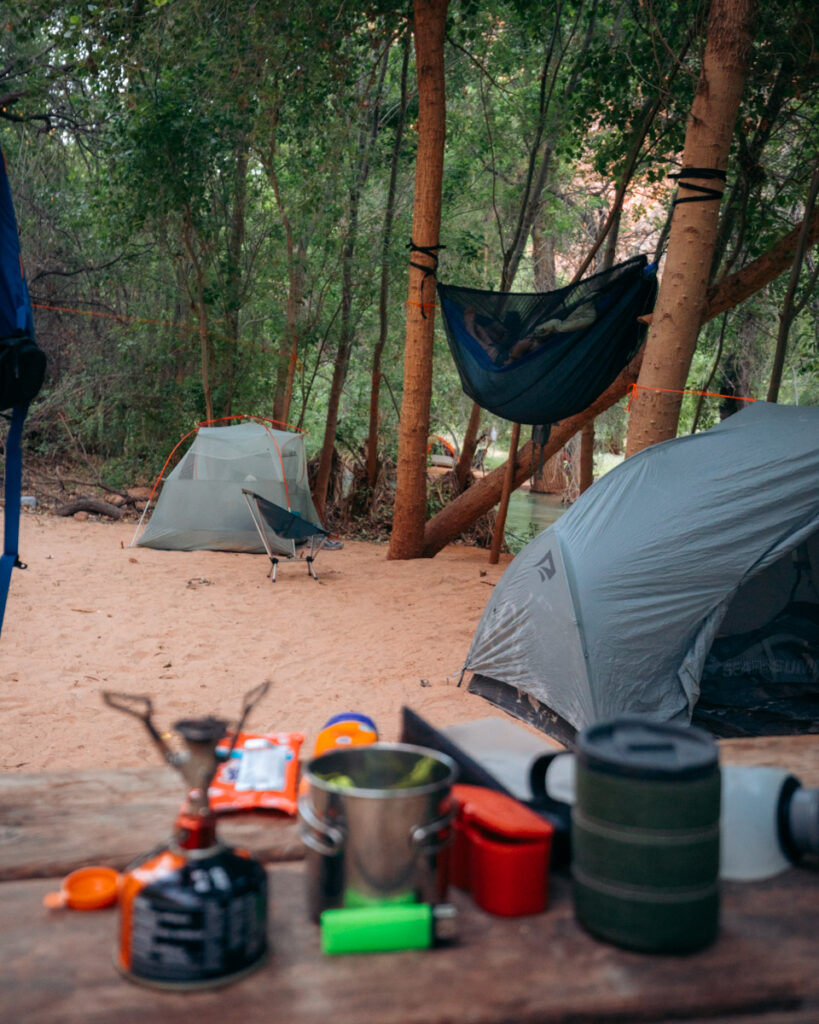
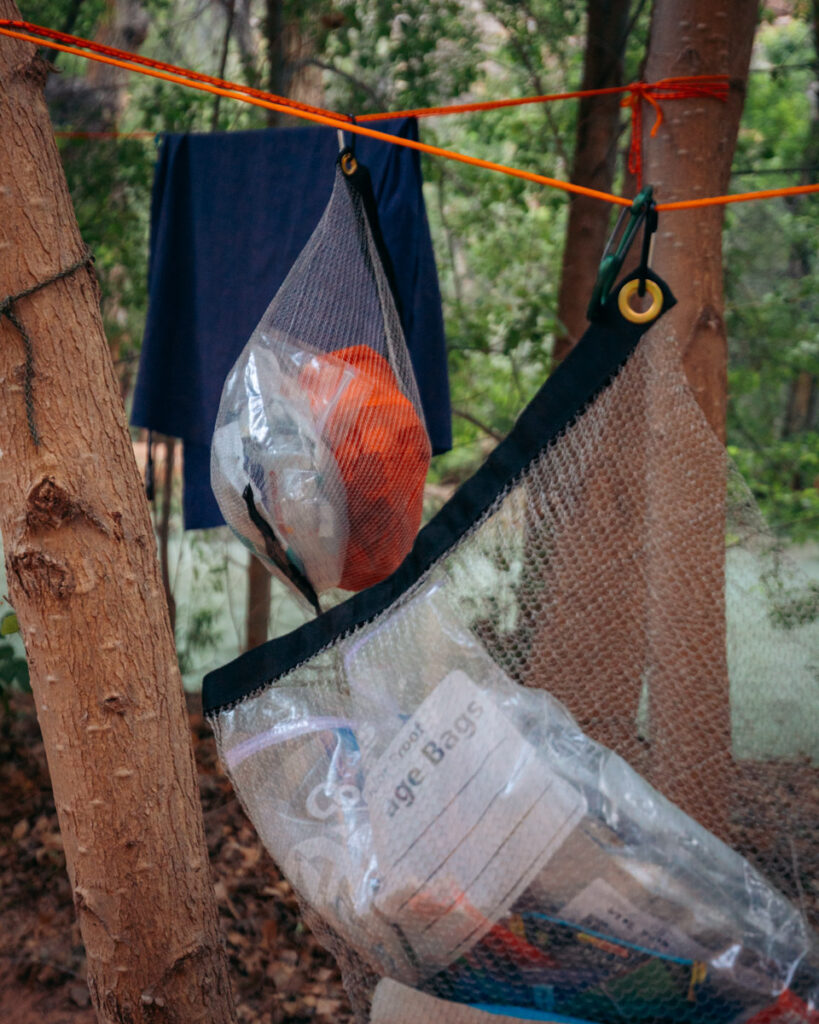
And one thing I didn’t fully appreciate ahead of time: camp life here is different.
Rodents are very real, and they will get into your food if you’re not careful. Most people had these wire mesh bags that close securely, and then stored their food inside odor-proof bags within that. It’s not something I would skip—you’ll see why pretty quickly once you’re there.
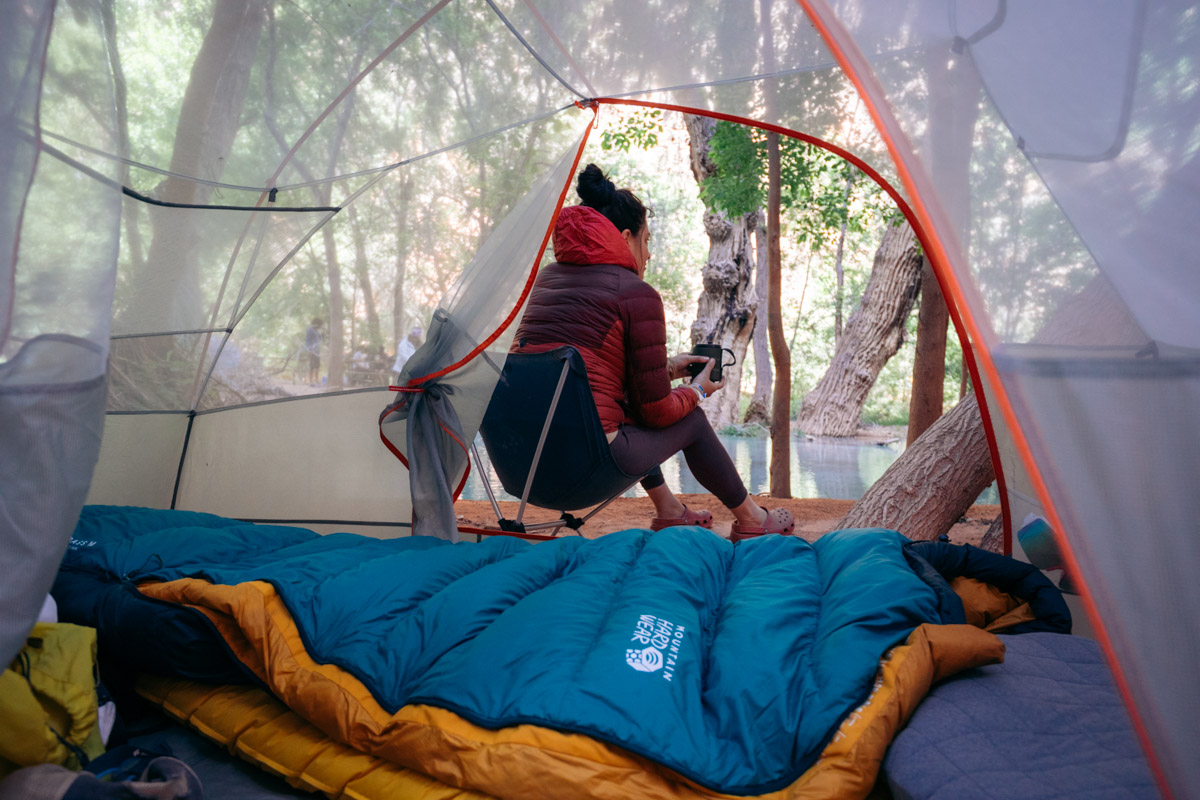
Also… I brought a camp chair, and it ended up being my favorite “non-essential” item. After hiking and spending full days exploring, having a comfortable place to sit at camp made a much bigger difference than I expected.
Finding a Campsite (And What to Expect)
This was one of the parts I was most unsure about going in.
We hiked in a little later than most people, and I kept wondering—are we going to be stuck with whatever’s left? Is there even going to be a “good” spot?
What I had heard (and what ended up being true) is that when you first reach the campground, you’ll see a lot of sites right away—but if you keep going, it just keeps opening up. The campground stretches much farther than I expected, almost all the way to Mooney Falls. We even saw people camping right near the top of it.
One thing I didn’t know ahead of time is that there’s a bit of a rhythm to how people find better sites. Everyone has a different colored permit depending on their dates, so you can usually tell who’s leaving the next morning. A lot of people will take a decent spot the first night, then wake up early (around 5am, when people are packing up to beat the heat) and move into a better campsite.
We kind of stumbled into that naturally. Our first night, we found a nice spot where the group was leaving the next day—but we also had our eye on another site that felt a little more tucked away. A lot of the campground is pretty close together, which can be fun in a social way, but also makes you appreciate a little privacy when you can find it.
So the next morning, we moved—and it ended up making a big difference.
The campground itself has more infrastructure than I expected. There’s a spring where you can get fresh water, composting toilets throughout (honestly much better than I anticipated), and a lot of sites already have things like picnic tables or even clotheslines that people leave behind and reuse.

But the biggest thing I noticed—and this was hard to ignore—was the amount of trash.
For a place this beautiful, I just wasn’t expecting it. It wasn’t everywhere, but enough that you’d notice it around campsites and along the creek. It felt a little at odds with the setting.
I found myself picking up a few extra things each day as I packed up meals, just to leave our area a little better than we found it. It’s one of those places where the experience is so special… and you really hope people treat it that way.
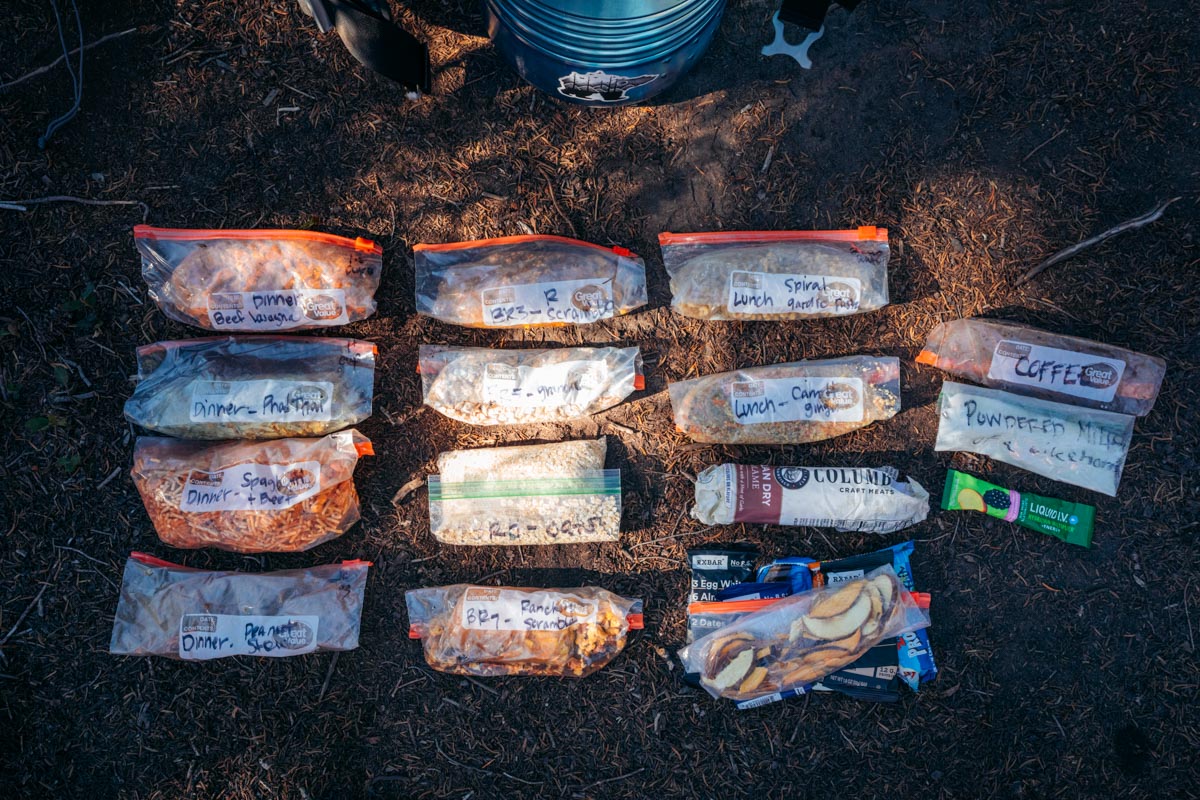
Food (What We Actually Did)
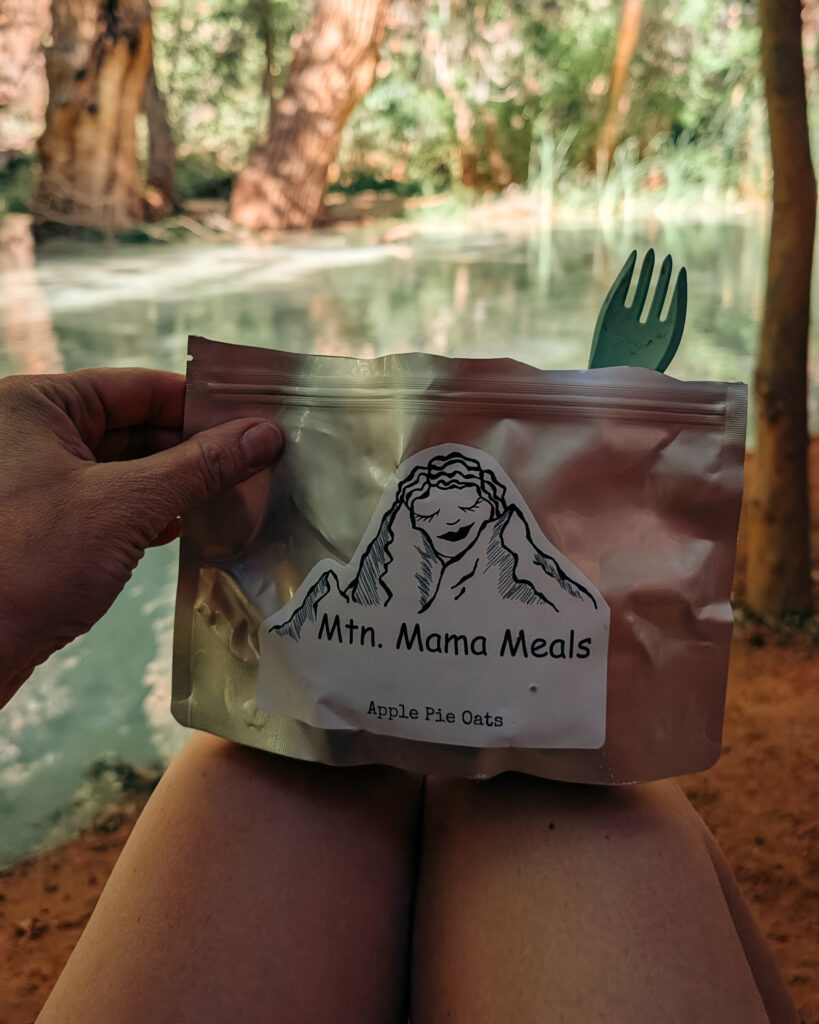
We kept this pretty simple and just brought all of our own food.
Breakfast and dinner were at camp, and then we’d pack something easy for lunch while we were out exploring during the day. It worked really well and honestly felt like the easiest option once you’re down there and settled in.
I was hoping to try fry bread while we were there, but the timing just never worked out. The stand wasn’t always open, and we never quite caught it at the right moment.
There is food available at the lodge in the village, but it’s a bit of a walk from the campground and not something we felt like going out of our way for—especially once we were in our rhythm of exploring during the day and relaxing at camp in the evenings.
So overall, bringing our own food ended up being the right call for us. It gave us more flexibility and made the days feel a little more relaxed. My absolute favorite freeze dried meals are Mtn Mama Meals.
How to Spend Your Days (And What I’d Actually Recommend)
One of the things I loved most about Havasupai is that you can really do as much—or as little—as you want.
Some people never go past Havasu Falls, and honestly, you could easily spend a full trip just there. It’s beautiful, there are picnic tables, places to swim, and it’s the most accessible.
But if you’re up for it, I’d really recommend exploring beyond that.
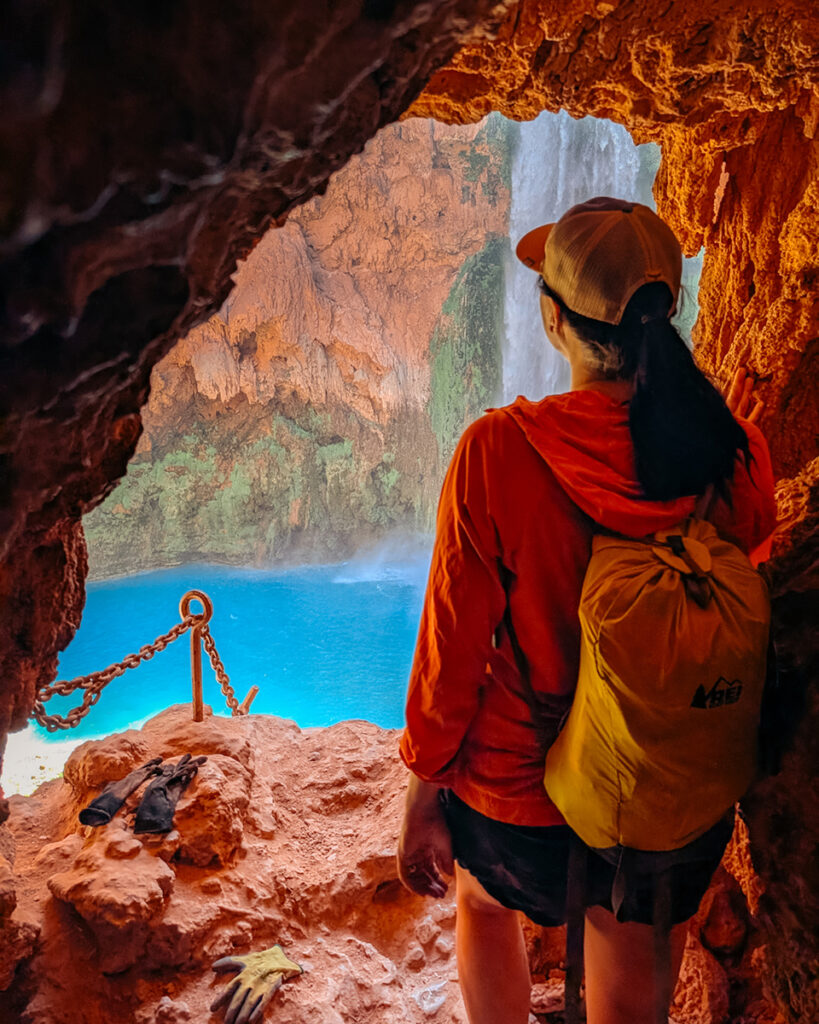
Day 1: Mooney Falls → Beaver Falls
Our first full day, we went straight down to Mooney Falls and kept going to Beaver Falls.
Getting down Mooney Falls is one of those things you hear a lot about beforehand—the chains, the ladders, climbing through the rock—but I didn’t find it nearly as intimidating as I expected. My legs were definitely shaking a little, but it felt manageable. It’s wet, a little slippery, but totally doable. (I actually did it in Crocs, which probably says a lot.)
From there, we hiked along the river to Beaver Falls. That part of the trail was one of my favorites—just following the water, crossing back and forth, and finding little pockets along the way.
Beaver Falls itself was a bit more crowded than I expected, so instead of staying right there, we found a quieter spot nearby—this beautiful emerald pool where we could swim, relax, and just hang out for a while.
We took our time heading back, stopped again at Mooney Falls for a bit, and then made our way back to camp.
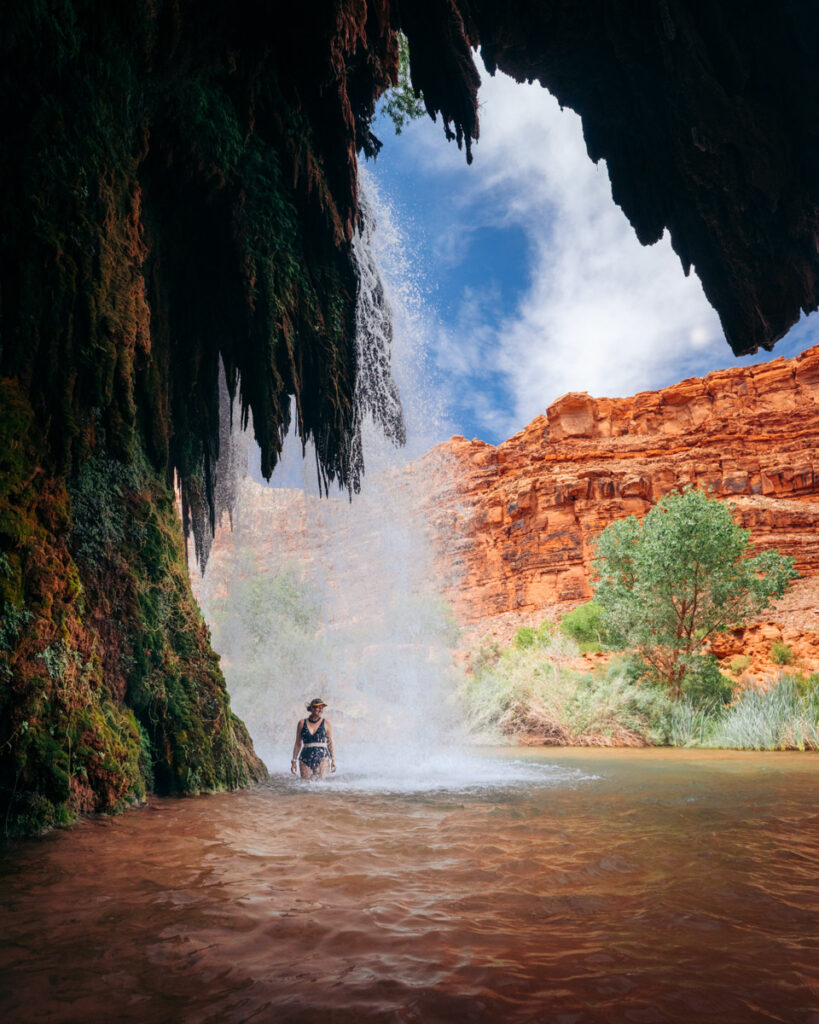
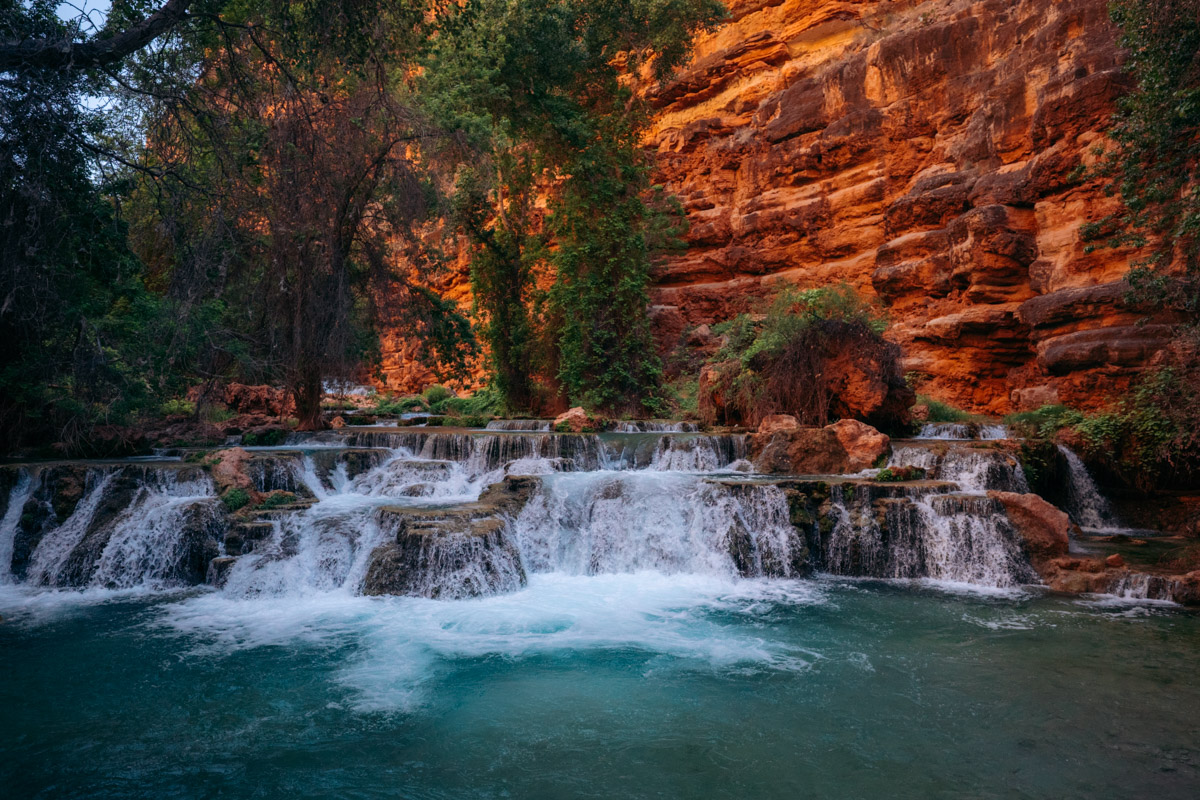
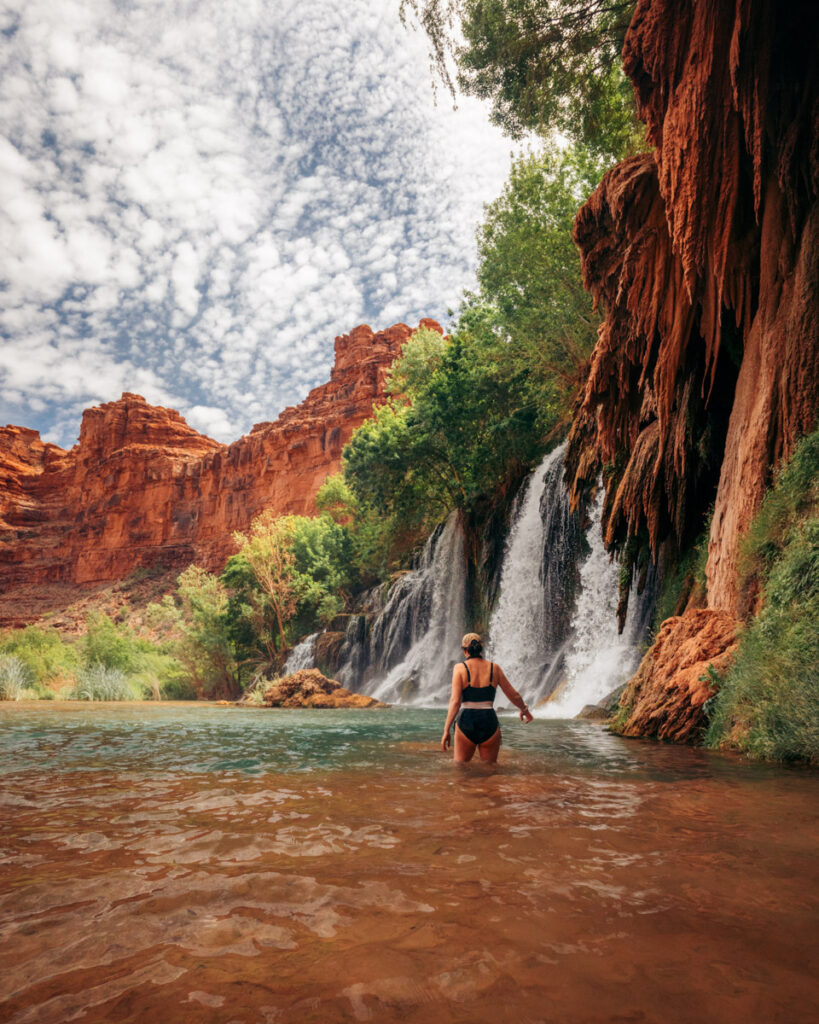
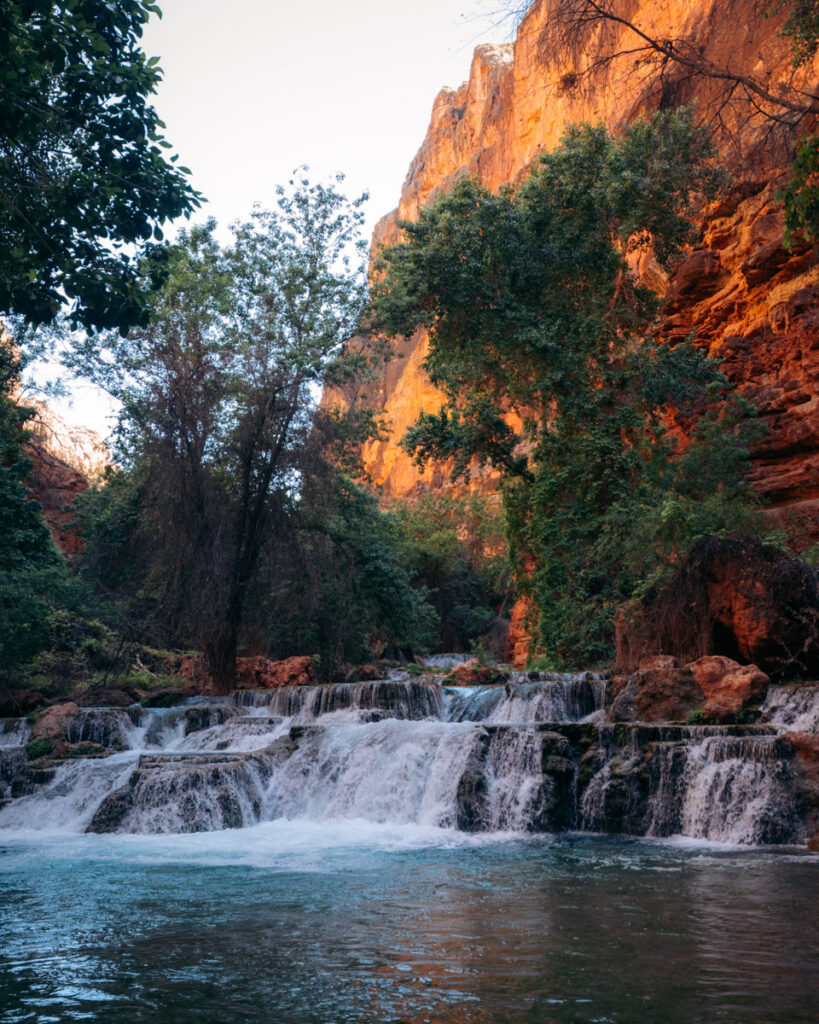
Day 2: Fifty Foot Falls + Havasu Falls
The next day ended up being my favorite.
We went looking for Fifty Foot Falls, which I hadn’t even heard of before the trip. Someone we met on the hike in mentioned it, said it was hard to find, and that was enough to make us curious.
And it is a little strange to get to—you basically have to step into the creek at one point and hike through the water, in and out, around a bend. It doesn’t feel obvious at all.
But when you find it… it’s incredible.
When we got there, there were a couple people, but they left shortly after, and for a while, we had the entire place to ourselves. You can swim, walk behind the waterfall, and it just feels completely tucked away—like a little hidden oasis.
It doesn’t have that bright blue color that everyone comes for, but honestly, it didn’t matter. It was probably my favorite part of the whole trip.
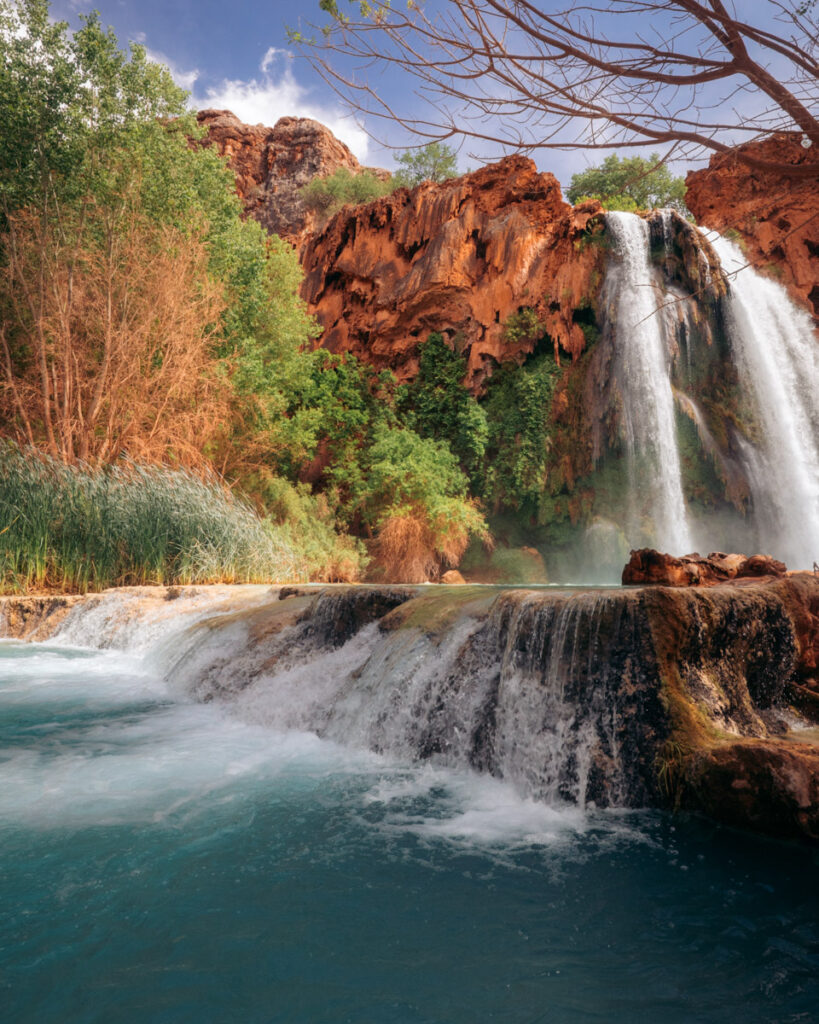
That afternoon, we spent time at Havasu Falls.
And this is where I’ll be honest—it was probably my least favorite, mostly because of how crowded it felt and how worn-down the area around it is. It’s the easiest to access, so it gets the most traffic.
But even with that, I still really enjoyed it. I walked a bit farther down and off to the side, found a quieter spot, went for a swim, and just took it in. The water really is that beautiful.
What We Skipped (And Why)
We didn’t hike all the way to the confluence.
A lot of people do, and I’ve heard it’s worth it—but for us, we realized we’d rather spend more time at each place instead of trying to fit everything in.
And honestly, that felt like the right choice.

What I’d Recommend
If you’re planning your days, I’d say:
- Make sure you see all the waterfalls
- But don’t rush through them
- Give yourself time to swim, explore, and just sit for a while
That ended up being the best part—not just checking things off, but actually being there.
What I Packed (And What Actually Mattered)
I always overthink gear before a trip like this, but Havasupai ended up being one of those places where a few things really stood out—and a few things didn’t matter as much as I expected.
Here’s what I brought and what I’d absolutely bring again:
The things I loved
Camp chair (worth every ounce)
I almost didn’t bring this, and I’m so glad I did. After hiking and spending full days exploring, having a comfortable place to sit at camp made a huge difference. This was easily my favorite “non-essential” item.
Water shoes (not optional)
You’re in and out of the water constantly—crossing the creek, hiking to Beaver Falls, exploring. I wore my Crocs the entire time and they were perfect, but anything like Tevas or Chacos would work too.
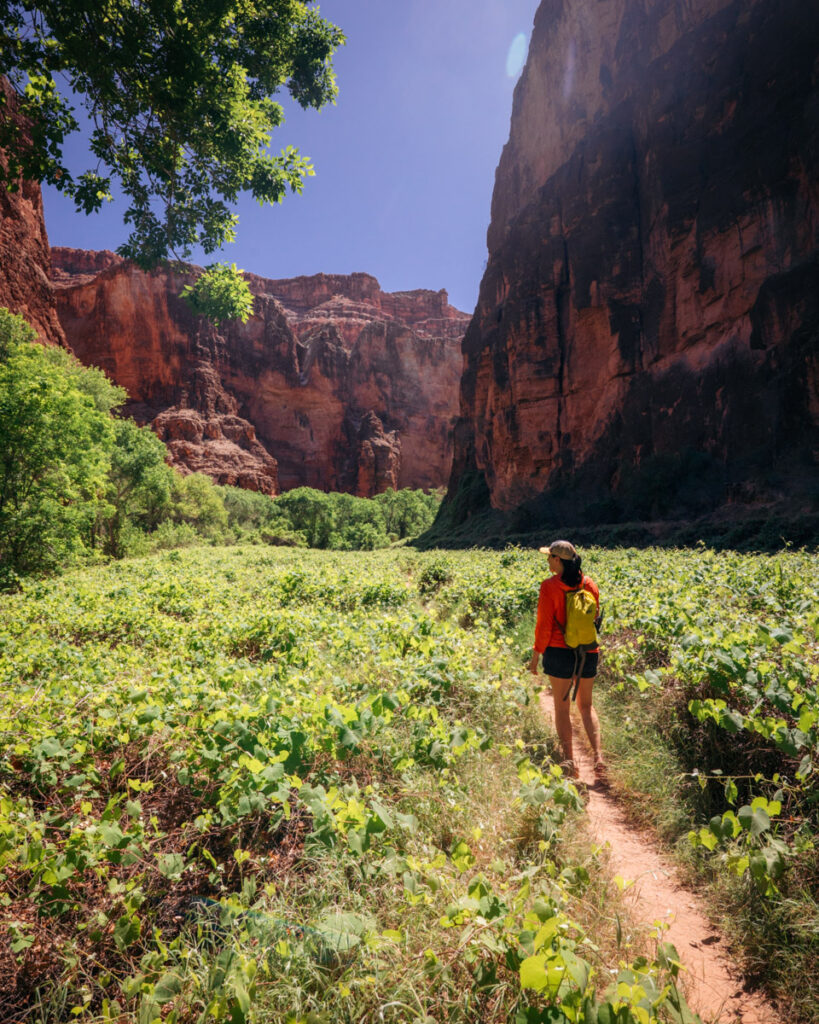
Small daypack / summit bag
I carried my larger pack in (I used my Hyperlite Southwest 55), but once you’re at camp, you don’t want to haul that around. Having a small, lightweight bag like my REI Flash 18 for day exploring made everything easier.
Headlamp + battery packs
Standard, but important. Nights are dark, and if you’re taking photos or getting up early, you’ll use it more than you think.
Camera + tripod
For me, this was non-negotiable. I don’t like relying on other people for photos, and having my tripod gave me a lot more flexibility, especially around sunrise and sunset.
Quick-dry towel
You’re swimming a lot. This towel ended up being way more useful than I expected.
Clean sleep clothes
This is something I always do, and it matters even more here. After being in the water all day, having a clean, dry set of clothes to change into at night just makes everything feel better.
Things that surprised me
Rodent-proof food storage is a must
This is not optional. There are a lot of rodents in camp, and they will get into your food.
Most people had wire mesh bags that seal shut, with their food stored inside odor-proof bags. It’s one of those things you don’t think much about until you’re there—and then you realize how important it is.
Water filter (even with the spring)
There is a freshwater spring in camp, but we didn’t always go out of our way to use it. Filtering water from the creek was just easier most of the time, so having a good filter was key.
Earplugs
This was one of those small things that made a big difference. Between people, pack trains, and general campground noise, having earplugs made sleeping a lot easier.
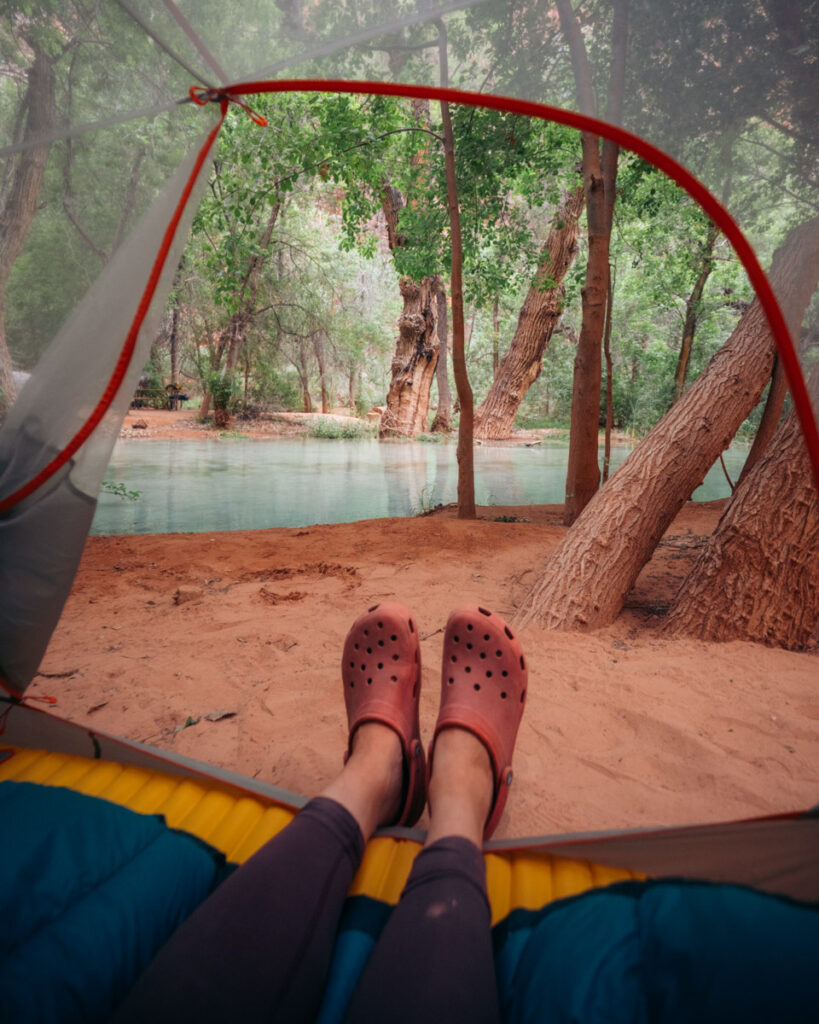
Shelter + sleep setup
I slept in a tent, and my friend used a hammock—and honestly, both worked well.
There are tons of trees for hammocks, and a lot of people go that route. I personally liked having a tent as a bit of a home base, but it really comes down to preference.
Also worth noting: we had basically no bugs in April, which made both setups a lot more comfortable.
What I wore
During the day, I kept it simple:
- sun shirt – Obsessed with my Outdoor Research Astroman Hoodie
- tank top
- shorts – I have worn my Mountain Hardware Shorts to shreds they are so comfortable
And then at night, I always changed into a clean set of clothes just for sleeping.
One night I even rinsed off in the river before changing, which felt amazing after a full day out.
Final thoughts
You don’t need anything overly technical for this trip—but a few thoughtful items make a big difference in how comfortable it feels once you’re there.
If I had to narrow it down, the things I wouldn’t skip are:
- water shoes
- a camp chair
- rodent-proof food storage
- a small daypack
Everything else just supports those.
Practical Info (Quick Things to Know)
Cost
Permits are around $400–$500 per person for the required 3 nights / 4 days.
This includes your camping fee. Anything else (helicopter, pack mules, food at the lodge) is extra.
How to get there
- Nearest major airport: Las Vegas
- Drive time: ~3.5 hours to the trailhead
- Most people stay the night somewhere near Kingman before hiking in
Best time to go
We went in April, and it felt like a really good balance.
The hike in and out were comfortable and never too hot, which I was really grateful for. The only downside was that it could feel a little chilly getting out of the water since the spring stays cold.
If I were to do it again, I might aim for late April or early May—just a little warmer, but still before the extreme heat sets in.
Pack in / pack out
Everything you bring in, you carry out—including trash.
That said, I did notice more trash than I expected, which made me even more aware of leaving things better than I found them.
Cell service
None once you’re down in the canyon.
Plan accordingly and enjoy being a little off-grid for a few days.
Is It Worth It?
I’m really glad I went.
It’s one of the most beautiful places I’ve ever seen—but it’s also more complex than I expected. It’s not untouched or pristine, and parts of the experience don’t quite match the photos you see online.
But if you go in knowing that—and take the time to explore beyond the obvious spots—it still feels incredibly special.
I don’t know if it’s a once-in-a-lifetime trip for everyone… but for me, it was one I’m really glad I experienced.