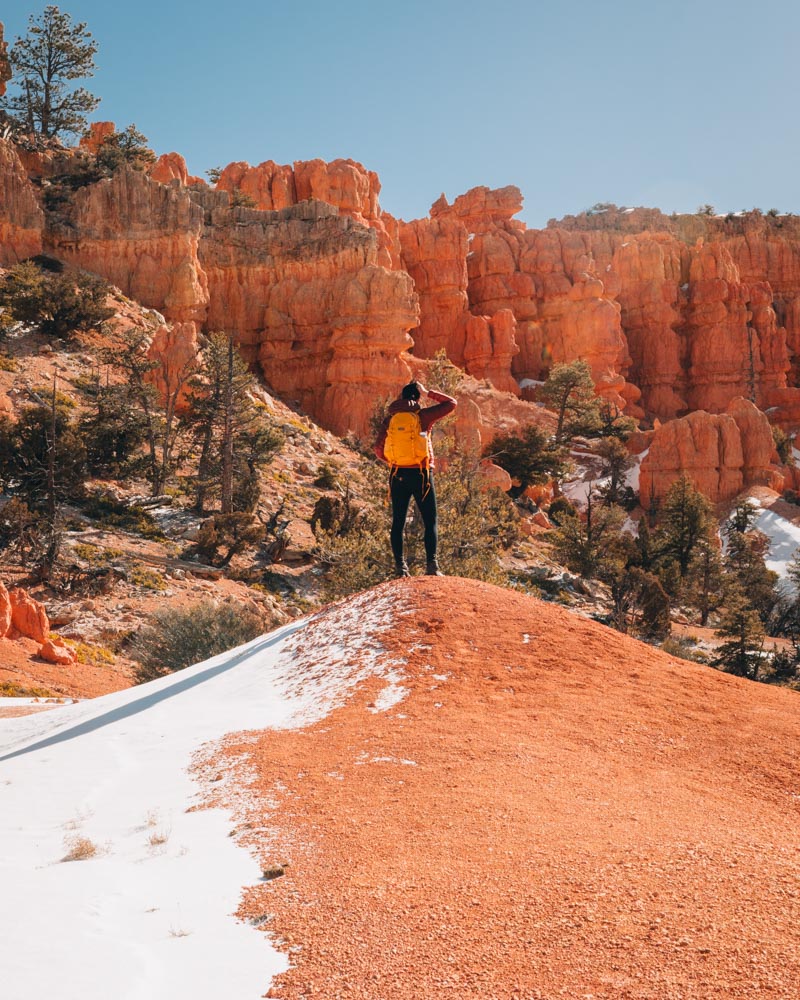

Ultimate Guide to Utah’s Lesser-Known Adventures
Utah is home to some of the most surreal landscapes in the United States, but the Mighty 5 national parks only scratch the surface. The state’s real magic lies in the lesser-known backcountry—slot canyons, remote overlooks, and desert wilderness that sees a fraction of the crowds. This guide covers 11 of the most spectacular hidden gems I’ve explored across southern and central Utah, organized by region to help you actually plan a trip rather than just collect a wishlist.

When to Visit
Timing really shapes the experience when it comes to Utah’s backcountry. Late February through May is my favorite window for most of these locations — and here’s why:
March–May: Mild, comfortable temps (15–25°C), quiet trails, slot canyons with seasonal pools and streamlets from snowmelt (great for photography), wildflowers blooming at lower elevations, easier permit availability, and roads that are usually clear of snow but not yet dusty from summer traffic — it’s a sweet spot.
Summer (June–August): Expect desert heat (often 40°C+), a higher flash-flood risk during monsoon season (late June onward), and more crowds. Still, it can be great for higher elevations if you’re already in the area.
Fall (September–October): Cooler weather returns and some areas show beautiful fall color. Popular spots do get busier again, but it’s still an excellent option if spring doesn’t fit your schedule.
Winter (December–February): The quietest season — crisp air, fewer people, and a totally different atmosphere. Snow can limit access at higher elevations, and daylight is shorter, but it’s ideal for overlooks, photography, and shorter hikes.
How to Use This Guide
I’ve organized locations into four geographic clusters. Most people will focus on 1-2 clusters per trip rather than trying to hit everything—the distances are substantial and many roads require slow driving.
Essential Trip Planning Information
Vehicle requirements: Many locations require high-clearance 4WD. I note specific requirements for each spot, but plan on a vehicle with at least 8 inches of clearance for most backcountry roads.
Permits: Paria Canyon and Buckskin Gulch require advance permits. Most other locations are permit-free but check current regulations.
Services and supplies: Cell service is nonexistent in most areas. The last gas stations and supplies are often 60+ miles from trailheads. Hanksville, Escalante, and Kanab are the main resupply points for backcountry areas.
Water: Carry significantly more than you think you need. I bring 4-6 liters per person for day hikes, more for overnight trips.
REGION 1: PARIA CANYON-VERMILION CLIFFS AREA
Base town: Kanab, Utah (services, lodging, last supplies)
Best for: Slot canyon hiking, backpacking, photography
Time needed: 1-4 days depending on whether you do day hikes or backpacking trips

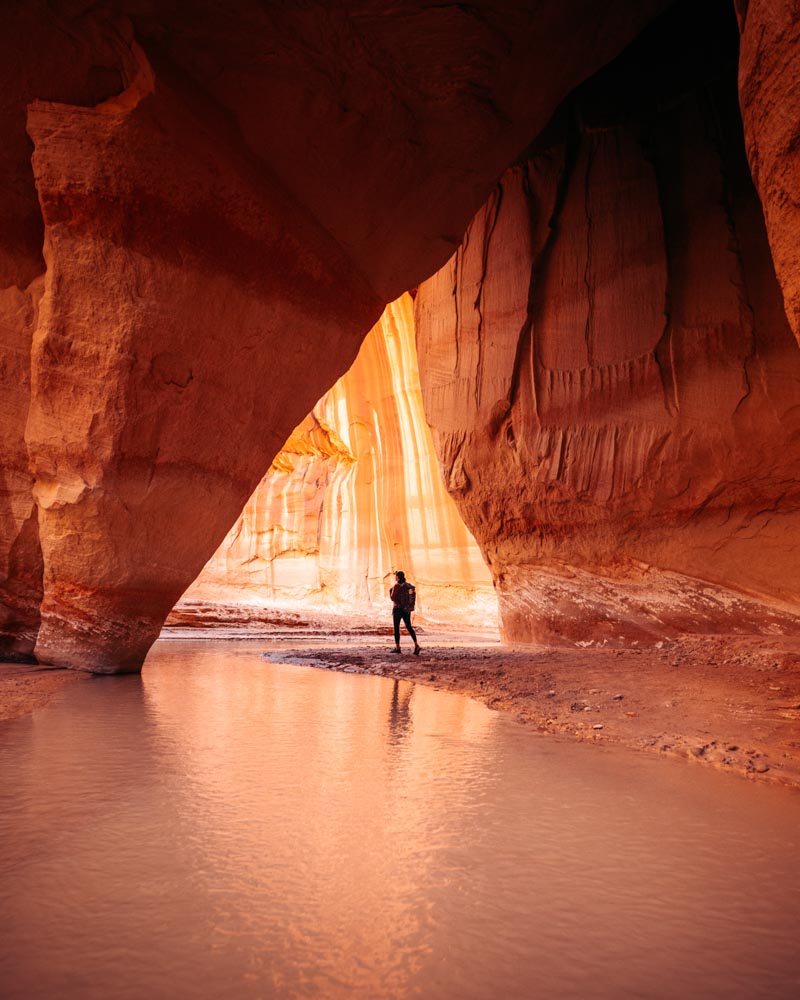
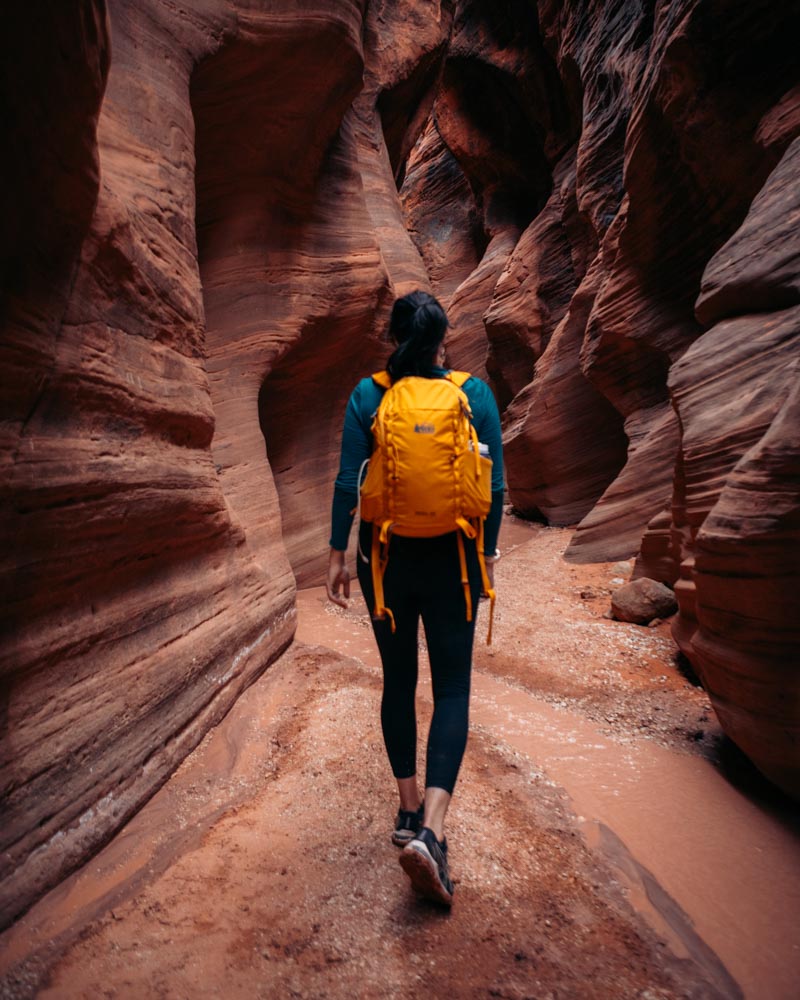
Paria Canyon
Paria Canyon-Vermilion Cliffs Wilderness | Permit Required
Paria Canyon is one of the most stunning slot canyon experiences in Utah. The hike takes you through a narrow, winding canyon where you’re walking in water most of the time—it’s cold but incredibly refreshing. The way light moves through the canyon is extraordinary, especially as you approach the confluence with Buckskin Gulch. The canyon changes completely depending on the time of day, with shadows and colors transforming between morning and afternoon.
Distance from Kanab: 45 minutes to White House Trailhead
Permits: Required year-round, book at recreation.gov. Day-use permits available same-day at the trailhead ranger station (cash only, $6 per person). Overnight permits must be reserved in advance.
Hiking options: Out-and-back from White House Trailhead (flexible distance), or point-to-point connecting to Buckskin Gulch (requires shuttle). Most day hikers go 3-5 miles in and turn around.
Water depth: Varies by season. In March-April expect ankle to mid-calf depth most of the way, with occasional knee-deep sections. May can be lower. Check current conditions at the ranger station.
What to bring: Water shoes or approach shoes you don’t mind getting wet, trekking poles for stability, dry bag for electronics/clothes, extra layers since you’ll be wet.
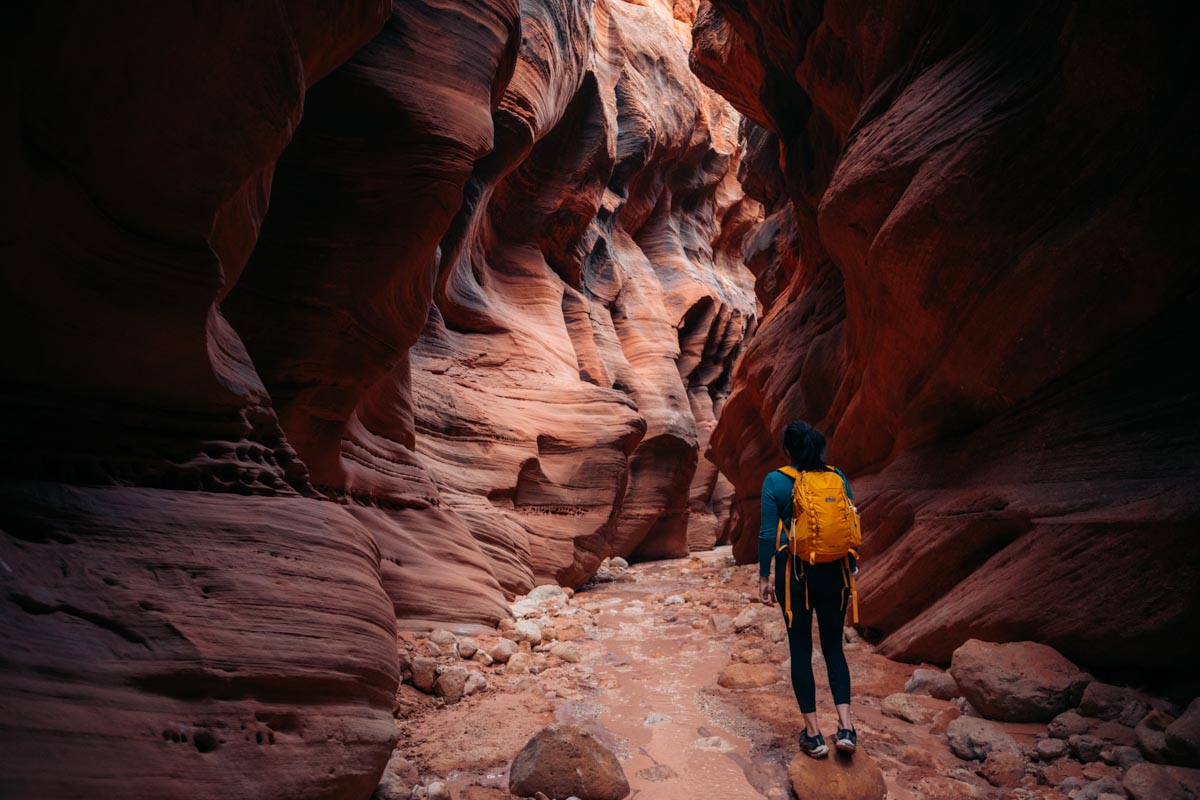
Buckskin Gulch
Paria Canyon-Vermilion Cliffs Wilderness | Permit Required
Buckskin Gulch is one of the longest slot canyons in the world and dramatically narrower than Paria. The walls tower overhead, sometimes only a few feet apart, creating an immersive experience. The geology is stunning—layered sandstone in shades of red, orange, and cream.
Access points: Wire Pass Trailhead (most popular, shorter approach) or Buckskin Trailhead (longer, fewer crowds)
Distance from Kanab: Wire Pass is about 1 hour south
Permits: Same system as Paria Canyon—day-use at trailhead, overnight in advance
Difficulty considerations: Several obstacles including boulder jams and occasional pools that may require scrambling or wading. Spring conditions can include cold pools. Check recent trip reports for current obstacles.
Recommended trip: Through-hike from Wire Pass to Buckskin Gulch to White House Trailhead (Paria Canyon) is the classic point-to-point. Requires two vehicles or shuttle service. About 21 miles total, typically done as a 2-3 day backpack.
REGION 2: ESCALANTE AREA
Base town: Escalante, Utah (basic services, camping supplies, restaurants)
Best for: Families, photographers, easy-to-moderate hiking, camping
Time needed: 2-3 days to hit the main spots
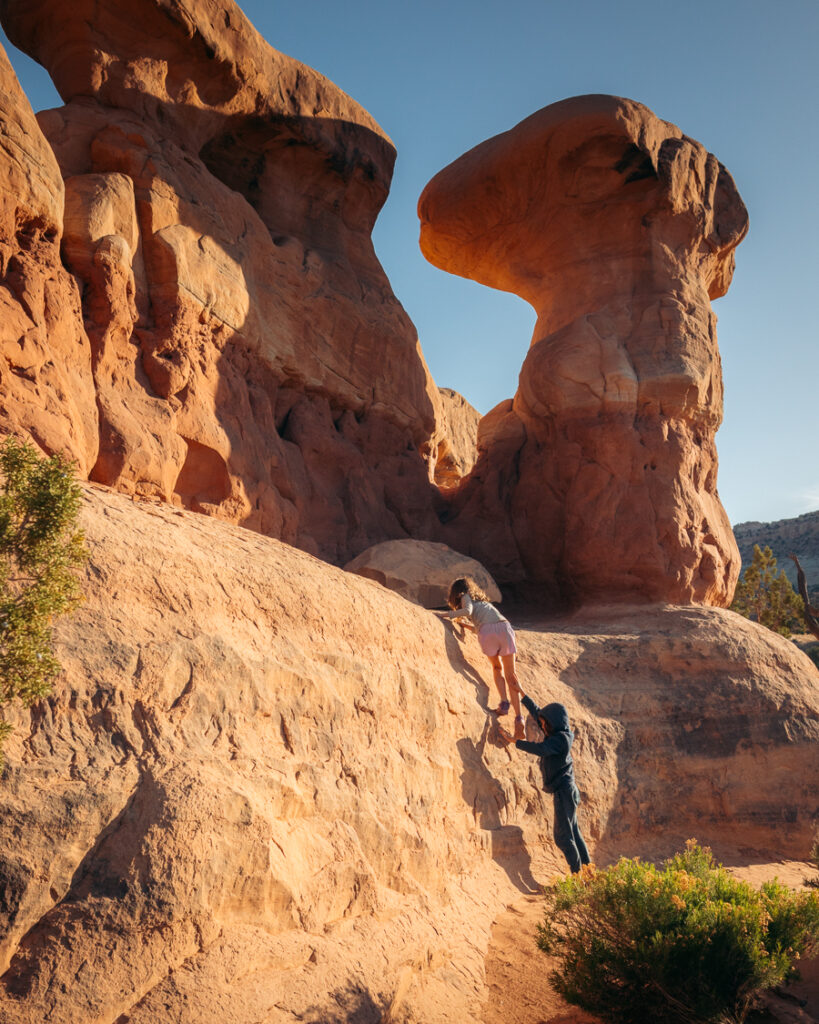
Devil’s Garden
Grand Staircase-Escalante National Monument
Not to be confused with the one in Arches, this Devil’s Garden is a playground of hoodoos and rock formations that’s perfect for families. The moment you get out of the car, you and the kids can start climbing, exploring, and running around—it’s fantastic for hide and seek among the formations.
Distance from Escalante: 12 miles south on Hole-in-the-Rock Road
Road conditions: Graded dirt road, usually passable by 2WD in dry conditions. Check current conditions in town—becomes impassable when wet.
Time needed: 1-2 hours minimum, but you could easily spend half a day exploring
Best light: Sunset is magical—the sun peeks through rock formations creating stunning photo opportunities. Plan to arrive 2 hours before sunset.
Difficulty: Extremely easy, no defined trail, just wander

Peekaboo and Spooky Slot Canyons
Grand Staircase-Escalante National Monument
These are excellent introductory slot canyons—short, accessible, and spectacular. Spooky lives up to its name with sections so narrow you’ll need to turn sideways and remove your backpack.
Distance from Escalante: About 26 miles south on Hole-in-the-Rock Road, then 6 miles on Dry Fork Road
Road conditions: High-clearance 4WD required for Dry Fork Road. Sandy, rutted sections. Not recommended after rain.
Trail details: 5-mile loop connects both slot canyons. Each can also be done separately as out-and-backs.
Difficulty: Moderate. Some scrambling required, tight squeezes in Spooky. Not recommended for claustrophobic individuals or very large packs.
Family note: Great for kids age 8+ who are comfortable with tight spaces. Younger kids may struggle with some narrow sections.
Connecting Escalante to Other Regions
To Hanksville area: 2.5 hours via Highway 12 (scenic route through Boulder)
To Kanab/Paria area: 1.5 hours via Highway 89
To Bryce Canyon: 1.5 hours via Scenic Byway 12 (excellent drive)
REGION 3: HANKSVILLE AND SAN RAFAEL SWELL AREA
Base town: Hanksville, Utah (limited services—gas station, small market, basic motel)
Best for: Photography, overlooks, remote camping, experienced backcountry travelers
Time needed: 2-4 days (locations are spread out with slow dirt roads)
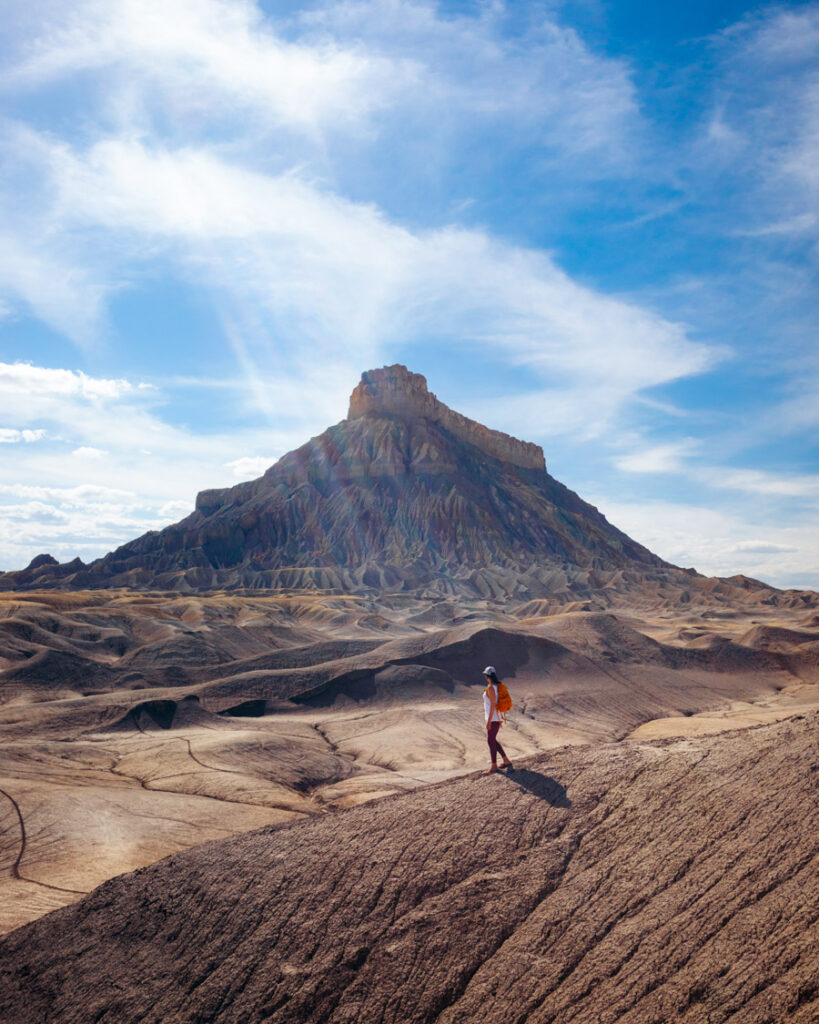
Factory Butte
Upper Blue Hills, Utah
Factory Butte is an otherworldly rock formation rising from lunar-like badlands. The barren, layered terrain creates one of the most alien landscapes I’ve experienced—it genuinely feels like another planet.
Distance from Hanksville: 20 minutes north
Road conditions: Graded dirt road to viewpoint, passable by most vehicles in dry conditions. 4WD recommended for exploring the surrounding area.
Activities: Photography, exploring the badlands, sunset viewing. The blue-gray shale contrasts dramatically with red desert surroundings.
Best light: Sunrise and sunset cast dramatic shadows across the desert floor. Midday is harsh but interesting for the stark, barren quality.
Camping: Dispersed camping available throughout the area. Completely remote—bring everything you need.

Bentonite Hills
Various locations near Factory Butte
The Bentonite Hills are stunning clay formations that look incredible in photos. In person, they’re not quite as vibrant as social media suggests, but they’re still beautiful and worth the visit. We spent a memorable night dispersed camping here—also one of the windiest nights I’ve ever experienced. Our tent was blowing sideways.
Important note: “Bentonite Hills” isn’t one specific location—these clay formations exist throughout the area. The most photographed spot is near Factory Butte, but similar formations appear across central Utah.
Access: Various dirt roads off the Factory Butte area. 4WD recommended. Very easy to get stuck if wet—clay becomes impassable.
Photography: Best in soft light (early morning or late afternoon). The mounds stretch for miles, and climbing over them is half the fun.
Camping: Dispersed camping allowed. Extremely remote with no facilities or water. Expect wind.
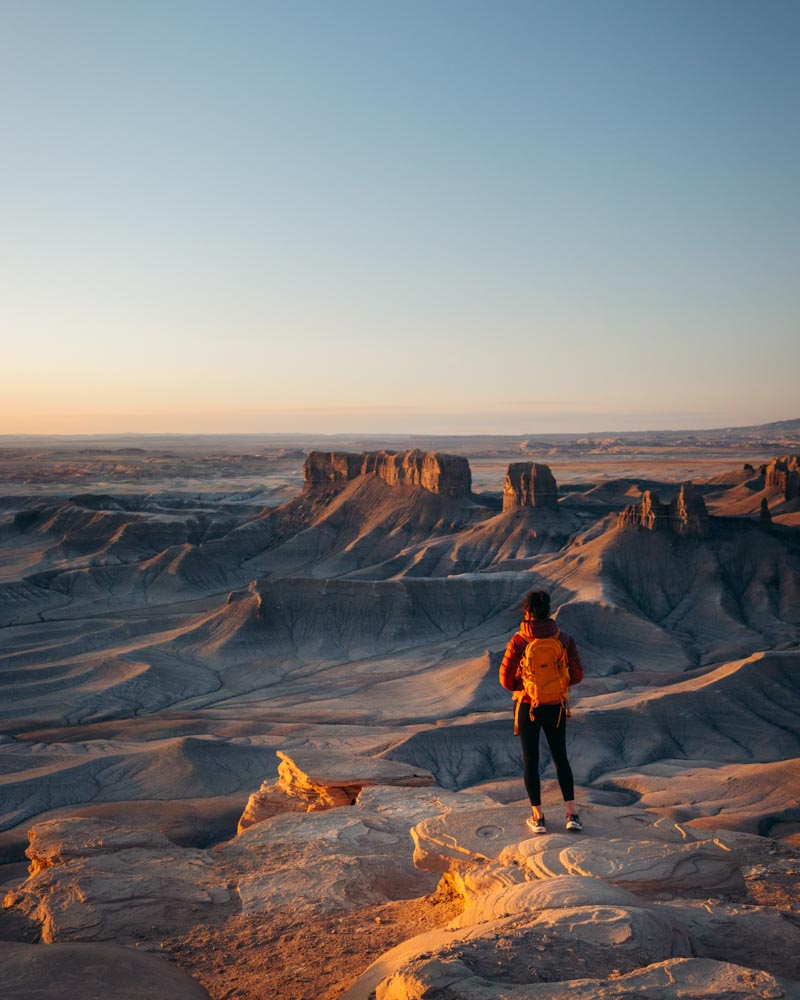
Moonscape Overlook
San Rafael Swell region
Moonscape Overlook delivers exactly what the name promises—a view into alien terrain. We camped overnight and woke for sunrise, which was genuinely spectacular. However, I nearly didn’t include this on the list because of the crowds. We were surrounded by about 100 other people at sunrise, and the over-the-top photo shoots and view blockers were overwhelming.
That said, it’s stunning and worth the hype. Just know you won’t be alone.
Distance from Hanksville: 30 minutes south
Access: Dirt road, rough in sections but generally manageable with high-clearance 2WD. 4WD safer after weather.
Best time: Sunrise is prime time, which means crowds. Consider arriving the evening before to camp and secure your spot.
Camping: Dispersed camping around the overlook. Popular spots fill up fast. No facilities.
Coordinates: 38°27’05.8″N, 110°50’16.6″W
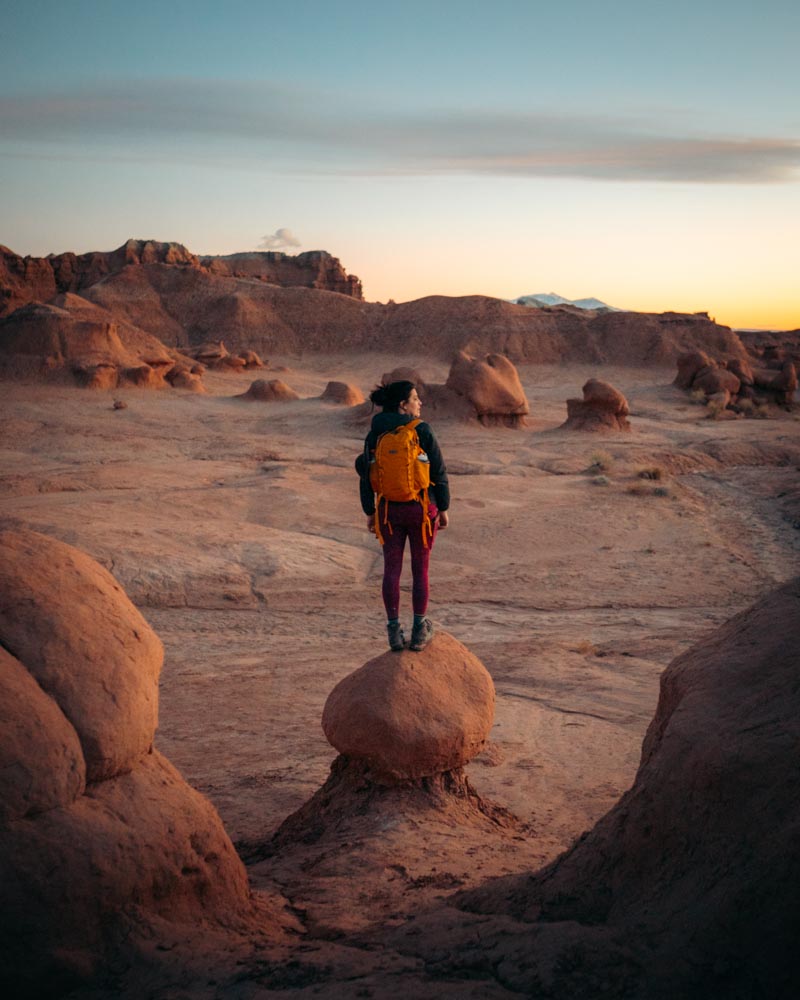
Goblin Valley State Park
Goblin Valley State Park | $20 entrance fee
The sunrise I experienced at Goblin Valley was one of the best I’ve ever seen. Beyond sunrise, there’s endless space to explore among countless hoodoos scattered across the park. What makes this place special is the freedom to wander—through, over, and under the formations. No defined trails, just explore.
Distance from Hanksville: 45 minutes north
Park structure: The main area is divided into Valleys 1-4. Most visitors focus on Valley 1 (closest to parking), but exploring all four valleys offers much more solitude and unique formations.
Activities: Sunrise viewing, photography, exploring goblin formations, running around (kids love this place), camping in the park campground
Recommended hikes:
- Goblin Valley Trail – Valleys 1, 2 & 3: 5.2 miles, 177 ft elevation gain
- Goblin’s Lair: 2.3 miles, 203 ft elevation gain (includes a chamber with skylight opening)
Camping: Developed campground with reservations recommended for weekends. Nearest dispersed camping is off park property.
→ Read the complete Goblin Valley guide (includes best valleys to explore, sunrise photography spots, camping details)

Little Wild Horse Canyon
Muddy Creek Wilderness, near Goblin Valley
Little Wild Horse Canyon is an excellent introduction to slot canyon hiking. The smooth, colorful rock walls create a natural playground with sections ranging from open walking to narrow passages only a few feet wide. It’s beginner-friendly with enough adventure to feel exciting.
Distance from Goblin Valley: 30 minutes (makes an excellent combination for a full day)
Access: Dirt road, high-clearance 2WD usually sufficient in dry conditions. Check conditions after rain.
Hiking options:
- Little Wild Horse out-and-back: ~4 miles
- Little Wild Horse + Bell Canyon Loop: 8.1 miles, 810 ft elevation gain (most popular option)
Difficulty: Easy to moderate. Some narrow sections and occasional rock hopping, but nothing technical. Good for families with kids age 6+.
Best time: Morning for best light in the canyon. Can get hot in afternoon during summer.
REGION 4: PAGE/LAKE POWELL AREA
Base town: Page, Arizona (full services, lodging, restaurants)
Best for: Photography, overlooks, camping with epic views
Time needed: 1-2 days

Alstrom Point
Glen Canyon National Recreation Area
Alstrom Point offers one of the most spectacular panoramic views of Lake Powell. Getting there requires navigating extremely rough, unpaved roads—it tested our driving skills and nerves. Type 2 fun all the way. But the reward was incredible: a night under the stars by a warm fire, followed by one of the most beautiful sunrises I’ve ever witnessed. I would return in a heartbeat.
Distance from Page: About 2 hours, but it’s slow going on rough roads
Road conditions: High-clearance 4WD absolutely required. Extremely rough, rocky sections. Deep sand in places. Do not attempt in 2WD or without significant clearance. Not recommended in wet conditions.
Navigation: Cell service cuts out early. Download offline maps or have a GPS. The route is marked but involves multiple turns on unmarked roads.
Time requirements: Allow 2 hours each way from pavement. Most people camp overnight rather than attempting the drive in darkness.
Camping: Dispersed camping at the overlook. Spectacular night skies. Bring everything—no facilities, no water, no cell service.
Best experience: Arrive before sunset, camp overnight, catch sunrise. The drive out in daylight is much easier.
AllTrails route (for navigation): https://www.alltrails.com/trail/us/utah/alstrom-point
REGION 5: ST. GEORGE AND DIXIE NATIONAL FOREST AREA
Base town: St. George, Utah (full services, larger city)
Best for: Families, shorter hikes, camping, year-round access
Time needed: 2-3 days
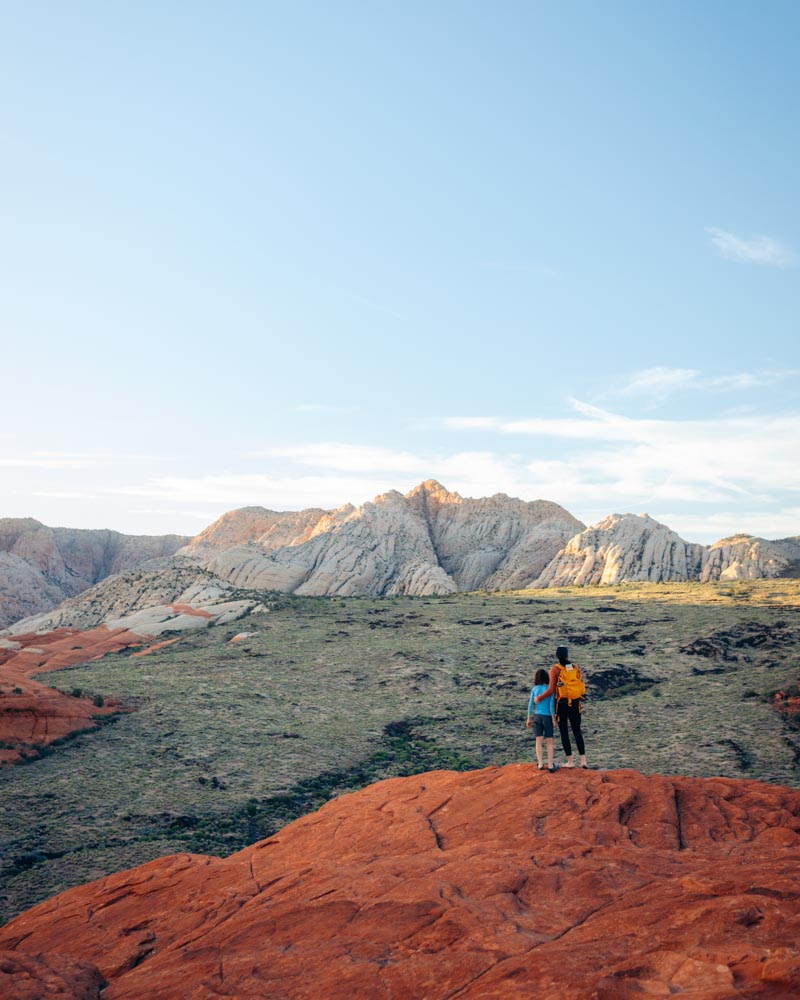
Snow Canyon State Park
Near St. George | $10 entrance fee
Snow Canyon combines vibrant red Navajo sandstone, ancient lava flows, and sweeping sand dunes. The diversity of landscapes in one compact area is remarkable. It’s excellent year-round with mild winter temperatures, and the colors shift dramatically with changing light.
Distance from St. George: 20 minutes north
Camping: Developed campground with compact, cozy sites. Reservations recommended for weekends. Unforgettable sunrises and sunsets.
Recommended hikes (if you only have time for one, do Petrified Dunes):
- Petrified Dunes Trail: The must-do hike. Unique swirling sandstone formations, short but spectacular.
- Jenny’s Canyon: Short, easy slot canyon. Great for kids or a quick adventure.
- Sand Dunes: Not really a hike, but running around on the dunes is a blast.
Best for families: Well-maintained trails, paved roads throughout park, easy access to facilities.
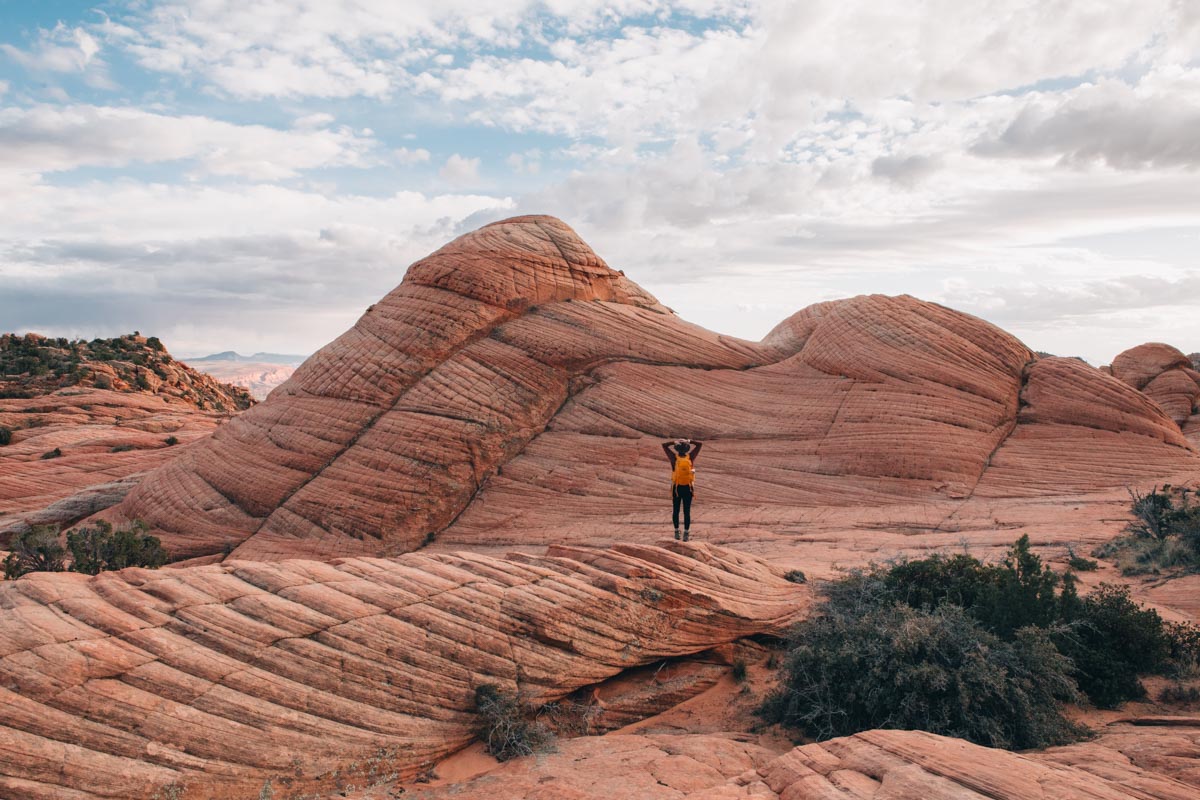
Yant Flats (Candy Cliffs)
Dixie National Forest, near St. George
Yant Flats is a hidden gem with stunning swirling sandstone patterns. This local favorite is especially magical at sunset when golden light casts warm hues over the rolling rock formations, creating an almost surreal landscape. Known for peace and solitude, it’s often overlooked by tourists—perfect for having views to yourself.
Distance from St. George: 45 minutes northeast
Trail details: 3.4 miles, 337 ft elevation gain. Easy-moderate hiking.
Access: Dirt road to trailhead, usually fine for 2WD in dry conditions. Higher clearance helpful.
Best time: Sunset is spectacular. Arrive 2 hours before sunset to hike out and find your photography spot.
Photography: The formations are spread across the plateau—explore to find your favorite angles.
Red Canyon and the Golden Wall Trail
Dixie National Forest, near Bryce Canyon
Red Canyon offers striking red rock formations and hoodoos similar to Bryce Canyon but with far fewer crowds. It’s a quieter alternative with equally stunning views. The Golden Wall Trail was the highlight for me—I had it completely to myself, and the close-up views of brilliant red cliffs and hoodoos were incredible.
Distance from St. George: 2.5 hours (or 30 minutes from Bryce Canyon entrance)
Golden Wall Trail details: 4.2 miles, 1,040 ft elevation gain. Moderate difficulty with rewarding views.
Other trails: Arches Trail (short, leads to natural arches), Pink Ledges Trail (close-up hoodoo views)
Best use: Excellent add-on to a Bryce Canyon visit, or a quieter alternative if Bryce is crowded.
Access: Right off Scenic Byway 12, paved roads throughout. Very accessible.
SAMPLE ITINERARIES
3-Day Escalante Focus
Day 1: Arrive Escalante, explore Devil’s Garden at sunset
Day 2: Peekaboo and Spooky slot canyons (full day)
Day 3: Drive to Hanksville area via Highway 12, visit Goblin Valley
5-Day Slot Canyon and Backcountry Adventure
Day 1: Arrive Kanab, get permits, scout Paria trailhead
Day 2: Paria Canyon day hike
Day 3: Buckskin Gulch from Wire Pass
Day 4: Drive to Escalante, Devil’s Garden sunset
Day 5: Peekaboo and Spooky, or drive to Hanksville area
7-Day Photography Loop
Day 1: Arrive Page, drive to Alstrom Point, camp overnight
Day 2: Alstrom Point sunrise, drive to Hanksville
Day 3: Factory Butte and bentonite hills, Moonscape Overlook sunset
Day 4: Goblin Valley sunrise, Little Wild Horse Canyon
Day 5: Drive to Escalante, Devil’s Garden
Day 6: Peekaboo and Spooky
Day 7: Drive to St. George via Bryce, visit Red Canyon

ESSENTIAL SAFETY AND PLANNING TIPS
Flash Flood Awareness
Slot canyons are beautiful but dangerous. Check weather forecasts not just for your location but for the entire drainage area upstream. Even if it’s sunny where you are, rain 20 miles away can create flash floods in minutes. Never enter slot canyons when rain is forecasted. Monsoon season (late June through September) carries the highest risk.
Vehicle Preparation
High-clearance 4WD is truly required for many locations—this isn’t optional or exaggerated. Check your vehicle’s clearance before committing to rough roads. Carry a full-size spare tire, tire repair kit, basic tools, and recovery gear if you have it. Air down tires for sand sections, air back up for rocky sections.
Communication and Navigation
Cell service is nonexistent in most backcountry areas. Download offline maps before leaving towns. Consider a GPS device or satellite communicator for remote areas. Leave detailed trip plans with someone who isn’t traveling with you.
Water and Supplies
Carry more water than you think necessary. The desert is unforgiving. I bring 4-6 liters per person for day hikes, more for overnight trips. Gas up in every town—distances between services are substantial. Carry extra food, layers for temperature changes, and a first aid kit.
Leave No Trace
These landscapes are fragile. Stay on designated trails where they exist. In areas without trails (like Devil’s Garden or Goblin Valley), walk on rock surfaces rather than cryptobiotic soil. Pack out everything you bring in. Use existing campsites when possible. Human waste should be packed out or buried 6-8 inches deep at least 200 feet from water sources.

FINAL THOUGHTS
These destinations offer some of the most spectacular landscapes in Utah without the overwhelming crowds of the national parks. Whether you’re seeking solitude, adventure, or stunning photography, these hidden gems deliver. The key is proper planning—understanding road requirements, timing your visit appropriately, and preparing for remote conditions.
Each location listed here has a detailed individual guide (linked throughout) with specific logistics, photography tips, and planning information. Start with one region, master it, then expand to others on future trips.
Utah’s backcountry rewards those willing to drive the rough roads and venture beyond the paved overlooks. These aren’t quick roadside stops—they’re adventures that require preparation, appropriate vehicles, and respect for the landscape. But the payoff is immense: genuine solitude, spectacular natural beauty, and the satisfaction of discovering places that most visitors never see.