Hiking PCT Section J Solo: 7 Days, 90 Miles, and Why Long Trails Are Different
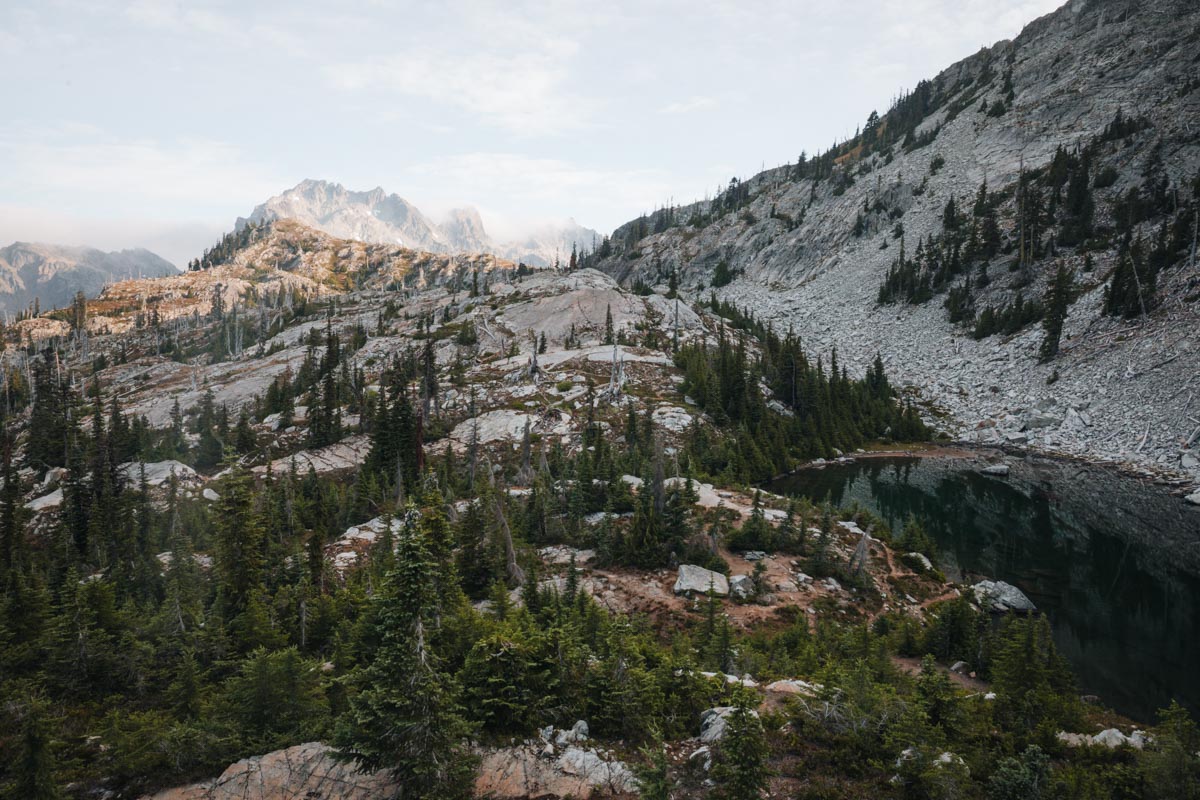
If you’ve ever dreamed of hiking the Pacific Crest Trail but don’t have five months for a thru-hike, Section J in Washington is the perfect test piece. Stretching about 90 miles from Stevens Pass to Snoqualmie Pass, it’s rugged, gorgeous, and packed with alpine lakes.
I hiked Section J solo over seven days—adding in side trips to Thunder Mountain, Spade & Venus, Circle Lake, and Spectacle. But here’s what surprised me after 15+ solo backpacking trips: on a long trail like this, solo doesn’t mean isolated. You’re part of a bubble—leapfrogging section hikers, chatting with thru-hikers, joining people for spontaneous detours.
I started with a partner who had to leave on Day 1. I finished solo but never lonely. This guide will give you everything you need to plan Section J, plus what I learned about trail community along the way.
Quick Facts
- Distance: ~90 miles (I added optional side trips)
- Time: 5–7 days standard, 7–8 days with detours
- Elevation Gain: ~14,000 ft
- Difficulty: Moderate-hard
- Best Season: Mid-July through September
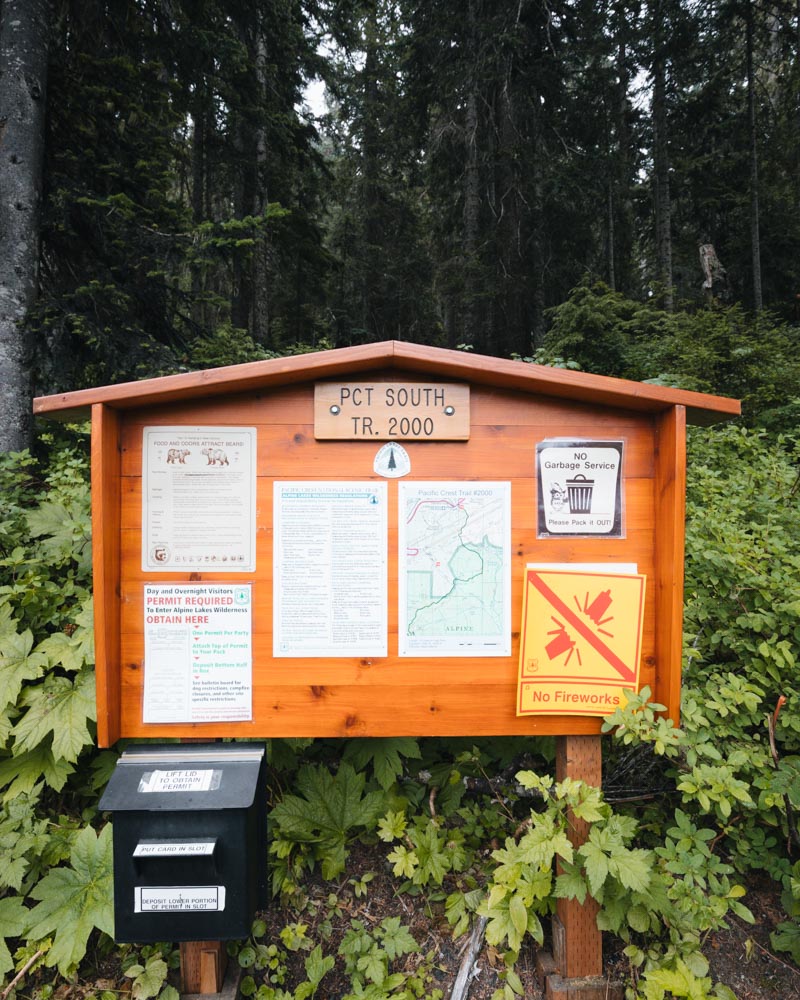
- Permits: NW Forest Pass for parking; long-distance PCT permit only required for hikes over 500 miles
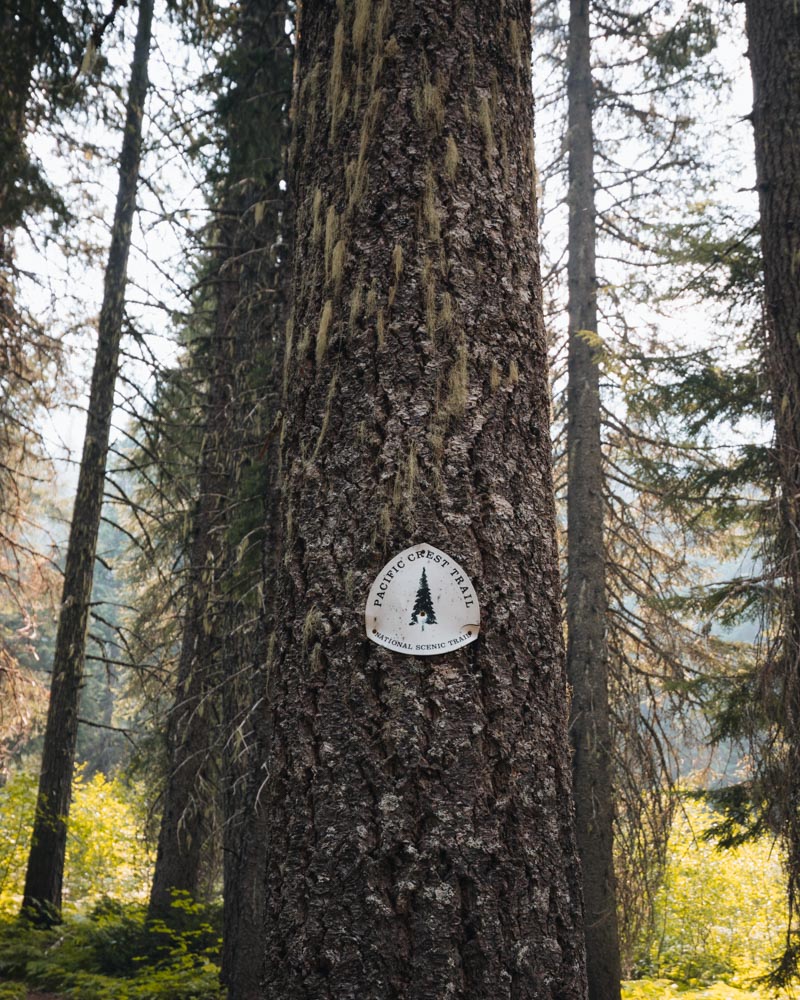
- Navigation: FarOut PCT App (offline maps) + paper backup
- Food Storage: Ursack or bear canister recommended in Alpine Lakes Wilderness
- Water: Frequent alpine sources, but always filter
How Many Days Do You Need?
Most hikers take 5–7 days to complete Section J if they’re sticking strictly to the PCT. The main trail itself is surprisingly rolling and fairly gentle for much of the way, even though you’ll still rack up serious mileage and elevation.
But here’s the catch: the side trips—Thunder Mountain, Spade & Venus, Circle Lake, Spectacle, and Glacier Lake above Spectacle—are another story. These detours are steep, rocky, and often relentless. They add both mileage and elevation gain that can quickly stretch your days longer than expected.
Because I built in several of these side trips, my 7-day itinerary worked, but felt very full. If I were to do it again, I’d recommend planning 8–10 days if you want to include multiple detours, swim breaks, and a little recovery time.
For context, I consider myself an above-average hiker—comfortable with big climbs and long days—and still found that slowing down to enjoy the detours was the best choice.
💡 Pro Tip: If you’re section hiking (not thru-hiking), take advantage of the flexibility. Adding even one or two buffer days will make the trip more enjoyable and give you the space to soak up those incredible off-trail lakes.
My 7-Day Itinerary (With Side Trips)
Day 1 (Take 1): Stevens Pass → Trap Lake (with Brooke)
Distance: ~11.2 miles | Elevation: +2,700 ft / –1,600 ft | Camp: Trap Lake
My friend Brooke and I kicked things off in classic Cascades fashion—rain, steady climbs, and moody views. The trail wound through forest, opened to ridges, and dropped us at Trap Lake by evening. Beautiful spot, but Brooke’s knee was done.
The next morning, I walked her out to the trailhead, drove her back to my home, and took a day to reset with my kids before deciding: I’m finishing this solo.
🏕️ Camp: Trap Lake
A great reward after a rainy first day—quiet, scenic, and easy to love. Beautiful alpine lake with plenty of campsites, especially if you walk farther back from the main area. There’s even a backcountry privy with a view you won’t forget.
Day 1 (Take 2): Thunder Mountain Lakes
Distance: ~12 miles | Elevation: +2,500 ft / –1,500 ft | Camp: Thunder Mountain Lakes
When my husband dropped me back at the trailhead, I was starting fresh. Solo for 70 miles.
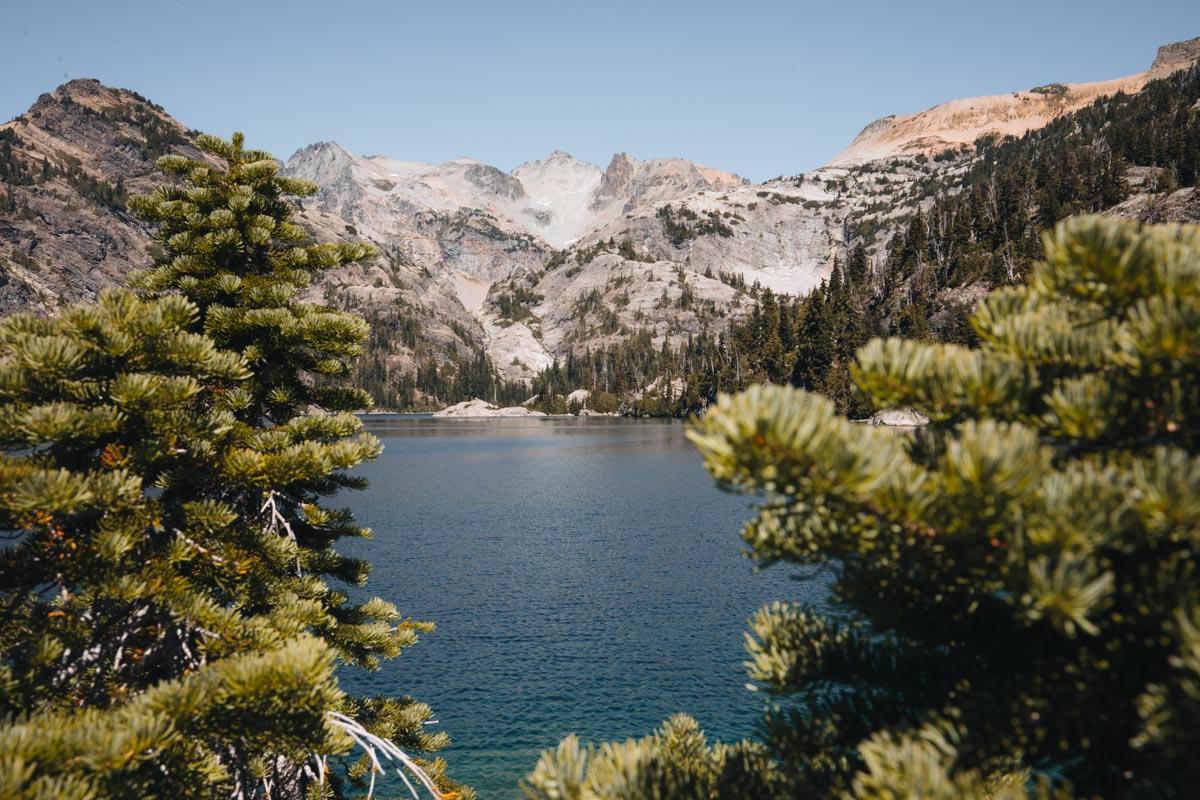
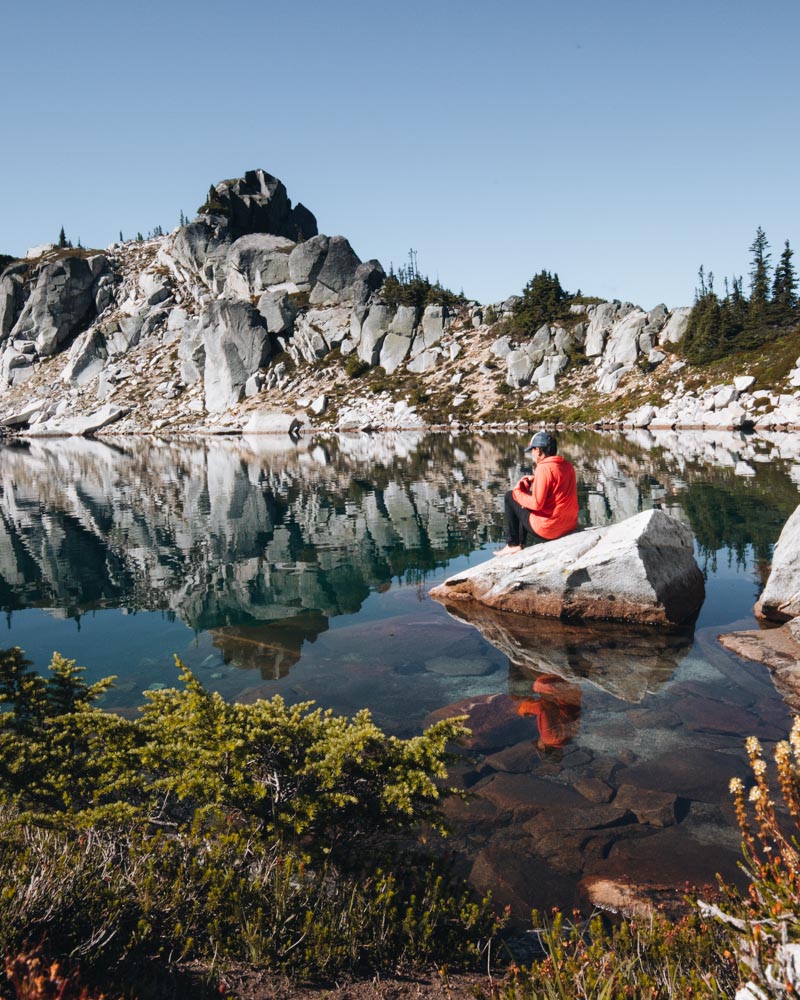
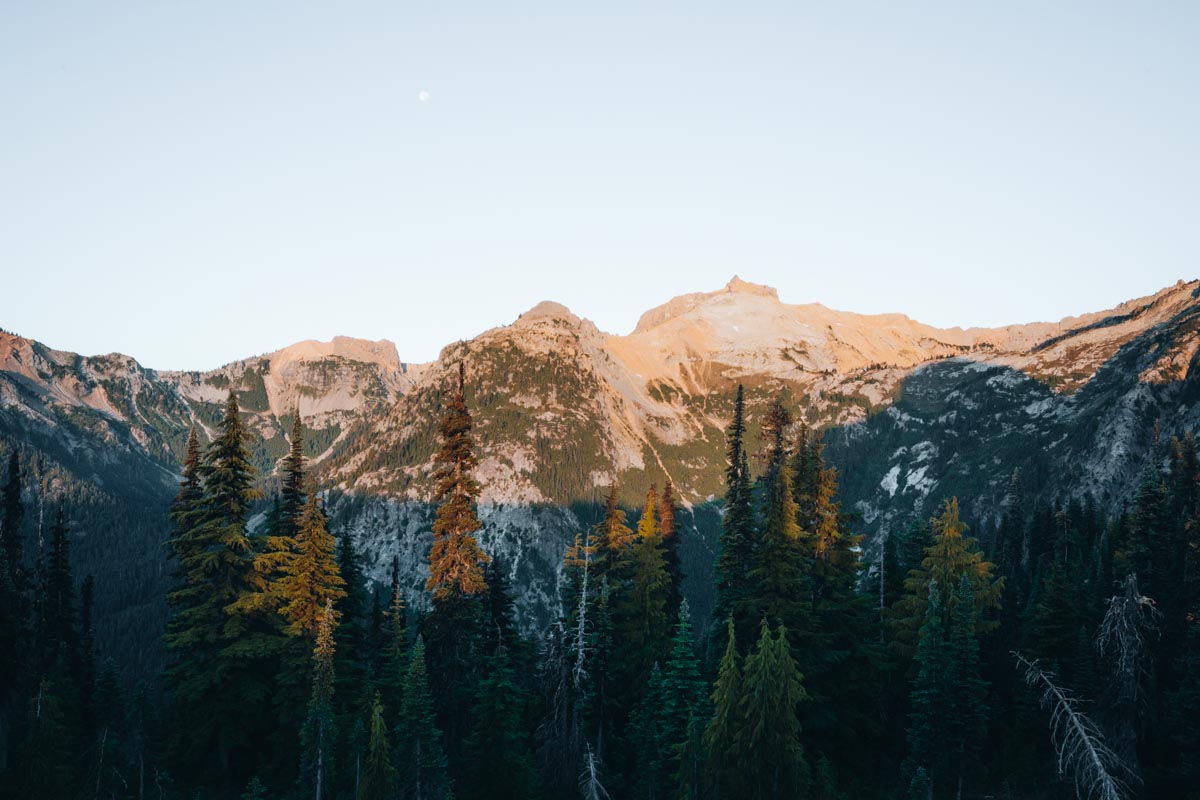
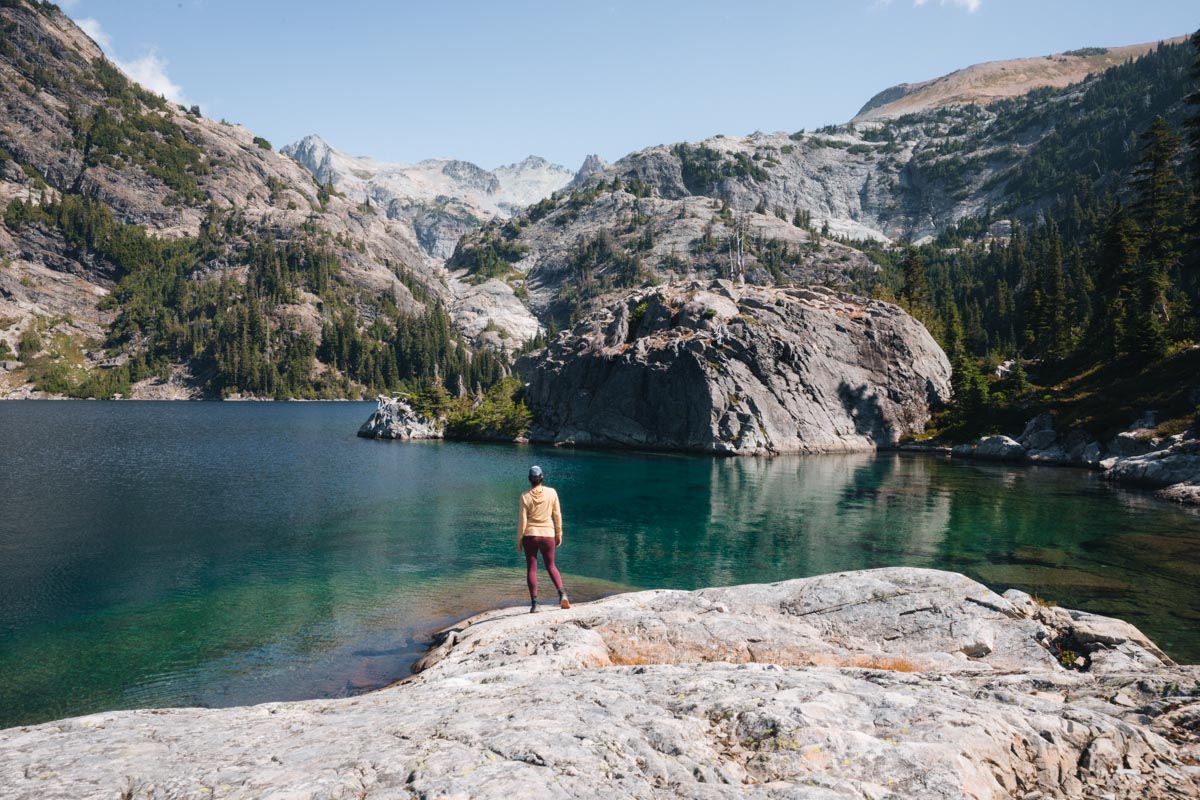
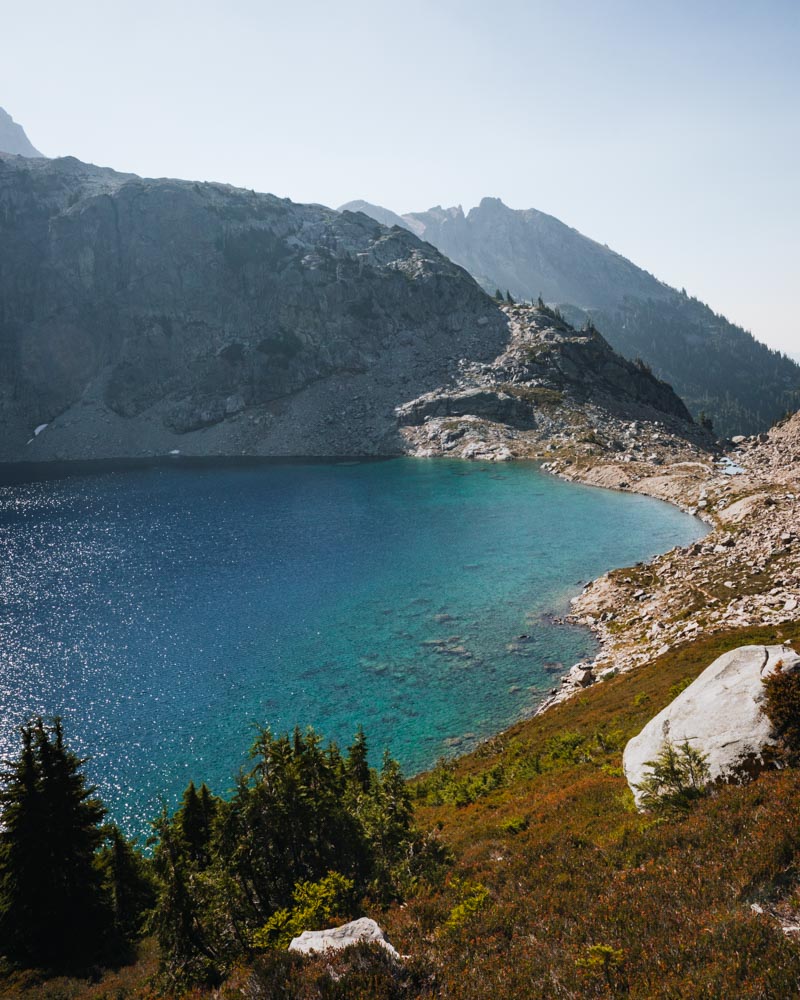
By late afternoon I made it to Thunder Mountain Lakes, which I’d visited once before and knew I wanted to see again. Got to camp with time to spare, pitched my tent, and walked up the ridge to catch sunset. The view up there blew me away—big open peaks, quiet, just me and the light fading out.
Thunder Mountain Lakes was full of people that Saturday evening—the lake is popular for good reason. I set up among scattered campsites and immediately got a taste of trail culture. People were chatting between sites, sharing beta about the trail ahead. Someone told me about the FarOut PCT app—apparently essential and I’d never heard of it.
The next morning I hiked up before sunrise with my camera. A few other photographers were already there, tripods set, waiting in silence. When the sun lit up the peaks, we all started shooting. No words—just a quiet, shared awe.
After the light show, I went straight into the lake. Freezing, shocking, the kind of cold that makes you gasp and laugh at the same time. A few other hikers were doing the same thing—early morning swims before packing up and heading out.
Cold, awake, and ready to keep moving South.
🏕️ Camp: Thunder Mountain Lakes
- Setting: Stunning alpine basin with two lakes tucked beneath rocky peaks.
- Campsites: A handful of established sites scattered near the shoreline.
- Perks: Easy access to water, ridge walk with unbeatable sunset views, refreshing morning swim.
- Vibe: Quiet but social—enough people around to feel connected, enough space to find solitude.
- My experience: I woke early to watch the sunrise hit the peaks, then dove into the icy water before packing up. It was cold, shocking, and exactly the reset I needed before heading back to the PCT.
✨ Would 100% come back to camp here again—it’s that magical.
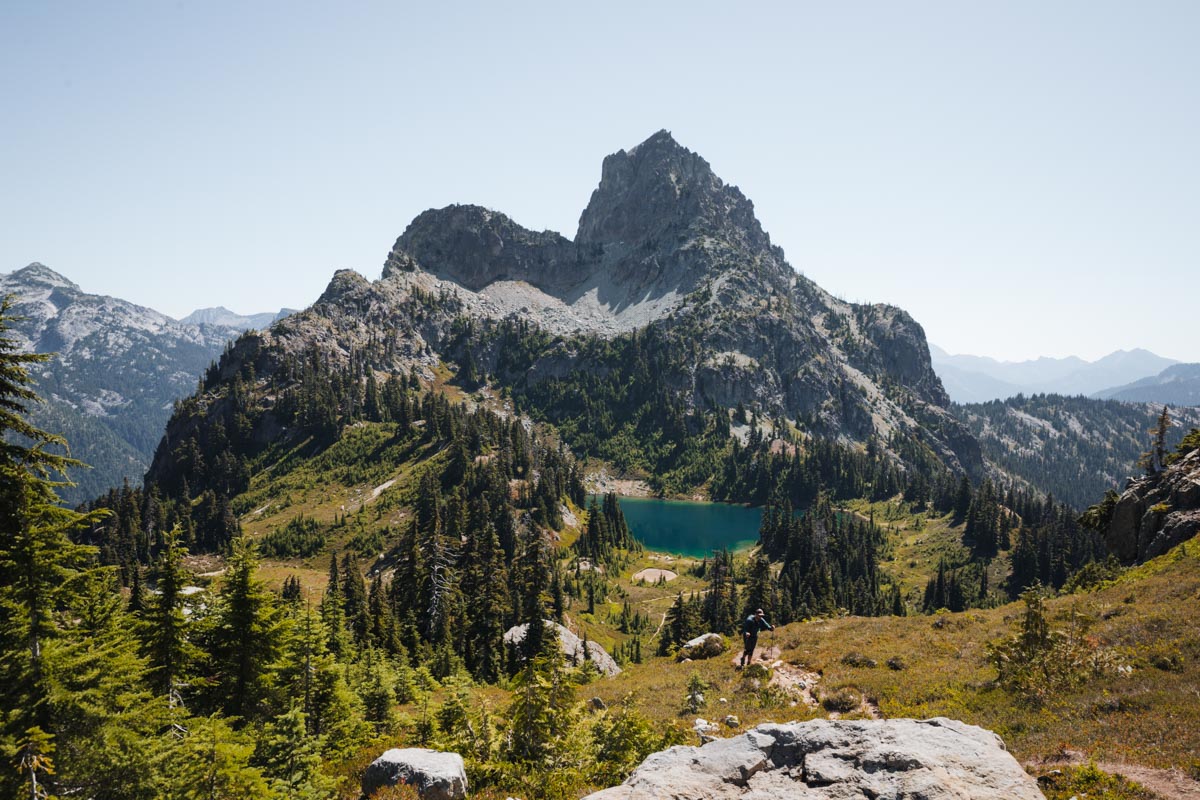
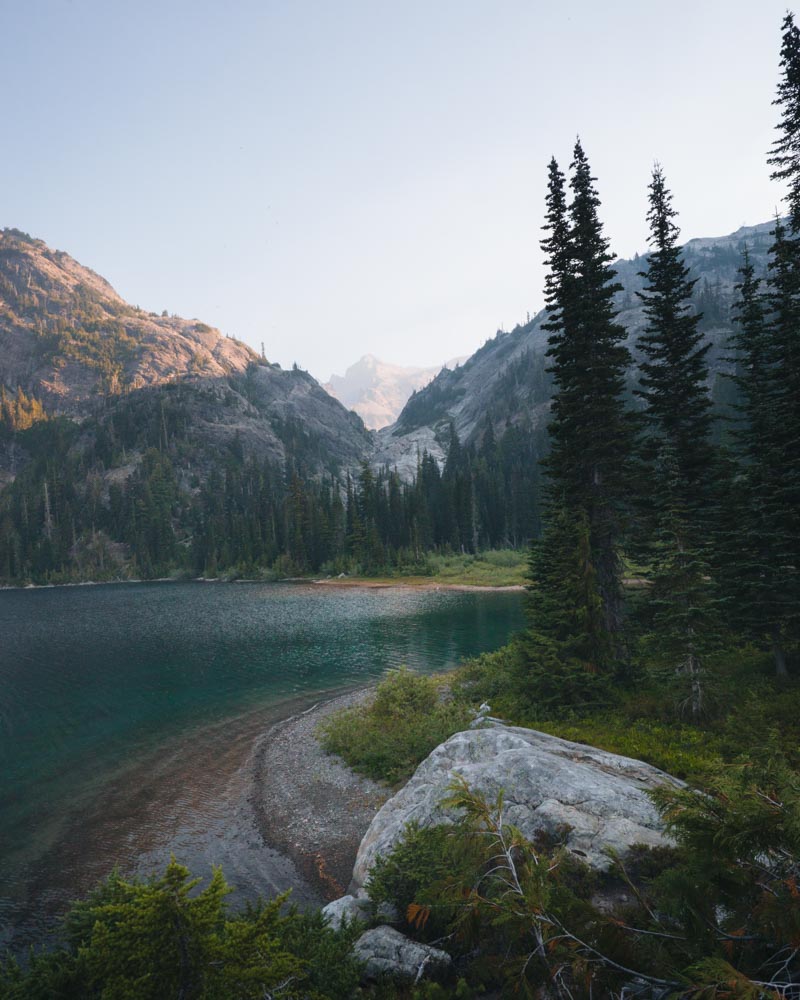
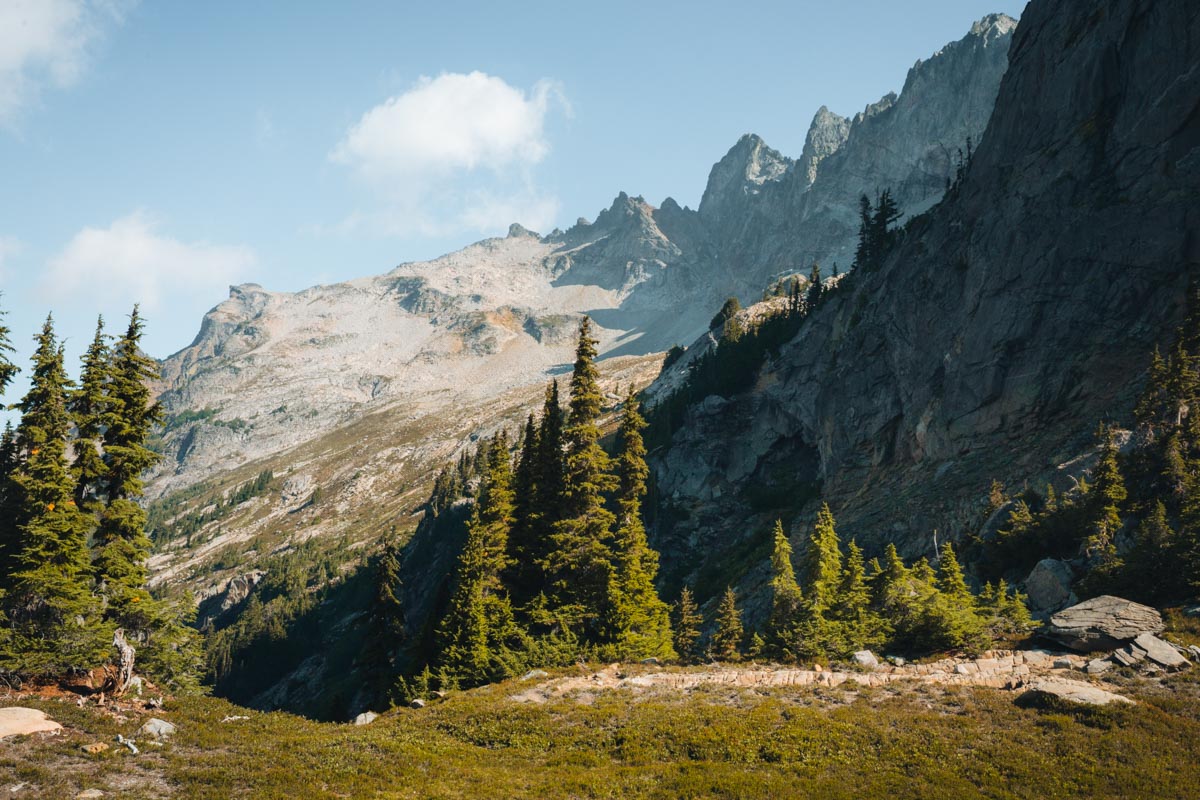
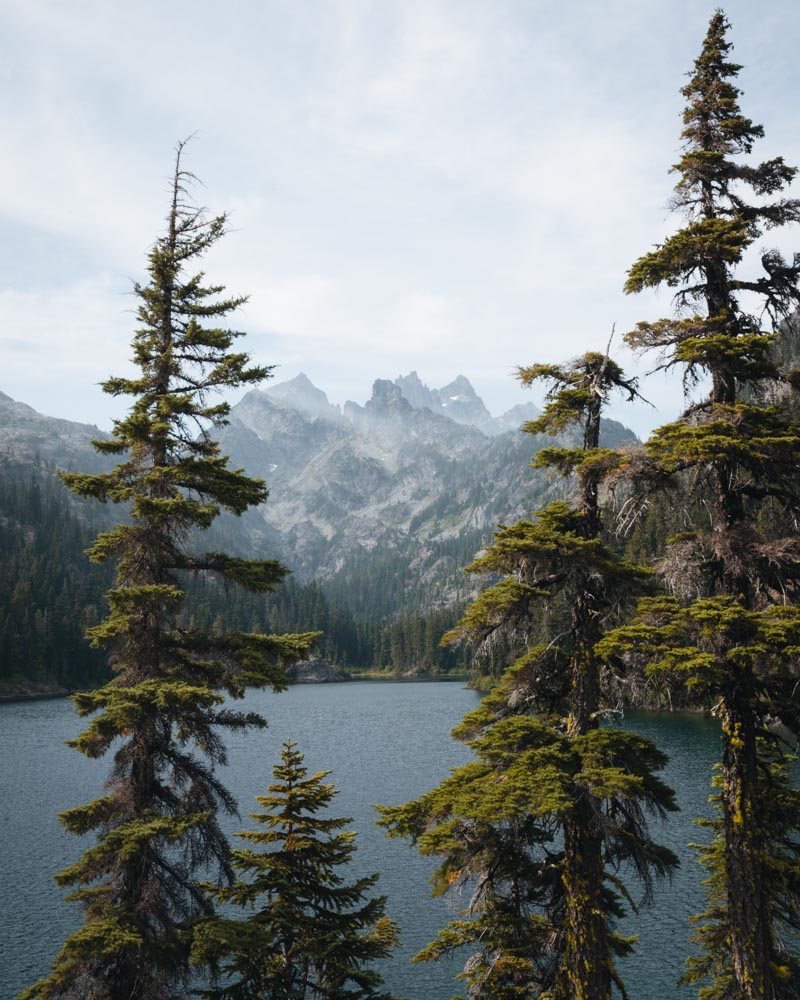
Day 2: Thunder Mountain Lakes → Cathedral Pass
Distance: ~17.5 miles | Elevation: +2,800 ft / –2,200 ft | Camp: Cathedral Pass (meadow above the junction)
After my swim I climbed back to the PCT. Throughout the day I kept passing hikers—thru-hikers grinding north, section hikers with noticeably more energy, all of us in this leapfrogging pattern. You’d pass someone, see them again at a lake, pass them again on a climb. It creates this fluid sense of connection without obligation.
I passed Glacier Lake and Deception Lakes, both perfect pause-and-breathe spots. I wasn’t planning such a big day, but I kept going and going. Somewhere along the trail, I got chatting with another hiker who mentioned a great meadow spot near Cathedral Pass. That casual trail conversation turned into my navigation for the evening.
By the time I reached that meadow camp spot, I’d covered way more miles than planned. I set up completely alone—nobody around, just epic views for miles. After the buzz of Thunder Lake, the solitude felt profound. This is what I love about long trail solo hiking: you get both. Community when you want it, solitude when you need it.
🏕️ Camp: Cathedral Pass (Above the Junction)
- Setting: High ridge near the pass, with sweeping views of surrounding peaks.
- Campsites: A few small flat spots tucked along the trail above the pass.
- Perks: Epic sunset light, total solitude, alpine air that feels untouched.
- Challenges: Exposed to wind, little cover—bring layers.
- Vibe: Remote, quiet, the kind of camp where you feel small in the best way.
- My experience: At first the emptiness felt intimidating, but once the stars came out, the stillness turned magical. One of the best nights of sleep on the trip.
✨ Not the easiest camp to settle into solo—but one of the most rewarding.

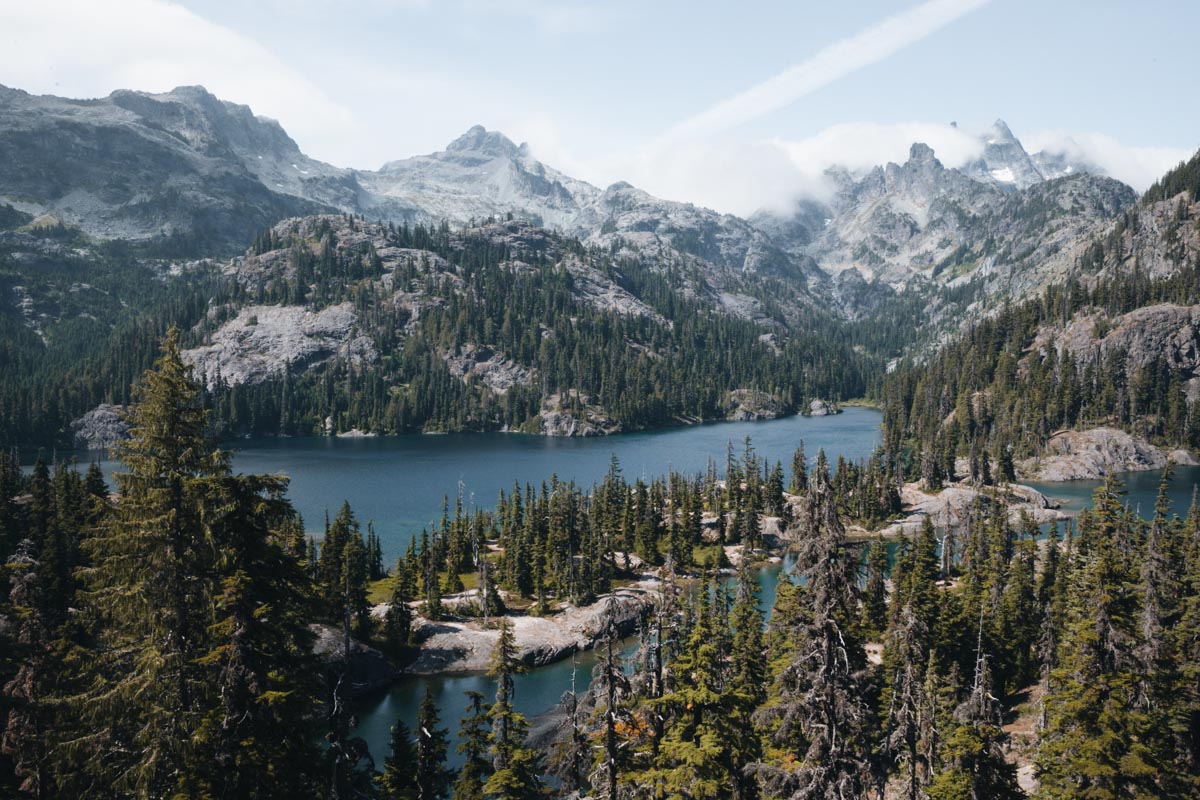
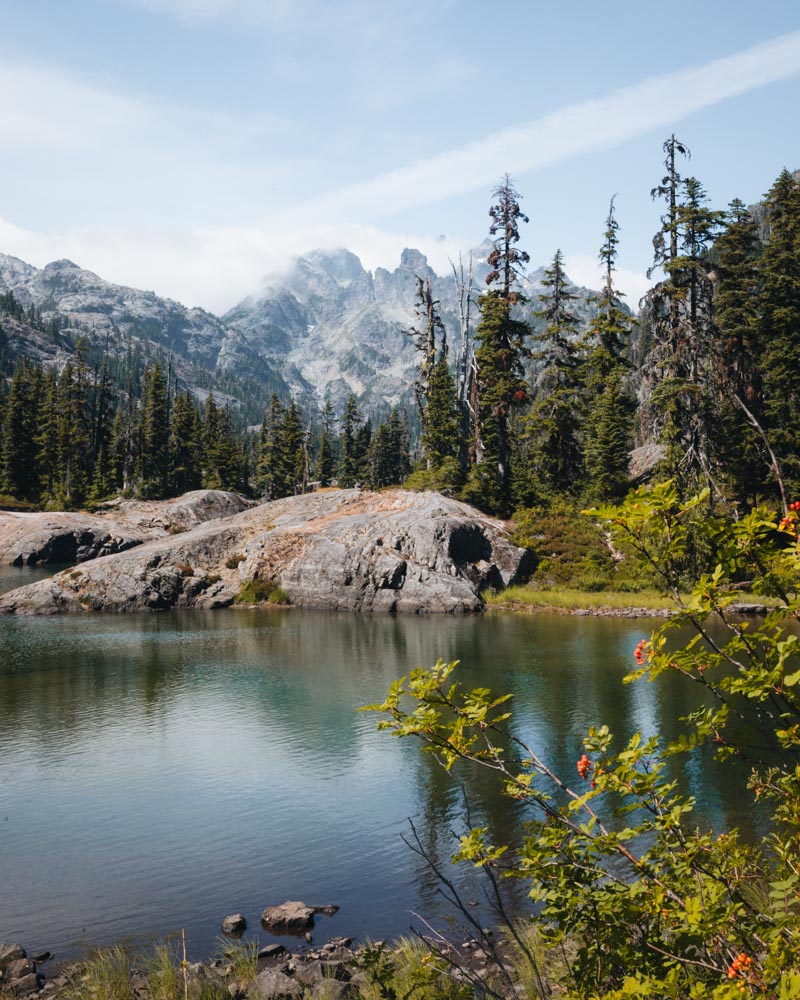
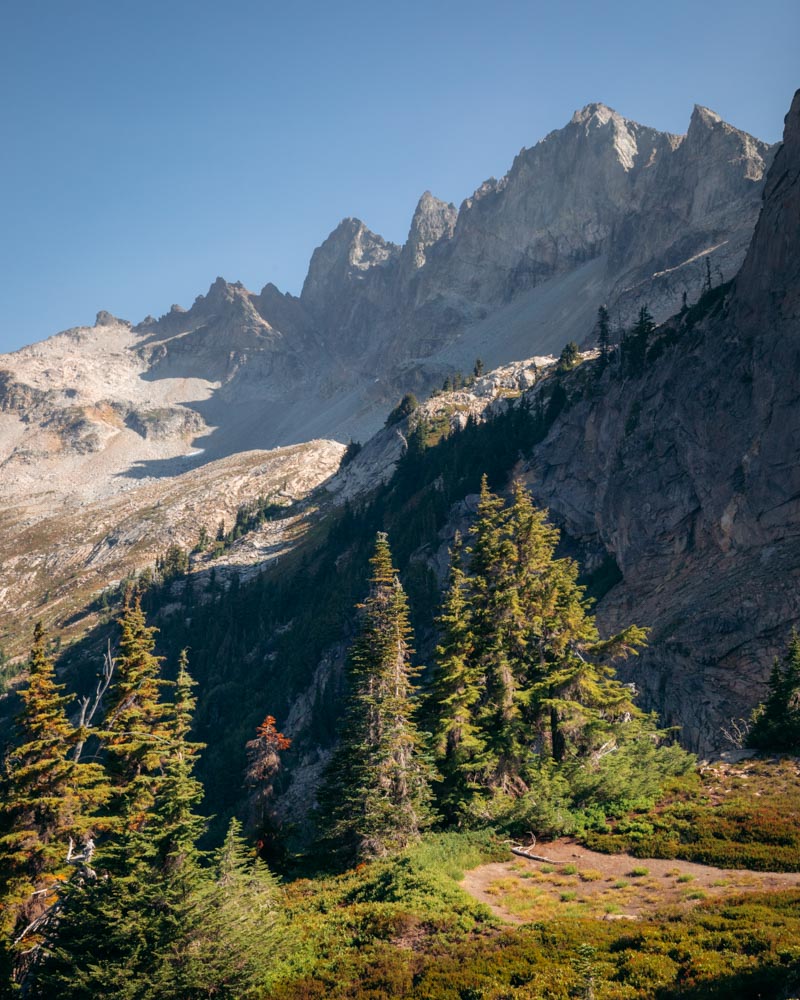
Day 3: Cathedral Pass → Peggy’s Pond → Circle Lake → Waptus Lake
Distance: ~16.5–17 miles | Elevation: ~1,000 ft gain, ~3,000 ft loss
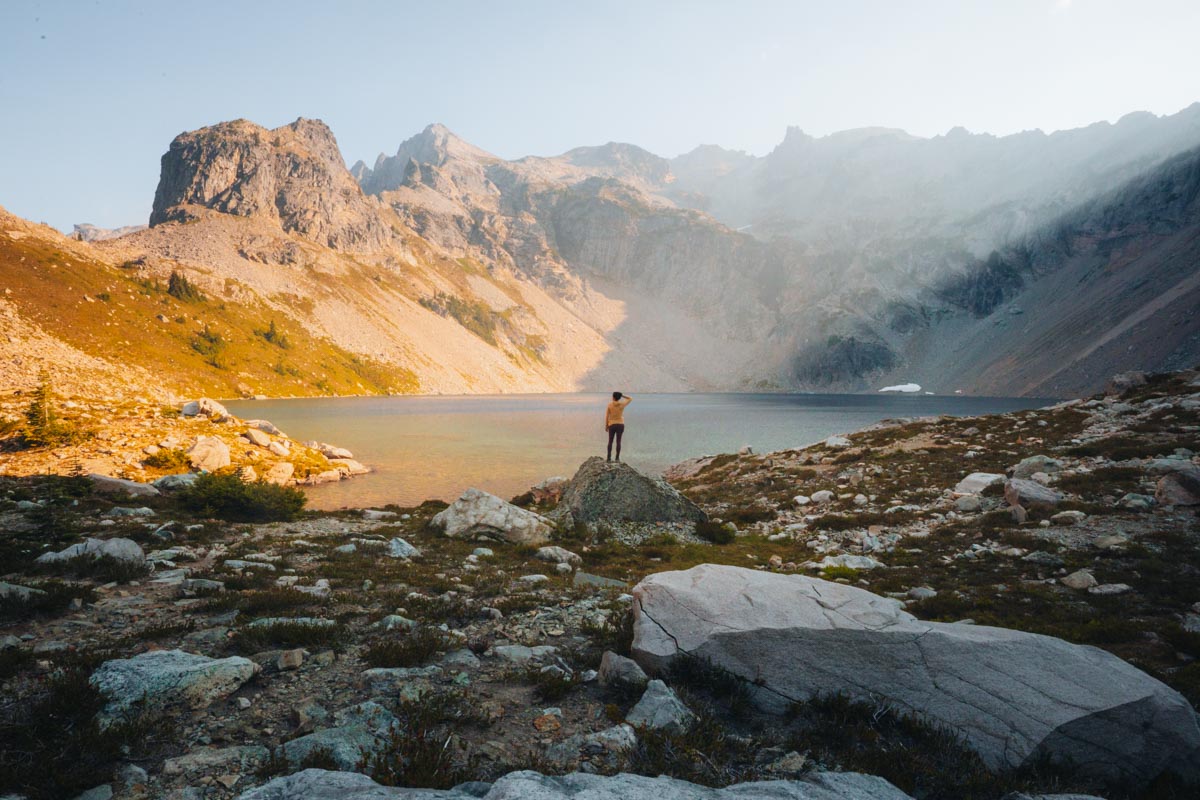
Day 3 was big. I left Cathedral Pass and almost immediately found myself debating at the Peggy’s Pond junction. It was only a mile off trail, but steep and rocky. I sat there for a good 10 minutes asking myself if I had the energy. Decided to go.
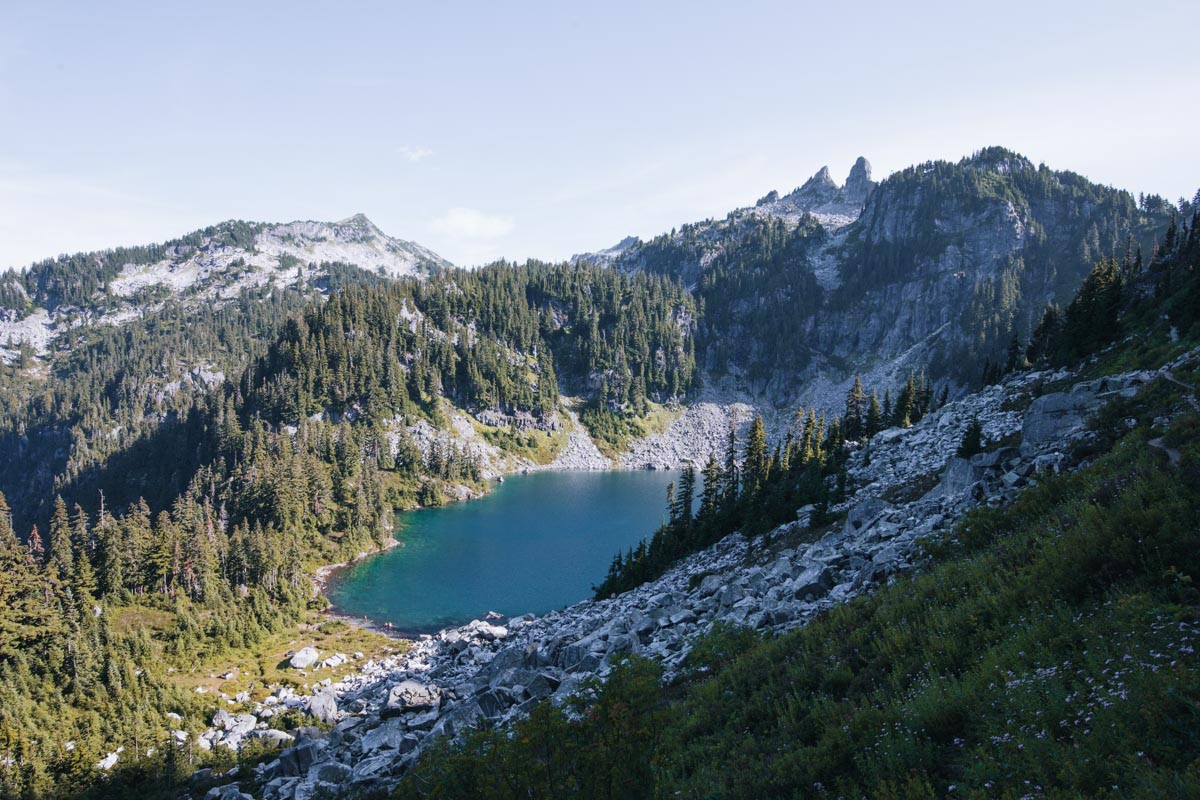
The climb was tough but short, and the payoff was huge. Peggy’s Pond sits right under Cathedral Rock and it stopped me in my tracks. Glassy water, jagged peaks, and total silence.
At the pond, I ran into two guys—one was the other’s high school gym teacher. Small world. They were heading to Circle Lake and asked if I wanted to join. I’d just climbed to Peggy’s and honestly wasn’t planning another detour, but they convinced me.
The hike to Circle Lake with them was fun—good conversation, that surreal alpine turquoise water that doesn’t look real until you’re standing next to it. We all jumped in. One helped me take photos, then we parted ways.
That’s the thing about solo on a long trail: you can join people spontaneously, enjoy the company for a stretch, then continue on your own terms. No negotiation, no obligation.
Back on the PCT, the trail dropped past Deep Lake. I reconnected with a section hiker I’d been leapfrogging and we finished the day to Waptus together. Ended up sharing a campsite on the east shore—swapping stories about our trips, what detours we’d taken, where we were headed next. Easy, natural trail conversation.
By the time I got to Waptus Lake, my legs were done. It’s a long downhill into the basin, but the lake feels massive and open, and camping right on the water was the reward I needed.
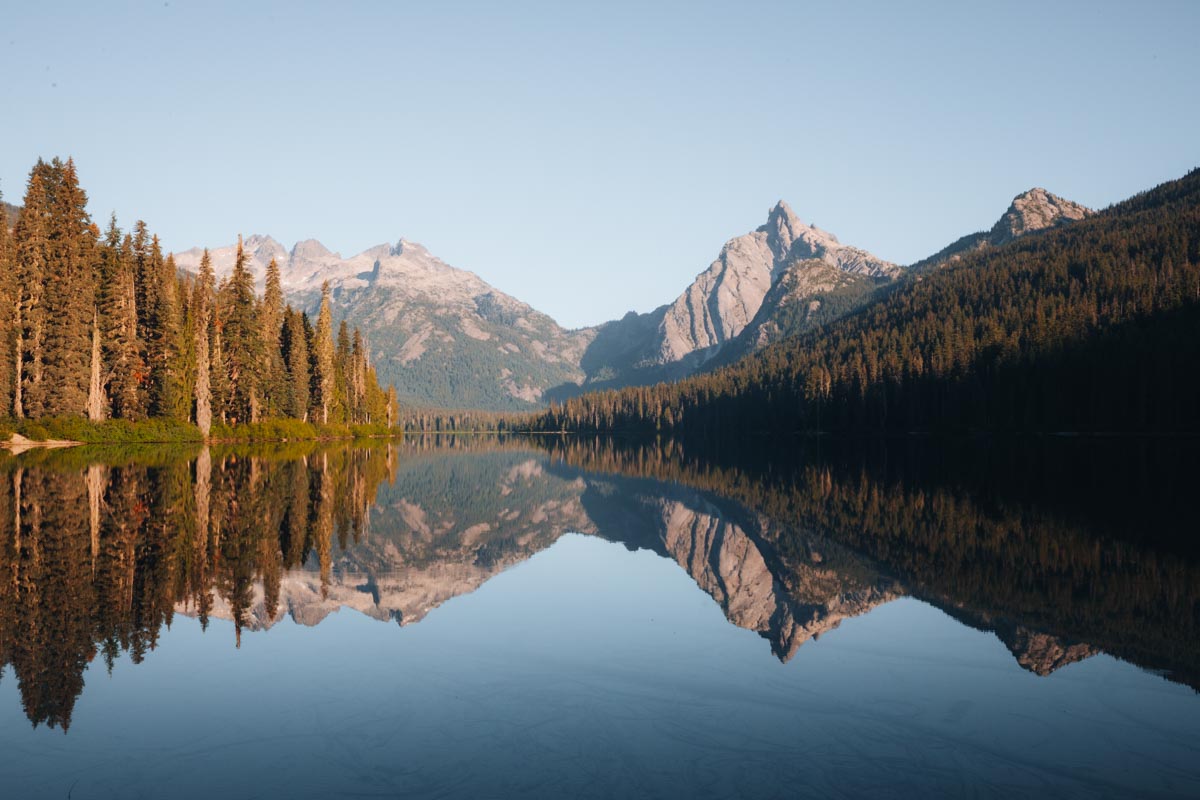
🏕️ Camp: Waptus Lake (East Shore)
- Big alpine lake with a handful of campsites right on the shoreline.
- Quiet, a little hidden, with tiny private beaches if you get lucky.
- Sharing it with another hiker made it even better—easy conversation and a reminder that sometimes company shows up when you least expect it.
- Sunset turned the water to glass. Even though I’d been here before, it felt brand new.
✨ Would camp here again in a heartbeat.
Day 4: Waptus Lake → Spade Lake
Distance: ~3–3.5 miles | Elevation: +2,000 ft (all climb) | Camp: Spade Lake
The climb from Waptus to Spade isn’t long on paper, but wow—it’s a grind. Nearly 2,000 feet of gain in just a few miles, straight up in 90° heat. No switchbacks, just a trail that points uphill and doesn’t let up. I’d been here once before and should’ve remembered how tough it was, but somehow your brain edits out the suffering and only keeps the view.
When I finally made it into the basin, I was completely drained. Instead of pressing on to Venus, I called it early and turned Spade into a rest stop.
When I got to camp, I found a family already set up there. We ended up chatting—they’d done huge backpacking trips all over the world. Good trail conversation, the kind that reminds you why the community aspect matters even when you’re hiking solo.
I swam in the icy alpine water, stretched out on sun-warmed granite, and spent the afternoon reading and cooling down in the stillness.
Spade was both a test and a gift: proof that sometimes the smartest move isn’t more miles, but giving yourself space to breathe.
🏕️ Camp: Spade Lake
- Campsites tucked along granite benches and trees at the shoreline.
- Perfect swimming spot—icy cold and refreshing.
- The basin feels enclosed and calm, great for recovery.
Day 5: Spade → Venus → Back to Waptus → Escondido Ridge
Distance: ~13–14 miles (with side trips) | Elevation: +4,000 ft / –3,500 ft (approx) | Camp: Escondido Ridge
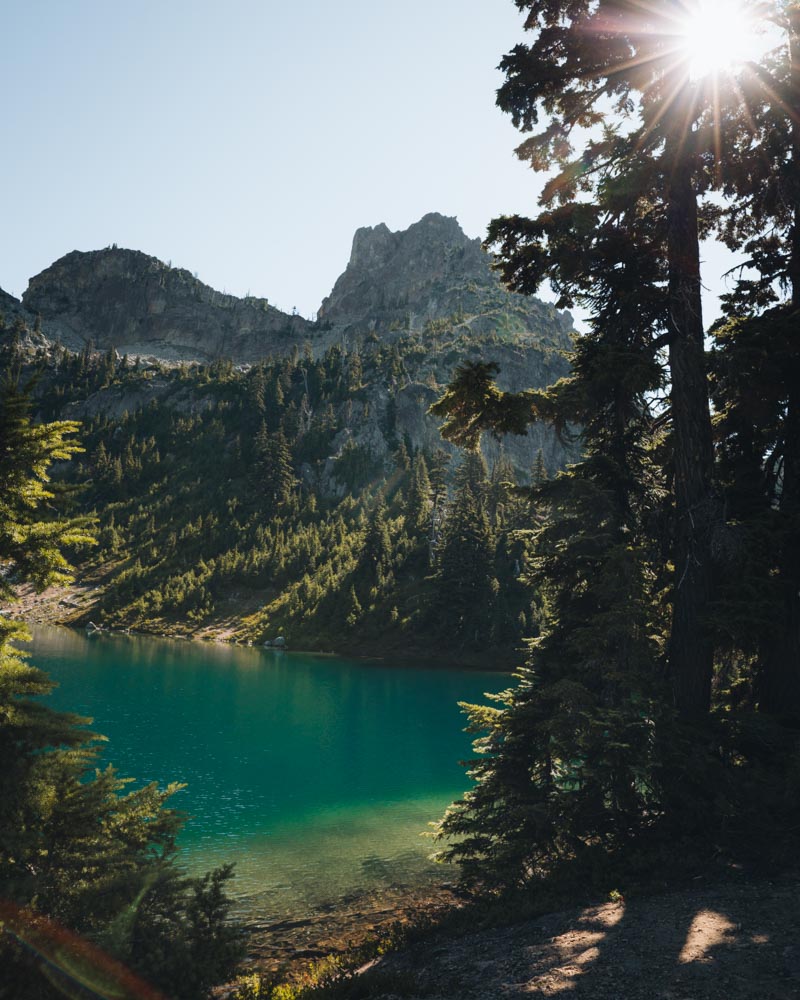
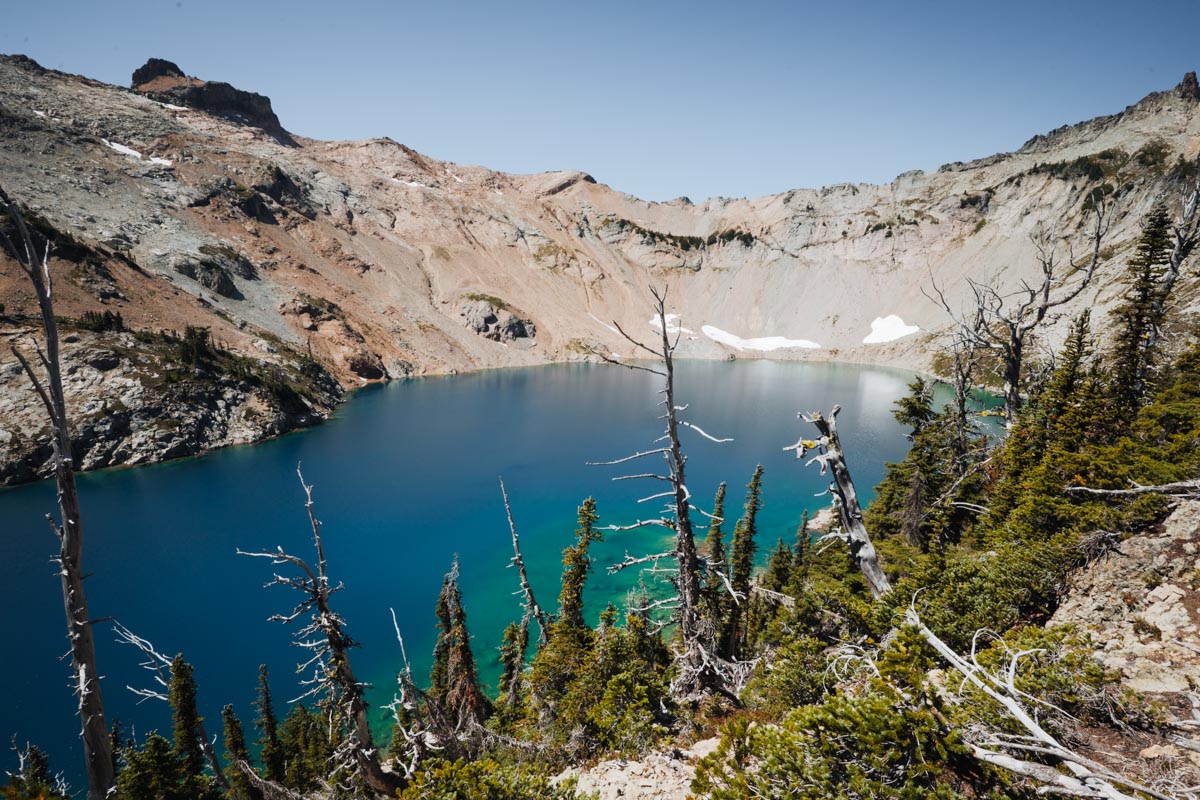
Waking up at Spade, I knew it was going to be a big day. Before packing up, I made the short climb to Venus Lake—a place I’d wanted to see for years. The turquoise water and rocky backdrop were unreal, and I couldn’t resist scrambling up behind the lake for even bigger views. Totally worth the detour.
After soaking it all in, I dropped back down to Spade, packed up, and then made the long descent all the way to Waptus Lake. By then the heat and miles were catching up with me, but there was no way around the next climb: Escondido Ridge.
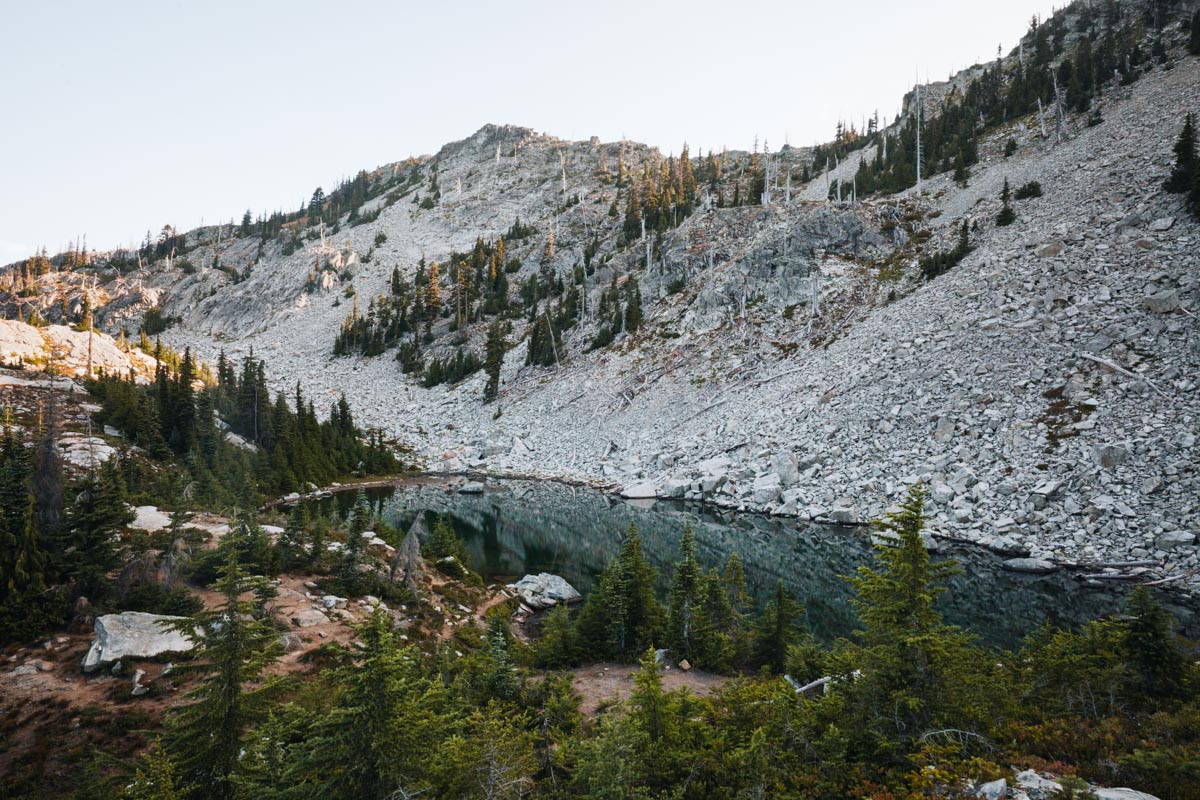
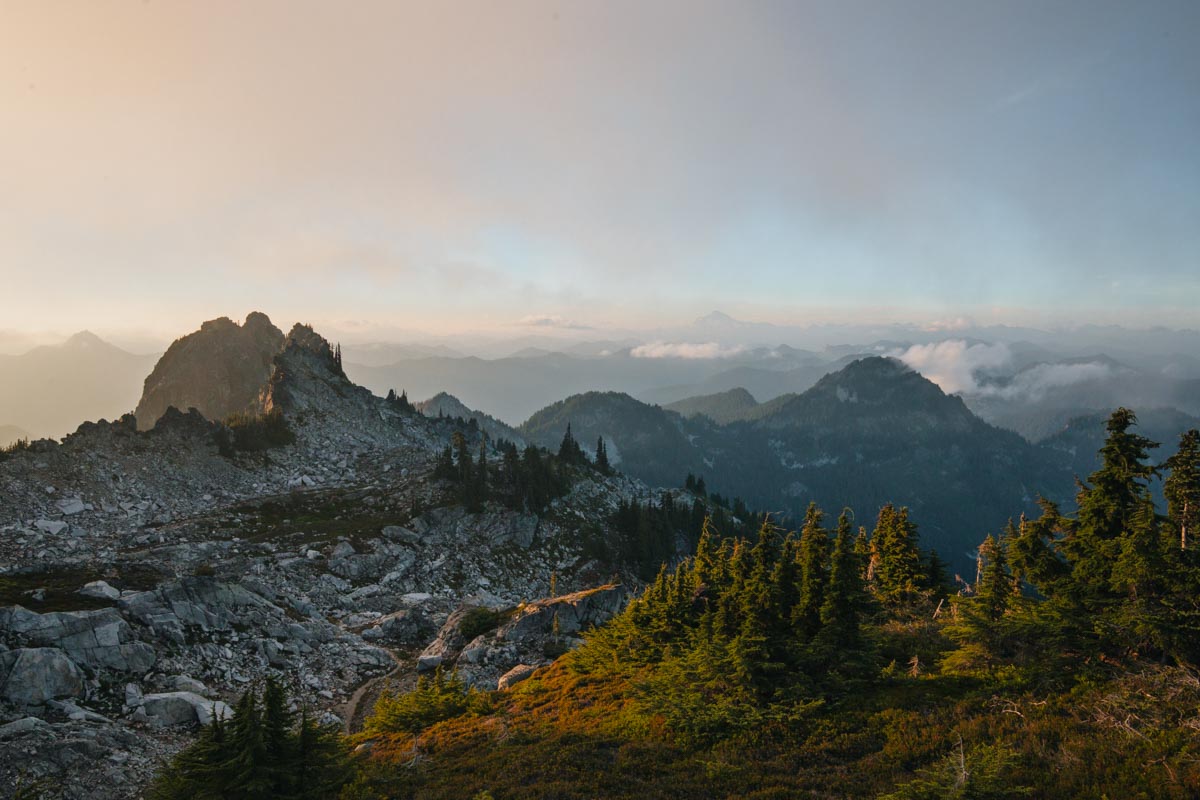
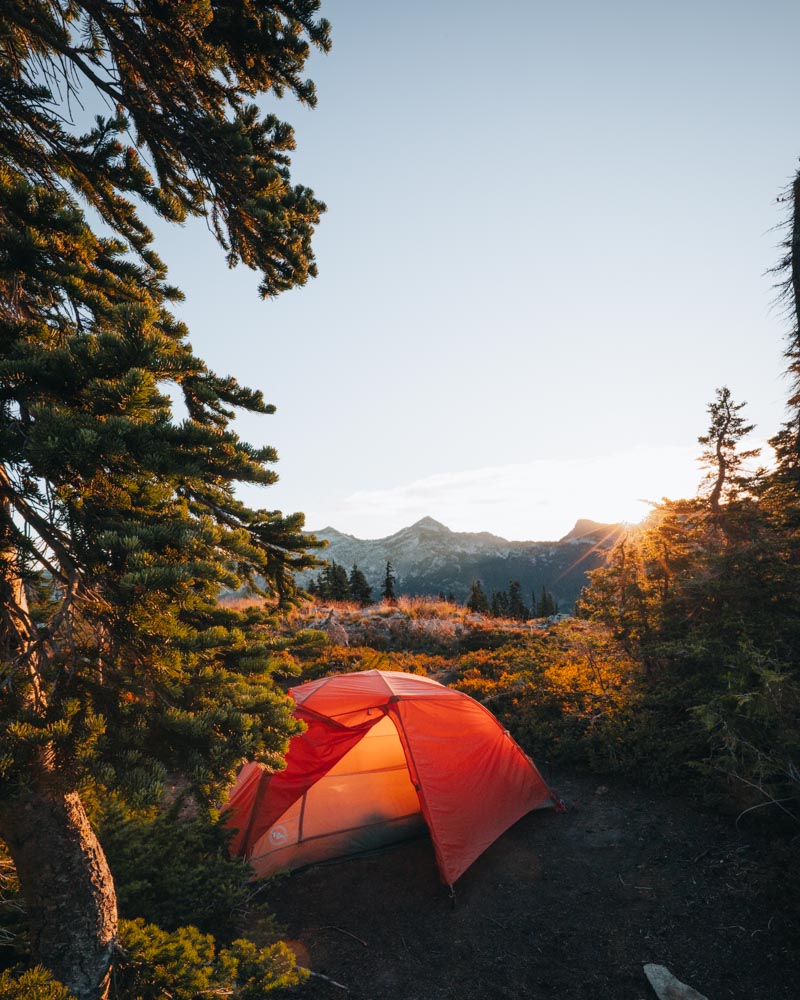
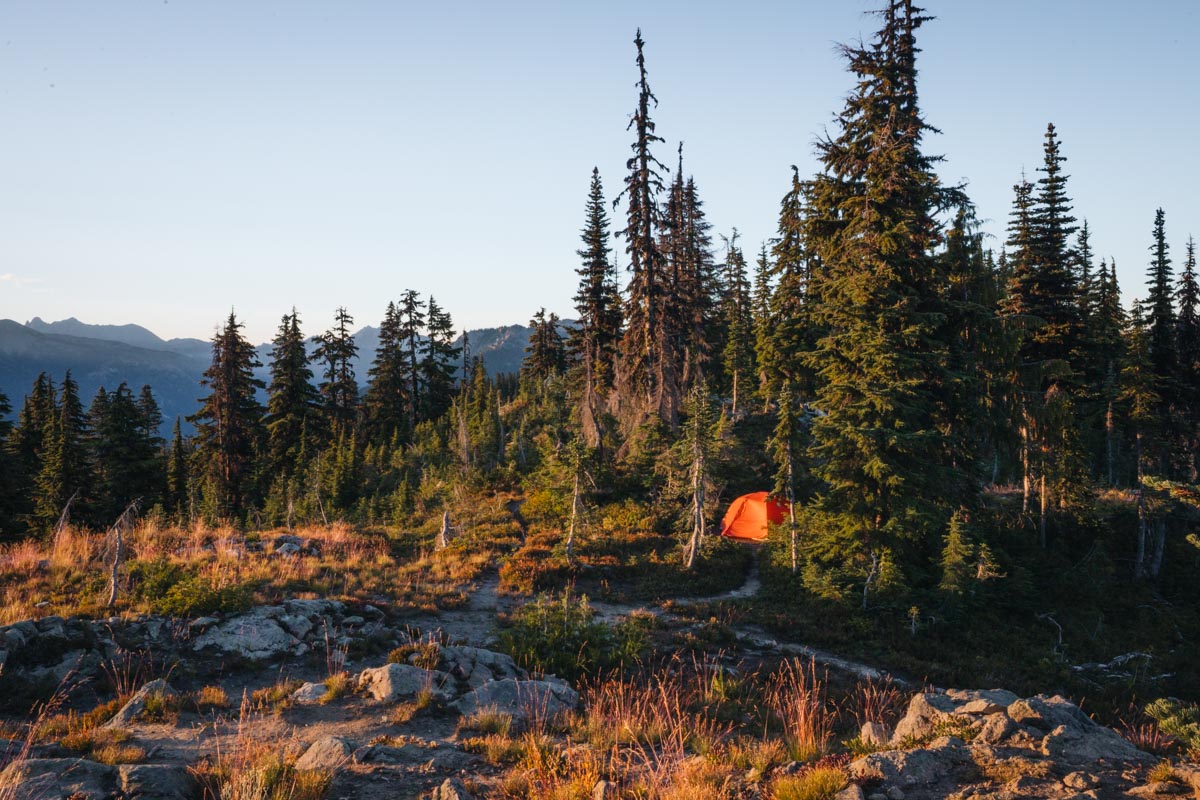
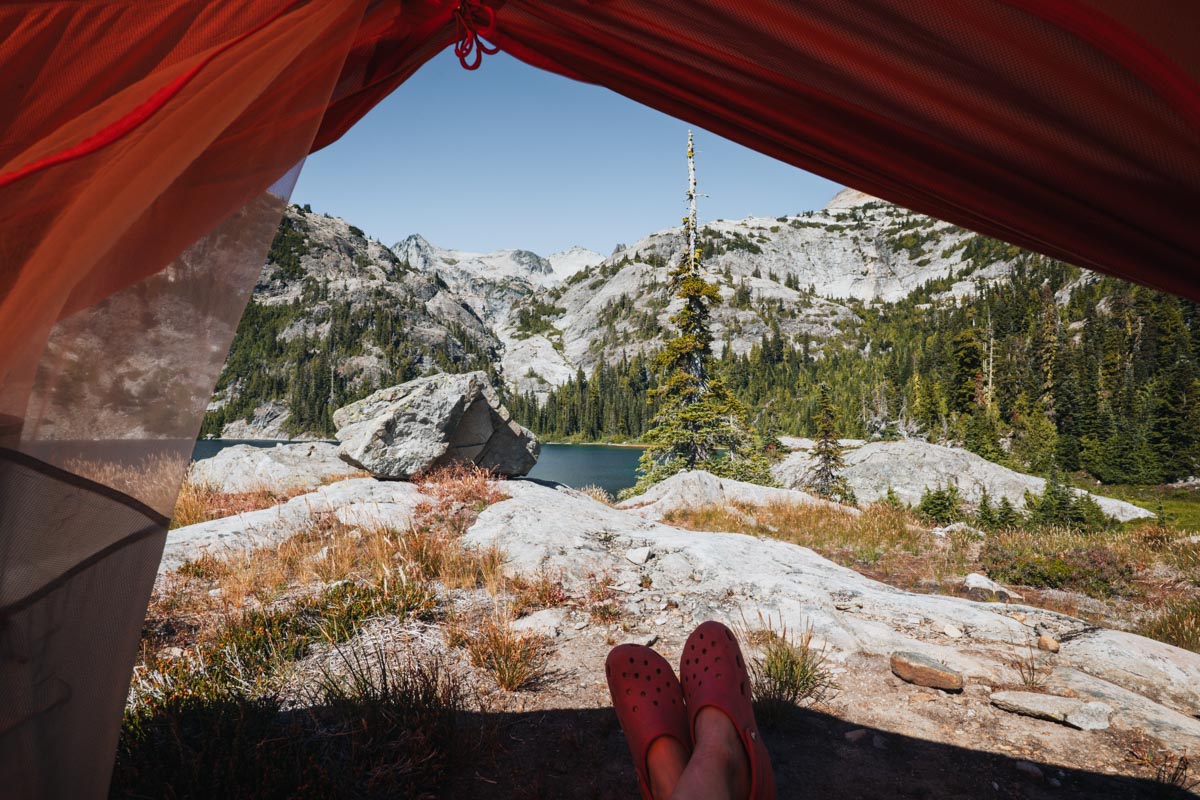
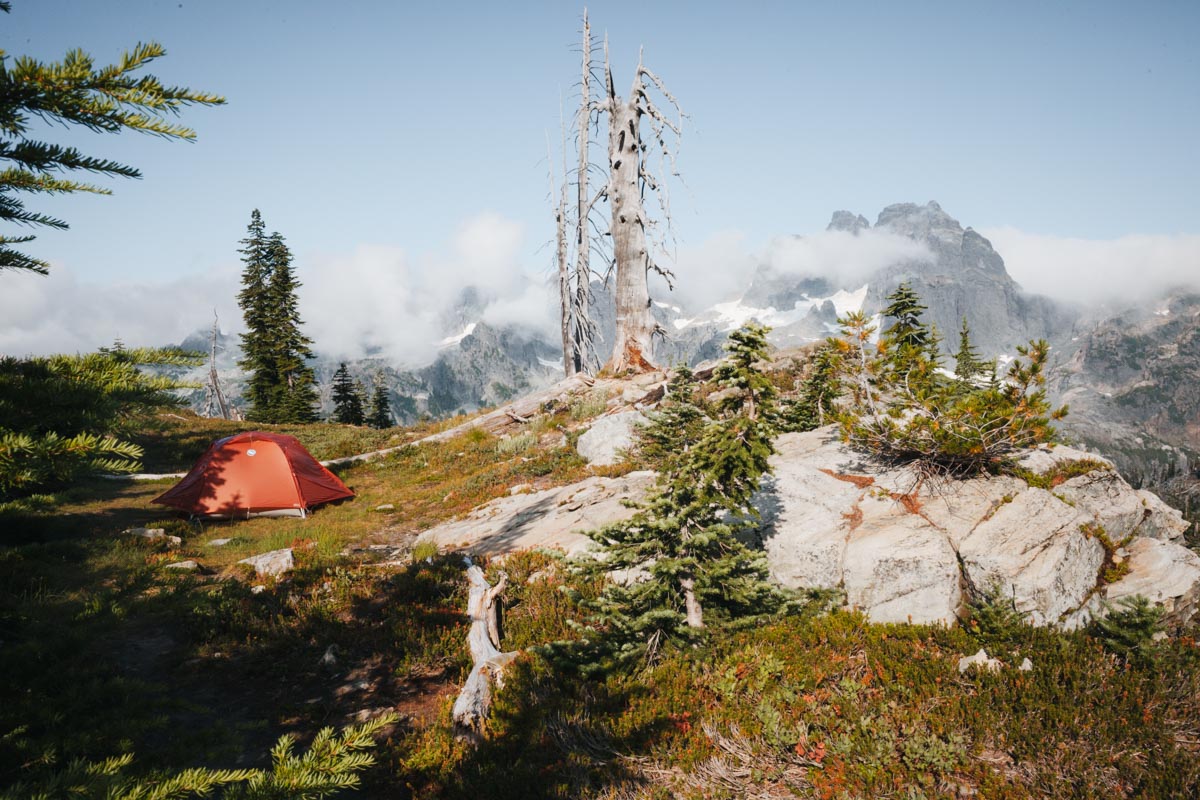
At the top sits what PCT hikers know as “the tarn”—the little alpine pond everyone seems to aim for when they camp on the ridge. A few thru-hikers had already claimed spots nearby, so I hiked just a bit higher and found a private perch above the tarn. It was marvelous—wide-open views, jagged peaks in every direction, and the kind of quiet that makes you feel like the whole wilderness is yours.
Watching the sunset fade across the Cascades and then waking up to the ridge glowing in morning light made this my favorite camp of the whole trip.

🏕️ Camp: Escondido Ridge
- “The tarn” is the classic camp spot, but there are private ledges above if you poke around.
- Exposed, quiet, and spectacular—I barely saw another hiker once I set up.
- Absolutely one of the most rewarding nights of my Section J trek.
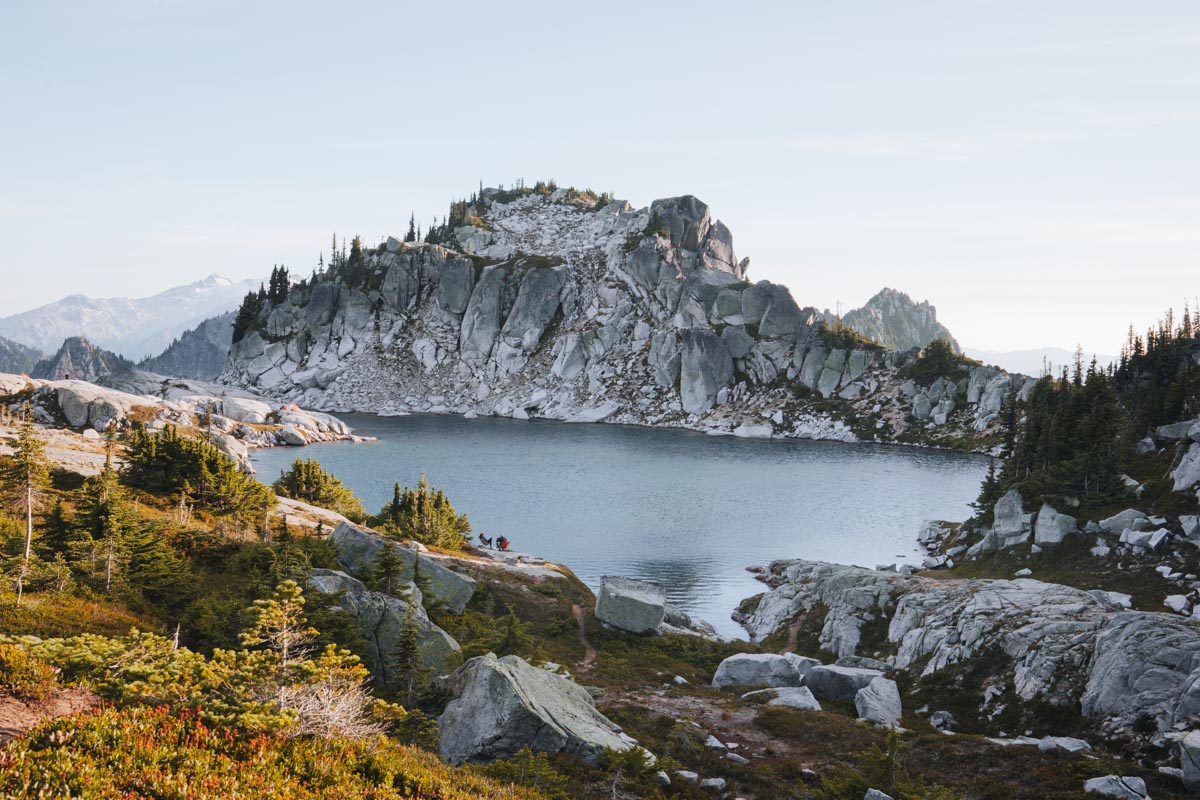
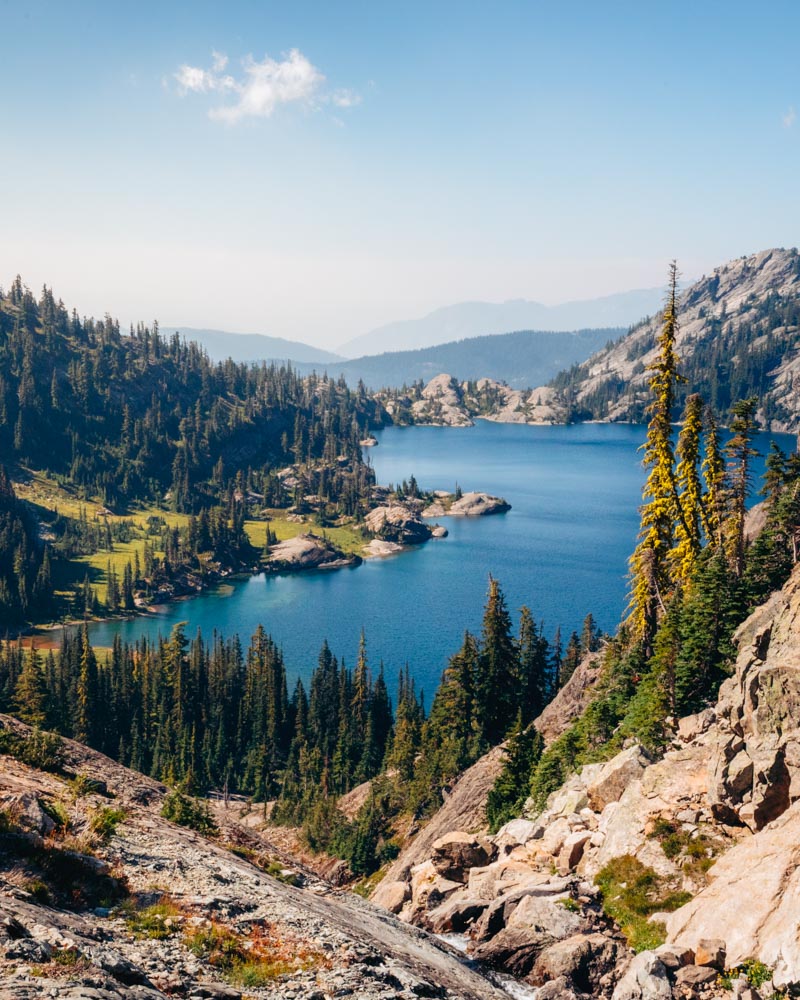
Day 6: Escondido Ridge → Spectacle Lake
Distance: ~7–8 miles | Elevation: +1,000 ft / –1,500 ft | Camp: Spectacle Lake
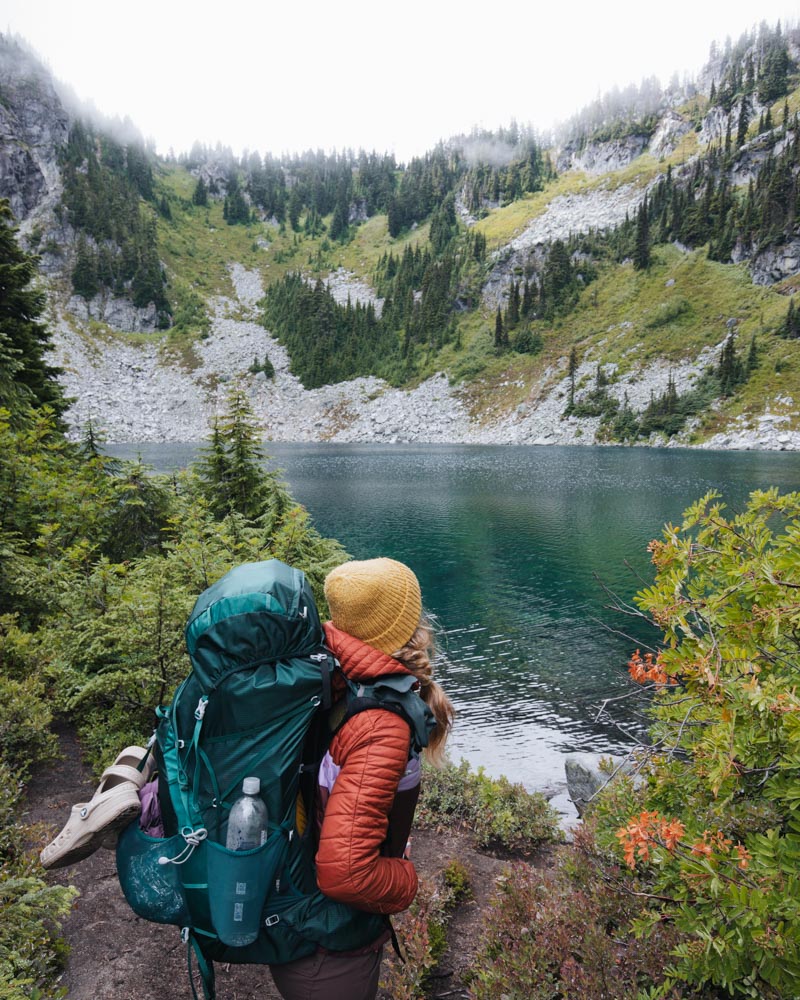
By Day 6 I knew I had a big push coming the next morning, so I made a different call: instead of cranking out miles, I headed straight for Spectacle Lake and decided to stay put. The forecast was calling for an atmospheric river, and if the hike out was going to be a sideways-rain kind of day, I wanted to soak up every bit of calm before the storm.
When I dropped into the basin, it felt like walking into another world. I set up camp, dove in for a refreshing swim, stretched out on warm granite with my book, and spent the afternoon just staring at the jagged peaks and deep-blue water. Honestly, this was one of those rare trail days that reminds you it’s not always about mileage—sometimes the best thing you can do is slow down and enjoy the place you are.
The only thing I missed was climbing up to Glacier Lake behind Spectacle. The next day brought zero visibility and relentless rain, so I never got to see the full hike out either. I told myself I’ll be back—because iSpectacle itself is this jaw-dropping, that the rest of that stretch must be unreal.
🏕️ Camp: Spectacle Lake
- Big basin campsites spread along granite benches with incredible views.
- The larger lake (they feel like 2 but are really the same) is icy for swimming if you’re brave enough – I recommend a swim on the East side in the smaller area – its the perfect temperature on a hot day.
- One of the most beautiful spots in the Alpine Lakes Wilderness—totally worth a “shorter” day.
Day 7: Spectacle Lake → Trailhead Exit
Distance: ~17–18 miles | Elevation: –3,500+ ft (mostly descent) | Camp: None – hiked out
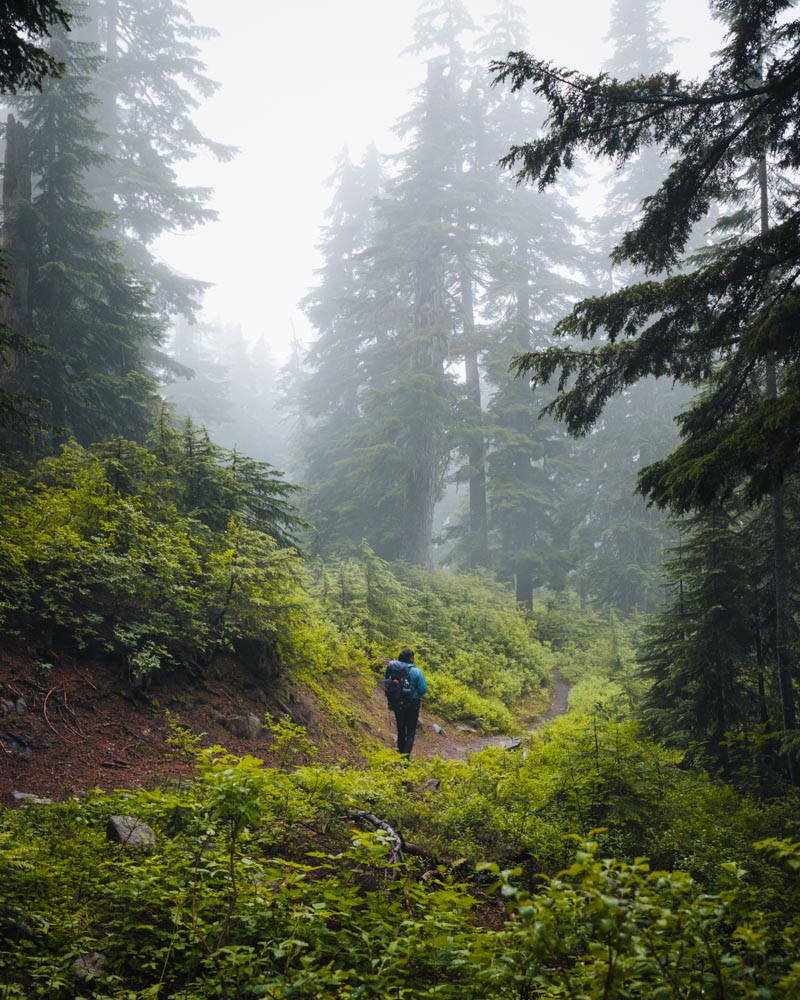
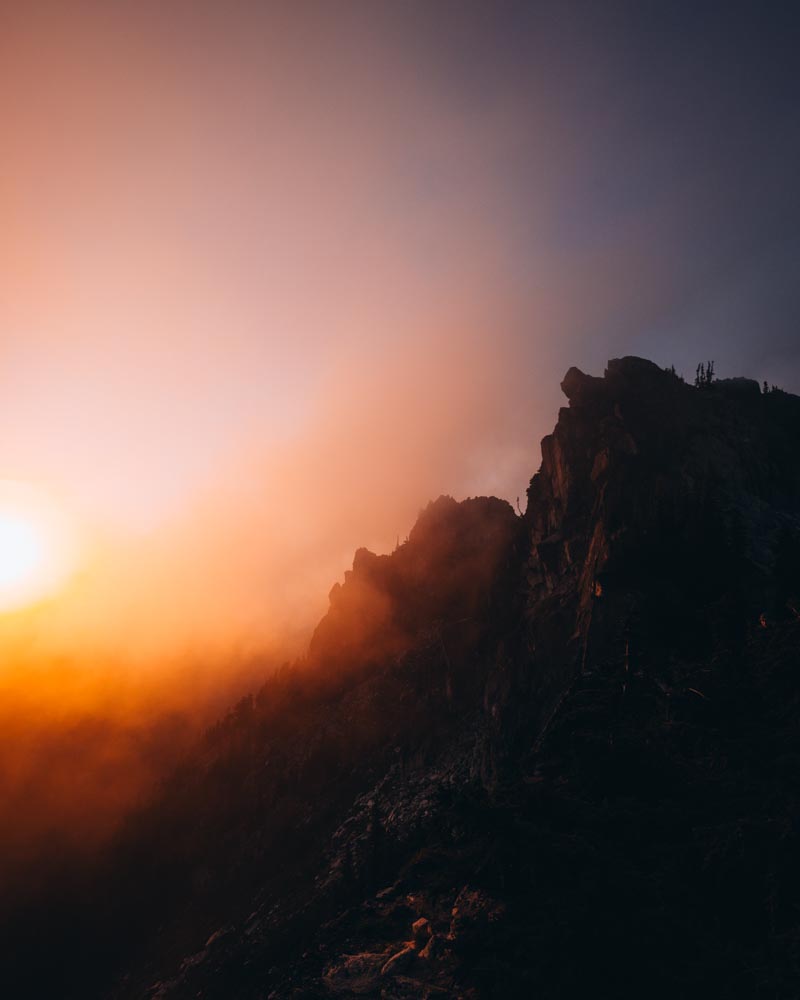
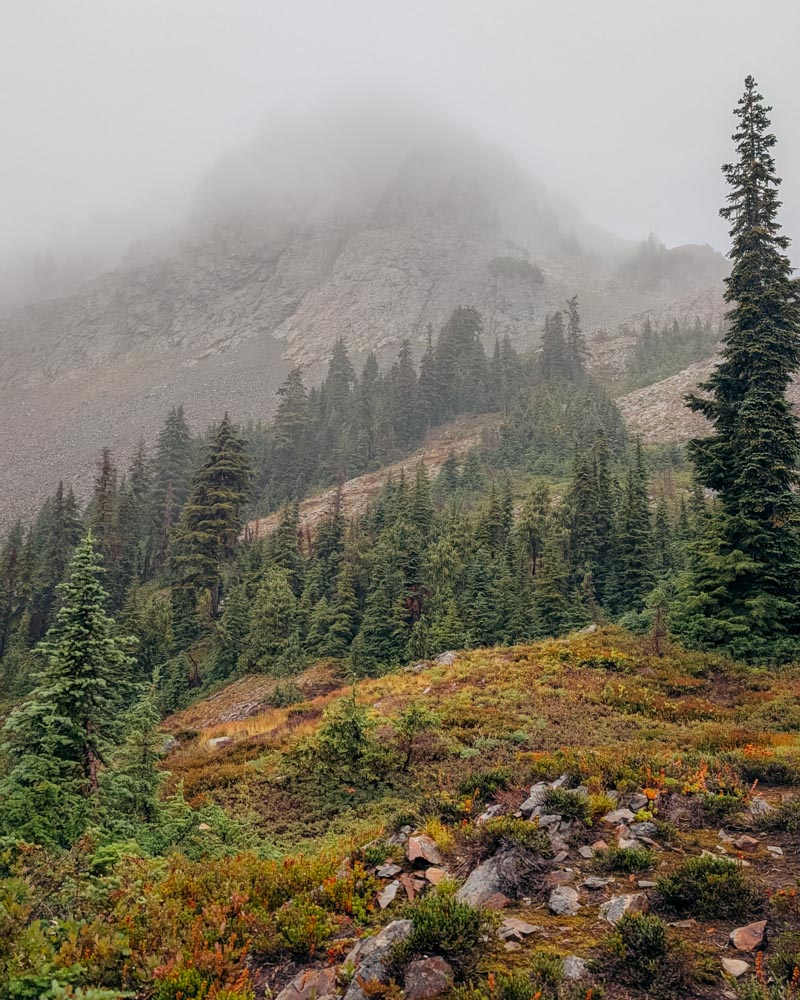
My last day was… a slog. The forecast had nailed it: an atmospheric river rolled in overnight, and I woke up to sideways rain and zero visibility. Packing up a soaked tent in the dark isn’t anyone’s idea of fun, but with a long day ahead, there wasn’t much choice.
The trail out from Spectacle Lake is supposed to be one of the most scenic stretches of Section J, with Glacier Lake and big ridgeline views. I saw absolutely none of it. The rain never let up, and the clouds clung so low I might as well have been walking through a car wash. I just put my head down and kept moving.
By the time I hit the trailhead, I was drenched, tired, and honestly laughing a little at how much the weather had decided to show me who’s boss. Not the epic ending I’d pictured, but in its own way, very memorable.
What I Learned: The Solo Hiker’s Advantage on Long Trails
After 15+ solo backpacking trips, I thought I knew what solo meant. Complete autonomy. Every decision mine. No compromise.
Section J taught me there’s another layer: on a long trail, solo hiking actually creates more meaningful connections than partnered hiking.
When you’re solo, you’re approachable. People chat with you at camps, invite you on detours, share beta about the trail ahead. You can join groups for a stretch, then peel off when you want. You’re independent but part of something bigger.
The leapfrogging pattern means you see familiar faces without commitment. The gym teacher reunion at Peggy’s Pond. The family with world travel stories at Spade. The section hiker sharing a campsite at Waptus. Trail community without obligation.
I still took every side trip I wanted. Still rested when my body needed it. Still made every decision based only on what I wanted.
But I was never lonely.
Popular Campsites on PCT Section J
I detoured a lot (Spectacle, Venus, Spade, Thunder Mountain Lakes), but if you’re sticking to the PCT corridor, these are the overnight spots most hikers use:
- Trap Lake – A small, picturesque basin that makes a good first-night stop if you start late.
- Surprise & Glacier Lakes – Easy side access, family-friendly, and often busy on summer weekends.
- Deception Lakes – Quiet forested sites near water, a reliable midpoint camp.
- Cathedral Pass – Open alpine terrain with dramatic views of Cathedral Rock and Mount Daniel. Some hikers detour to Peggy’s Pond for even better scenery.
👉 Pro tip: Download the FarOut PCT App before your trip. It has real-time campsite comments, mileage, and water source updates—essential for planning each night on Section J.
PCT Section Hiking Essential Gear
This is the gear that I used and found invaluable on my Section J thru hiking.
Shelter + Sleep System
Sleeping Bag: Mountain Hardware Bishop Pass 0 Sleeping Bag
As someone who hates being cold, this guy always keeps things toasty!
Pillow: Thermarest Compressible Pillow
This might seem like a luxury item but quality of sleep is SOOO important on the trail!
Sleeping Pad: Therm-a-Rest NeoAir XLite NXT Sleeping Pad
I will use an insulated pad all year, so it not only comfortable but warm.
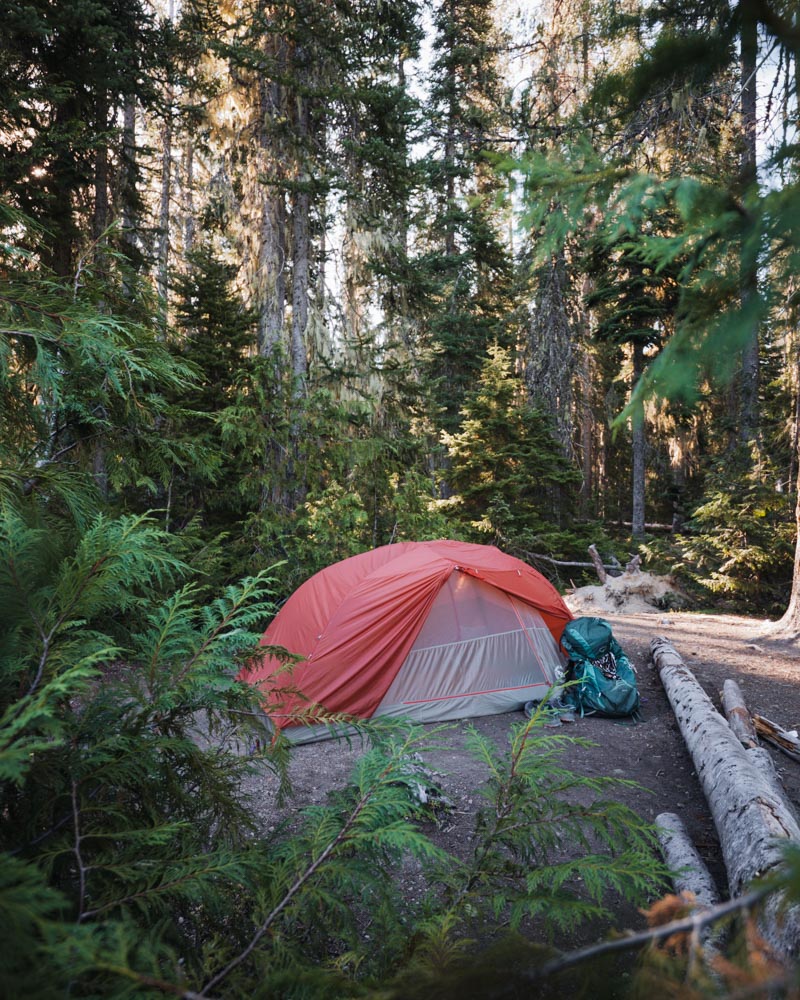
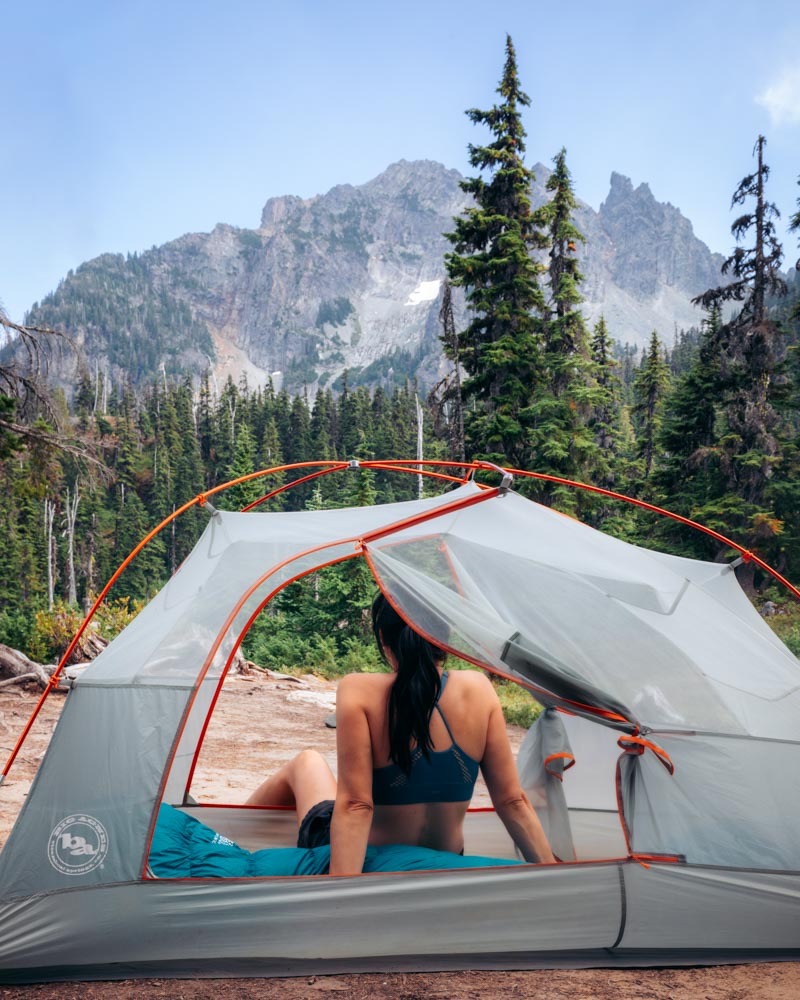
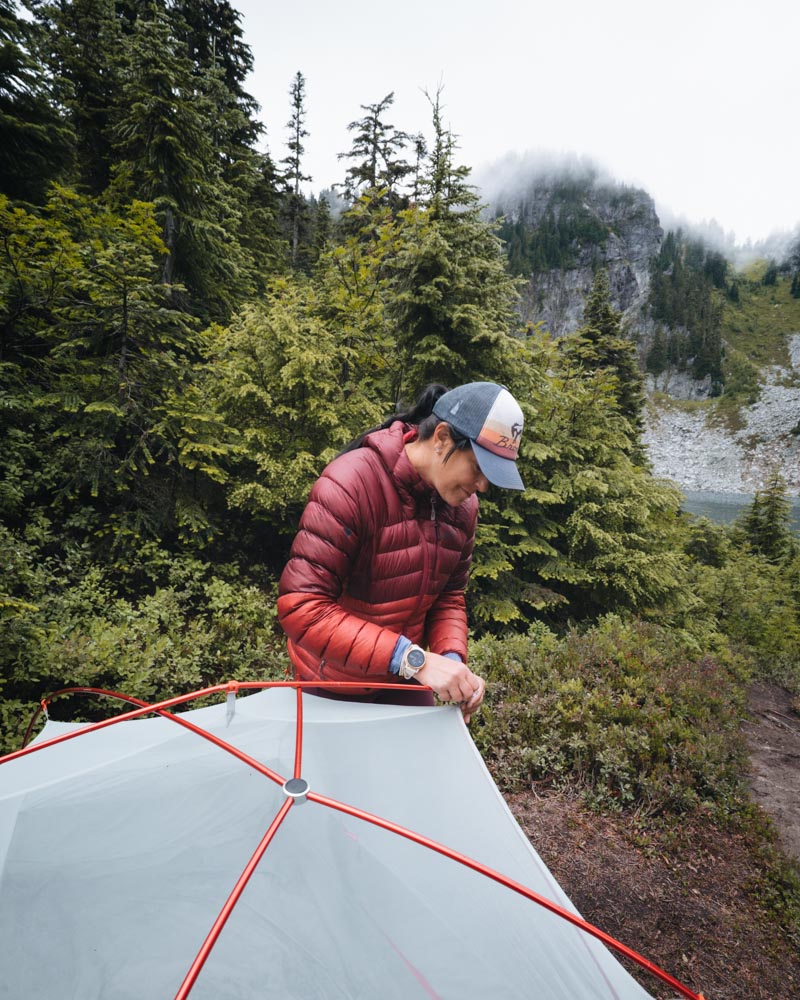
My FAVORITE tent: Big Agnes Copper Spur UL2 Tent
I have been using this tent for over 5 years and I LOVE it. If you are solo, I suggest a 2p tent for a little extra room for your things.
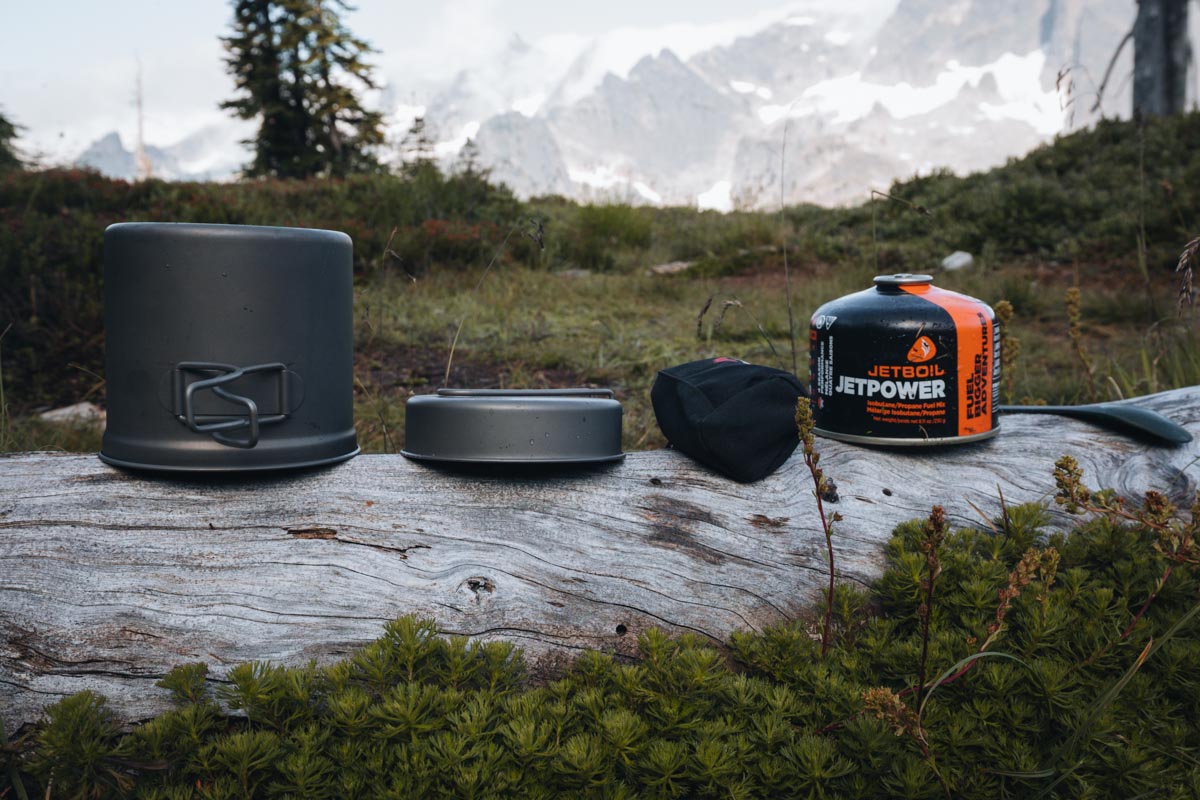
Camp Kitchen
Stove: MSR PocketRocket Deluxe Stove
Light and compact this thing always goes with me.
Long Handled Spork: Snow Peak Titanium Spork
The long handle keeps your fingers clean when eating out ofa freeze dried meal.
Cook Pot: TOAKS Titanium 900 ml D115 mm Pot
I like to cook meals in this as well as rehydrate freexedried meals. You could easily get away with a smaller pot too.
Food Storage
Bear Sack : Ursack Major Bear Sack – 10 Liters
I’ve always carried a bear canister, but they’re heavy and bulky. When allowed, I love using a bear bag instead—it’s lightweight and so easy.
🔗 These are affiliate links – I earn a small commission if you purchase, but it doesn’t cost you extra. I only recommend gear that’s survived our chaotic family adventures!
Section J Logistics (Permits, Transport, Timing)
- Permits: Parking via NW Forest Pass. No PCT long-distance permit required for hikes under 500 miles.
- Trailheads: Stevens Pass (US-2) ↔ Snoqualmie Pass (I-90). Stage cars at each end or arrange a shuttle/ride.
- Timing: Expect lingering snow early season. Best hiking window is mid-July through September. Be prepared for storms.
- Apps/Maps: FarOut PCT App (offline). Green Trails paper maps are a solid backup.
- Safety: Rapid weather changes, swollen creek crossings after rain, limited cover on ridges—pack layers and be ready.
PCT Section J FAQ
How hard is Section J?
It’s a challenging stretch with sustained climbs, rocky tread, and exposed ridges. Side trips to alpine lakes add more difficulty.
How many days should I plan?
Most hikers take 5–7 days. With detours (Thunder Mountain, Spade/Venus, Spectacle), 7–8 days felt right.
Do I need a bear canister?
Not strictly required for every mile, but strongly recommended. Ursacks or bear cans are expected in the Alpine Lakes Wilderness.
Is water reliable?
Yes—but treat everything. Late in the season some seeps may dry up, so check FarOut app comments before heading out.
What about bugs and storms?
Mosquitoes can be intense in mid-summer. Later in the season, cold nights and fast-moving storms are common.
💭 Trail Takeaway
Not every day on the PCT gives you views—some days it just gives you miles. But finishing out Section J in that storm still felt like a win. After a week of highs, lows, and some of the most beautiful lakes I’ve ever seen, walking out wet and beat just felt like part of the story.
And that trail community? That’s the part I didn’t know I was missing.
Ready to plan your first solo trip? Start here: Solo Backpacking for Women
Want to see the gear that actually worked? What I Pack for a One-Night Backpacking Trip in Washington