
13 Best Backpacking Trips in Washington (From a Local)
Epic routes, pro-tips, and local insights from a Washington-based hiking mama
Washington is one of the best states in the country for backpacking — but it can also feel overwhelming to plan your first (or next) trip.
This list covers the best backpacking trips in Washington State, from approachable overnights to iconic, more demanding routes. These are trips I’ve personally done or planned extensively, with real notes on permits, timing, and what to expect — not just a list pulled from a map.
Some of these hikes are great first backpacking trips. Others require experience, planning, and flexibility. I’ve included quick details below so you can find the trip that actually fits your skill level, schedule, and season.
New to overnight trips? Start with my Beginner’s Guide to Backpacking before tackling these routes. Looking for easier options? Check out 8 Easy Overnight Trips Near Seattle or Backpacking Trips for Kids.

Before You Head Out
Preparation is everything. Here are a few essentials I always bring.
- Navigation: AllTrails+ and Gaia GPS + paper map
- Headlamp: Black Diamond Spot
- Shelter: SOL Emergency Bivvy for day hikes, ultralight tent for overnights
- Water Treatment: Sawyer Squeeze or LifeStraw Gravity Filter
- Emergency Comms: Garmin inReach Mini 2
- Sleep System: Mountain Hardwear Bishop Pass Sleeping Bag + Therm-a-Rest NeoAir XLite Pad — lightweight, warm, and packs down small.
And don’t forget to tell someone your itinerary + expected return.


This post contains affiliate links, which means I may earn a small commission if you purchase through them—at no extra cost to you. I only recommend gear I genuinely use and love. Thanks for supporting my adventures!
The Ten Essentials (Refresher)
This isn’t just for epic treks—I bring them for all hikes:
- Extra water
- Navigation (GPS & map)
- Headlamp
- Sun protection
- First aid
- Knife or multi-tool
- Fire starter
- Shelter
- Extra food
- Extra layers

Leave No Trace isn’t about being perfect—it’s about being thoughtful. Pack out your trash, stay on trail, and set up camp away from lakes and fragile plants. If you need to wash up, do it away from water sources, and keep things low impact so others can enjoy the same wild beauty. These places feel like magic, and it’s on all of us to help keep them that way.
Best Overnight Backpacking Trips in Washington

Rampart Lakes + Alta Mountain
Location: North Cascades National Park
Distance: 12 miles (varies if you add Black Peak)
Elevation Gain: 3,800 ft
Difficulty: Hard
Parking Pass: NW Forest Pass
Trail Guide: Rampart Lakes and Alta Mountain
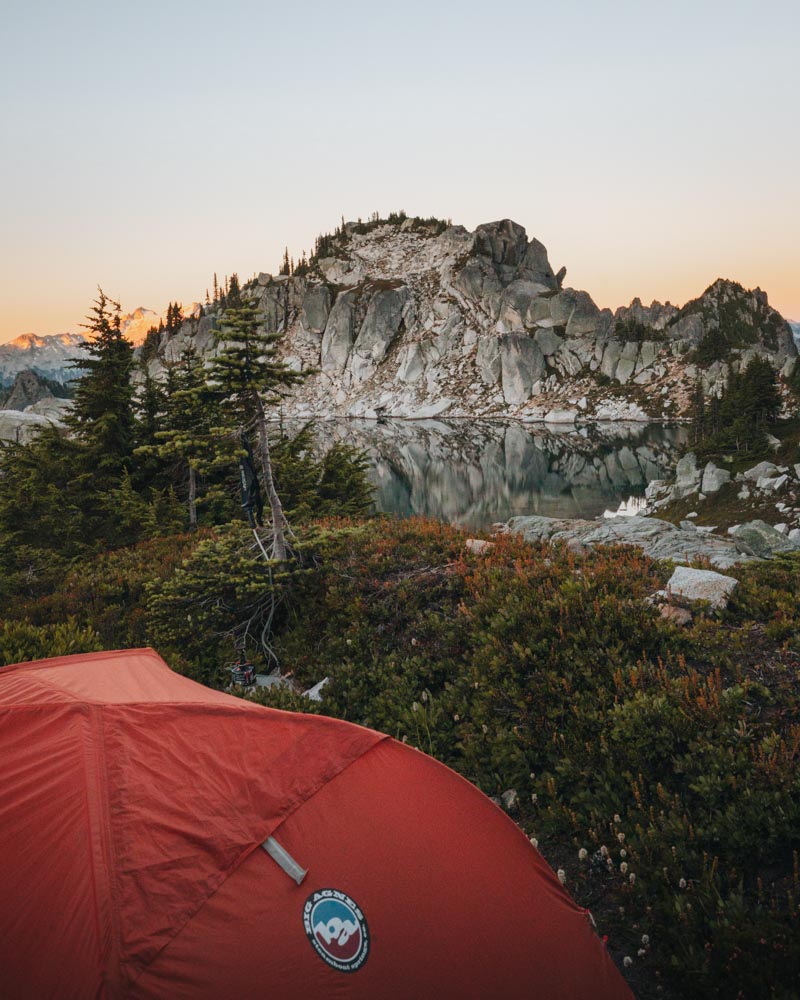
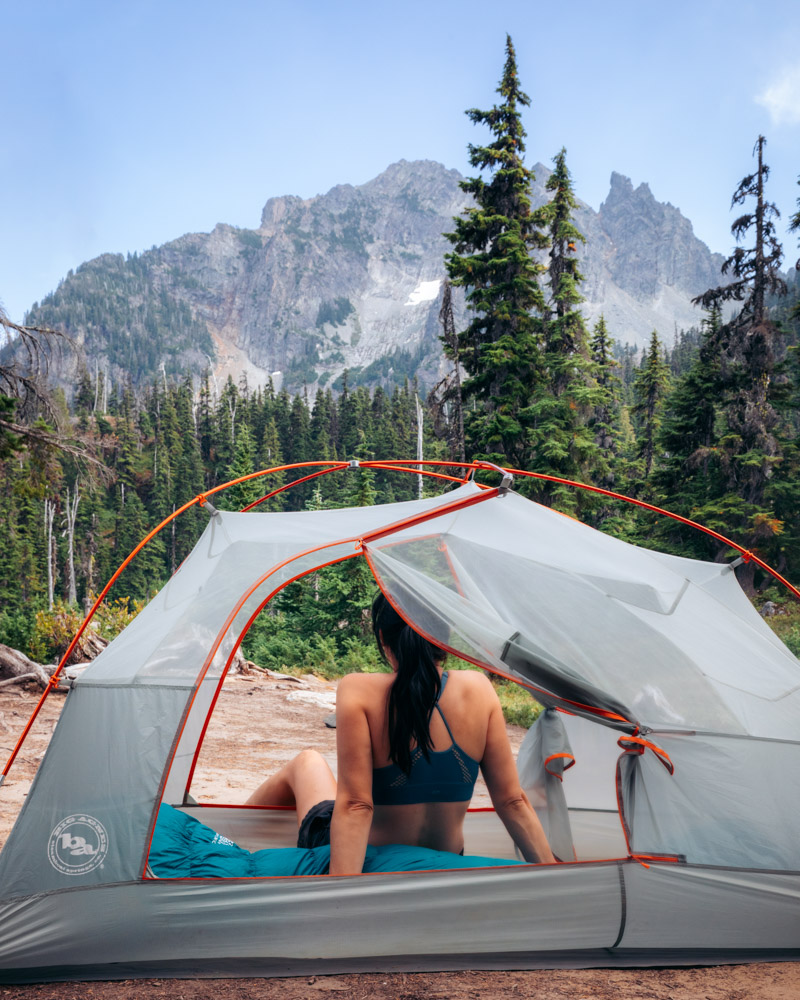
Rampart Lakes is one of those places that makes you want to stay a while—hidden campsites, alpine views, sunrise reflections, and plenty of cold, clear water for swimming. It’s perfect for staying up for a few days. A lightweight tent like the Big Agnes Copper Spur HV UL2 makes multi-night trips like this so much easier. (this one also often goes on sale)
The trail starts off mellow through the forest, then gets steeper and more rugged as you climb toward Rachel Lake. It’s a perfect spot to take a break and jump in—cold, refreshing, and exactly what you need before the final push. The water color here is unreal.
From there, it’s a short climb to Rampart, where a chain of alpine lakes spreads out across a rocky basin. Wildflowers, granite slabs, and quiet corners to pitch your tent. It’s kind of hard to leave.
Bonus: You can make a an afternoon out of a hike to Alta Mountain. From Rampart Lakes, follow the unmarked but well-worn path that ascends steeply towards the summit. The climb is demanding, but the panoramic views from the top are INCREDIBLE. From the summit of Alta Mountain, you’ll enjoy 360-degree vistas of the Alpine Lakes Wilderness.


Pro-Tip: If you have the time, add Lila Lakes to your itinerary making it more of a multi day backpacking trip. Lila Lake is just a pretty as the Rampart Lakes so you cant go wrong!

Lewis + Wing Lake
Location: North Cascades National Park
Distance: 9 miles (varies if you add Black Peak)
Elevation Gain: 2,100 ft
Difficulty: Hard
Parking Pass: NW Forest Pass
Trail Guide: Wing Lake
Tucked high in the North Cascades, Wing Lake feels like a secret you earn. The hike starts mellow enough on the Maple Pass Loop, but then come the boulder fields, a quiet pass by Lewis Lake, and then a golden tunnel of larches that feels like it was made for fall. But it’s the lake that makes you stop. Cold, clear, and ringed in gold, Wing Lake is the kind of place you want to go back to every year. Pitch your tent on a little rise above the shoreline, watch the larches light up at sunrise, and wake up to still water reflecting jagged peaks. It’s quiet, it’s wild, and it’s absolutely worth the climb.


Wing Lake is absolutely spectacular during larch season — the golden trees surrounding the lake are unforgettable. See my Best Fall Hikes in Washington for timing tips and other larch destinations.
Pro-Tip: Walk around to the far side of the lake for the best views. Campsites are scattered along the shoreline, but the farther back you go, the better the scenery. This is one epic spot for a backpacking trip!

Gothic Basin + Foggy Lake
Location: Mount Baker-Snoqualmie National Forest
Distance: 9.3 miles
Elevation Gain: 3,139 ft
Difficulty: Hard
Parking Pass: NW Forest Pass
This one’s a grind—but Foggy Lake and the view of Del Campo and Gothic Peak make you forget about all your hard work. The trail kicks off at Barlow Pass and climbs fast through thick forest before spilling out into classic North Cascades drama: jagged peaks, open ridges, and rocky everything. There are so many rocks on this trail. Did I add rocks?
Trekking poles are non-negotiable here — I use the Black Diamond Trail Ergo Cork for rocky terrain like this.
It’s tough going in spots, but then come the views. Some of the most expansive on the Mountain Loop. Foggy Lake is cold and wild and unbelievably beautiful, especially in the morning when the peaks reflect off the surface like glass. For the best camp spot, head to the far end of the lake—less traffic, more views, and the kind of stillness you hike this hard to find.

Bonus: Catch sunset from Gothic Peak if you have the energy!

Ptarmigan Ridge + Goat Lake
Location: Mount Baker-Snoqualmie National Forest
Distance: 11.6 miles
Elevation Gain: 2,480 ft
Difficulty: Moderate
Parking Pass: NW Forest Pass
Goat Lake sits tucked into a rugged bowl beneath Mount Baker, and getting there feels like walking through a postcard that keeps outdoing itself. The trail starts at Artist Point with sweeping views right out of the gate, then winds past Table Mountain and weaves through rocky terrain that feels more alpine with every step. Around mile 4, Goat Lake comes into view—deep blue, cold, and absolutely stunning. It’s the kind of spot that begs you to stay the night, with glacier-fed water perfect for a polar plunge and stars that seem to double when they hit the surface.
If you’ve still have some energy, push a little farther to the edge of Coleman Glacier—where Mount Baker looms so close, it feels like you could reach out and run your hand along the ice.


Camp at Goat Lake for an unforgettable sunset behind Mt. Baker. For even better views, head to the saddle between Goat Lake and Mt. Shuksan, where you’ll get Baker on one side and Shuksan on the other.

Goat Rocks Wilderness – Old Snowy Via Snowgrass Flats
Location: Goat Rocks Wilderness
Distance: 13.6 miles (+ Knife’s Edge detour)
Elevation Gain: 3,850 ft
Difficulty: Hard
Parking Pass: NW Forest Pass
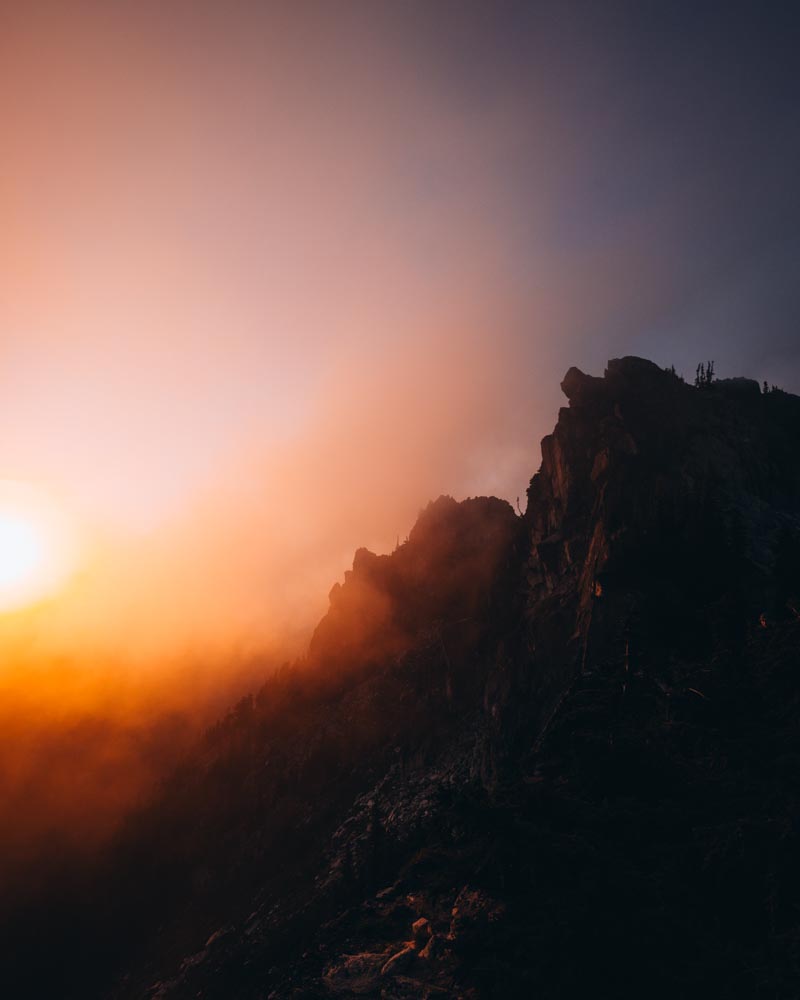
Goat Rocks feels like stepping into a dream—wide open ridges, wildflowers everywhere, and views that stretch all the way from Rainier to Adams to St. Helens. Bug pressure can be intense in the meadows — I never go without my Sawyer Picaridin Insect Repellent.The trail winds through high meadows before climbing toward Goat Lake, a clear little gem tucked beneath craggy cliffs. Camp here and you’ll wake to quiet water and soft morning light on the peaks—pure magic. From there, the real fun begins. The Knife’s Edge is everything it’s hyped up to be: narrow, wild, and wide open, with mountain views in every direction and wind that makes you feel alive. Old Snowy is right there if you’re craving a scramble, but honestly, just being up here is enough.
For an epic sunset head up to Hawkeye Point. There are also a few unreal campsites up there with insane views of Mt.Adams.

Pro-tip: Ridge below Old Snowy, offering sunrise and sunset views of Mounts Rainier, Adams, and St. Helens.


Gem Lake via Snow Lake
Location: Mount Baker-Snoqualmie National Forest
Distance: 11 miles
Elevation Gain: 2,670 ft
Difficulty: Hard
Parking Pass: NW Forest Pass
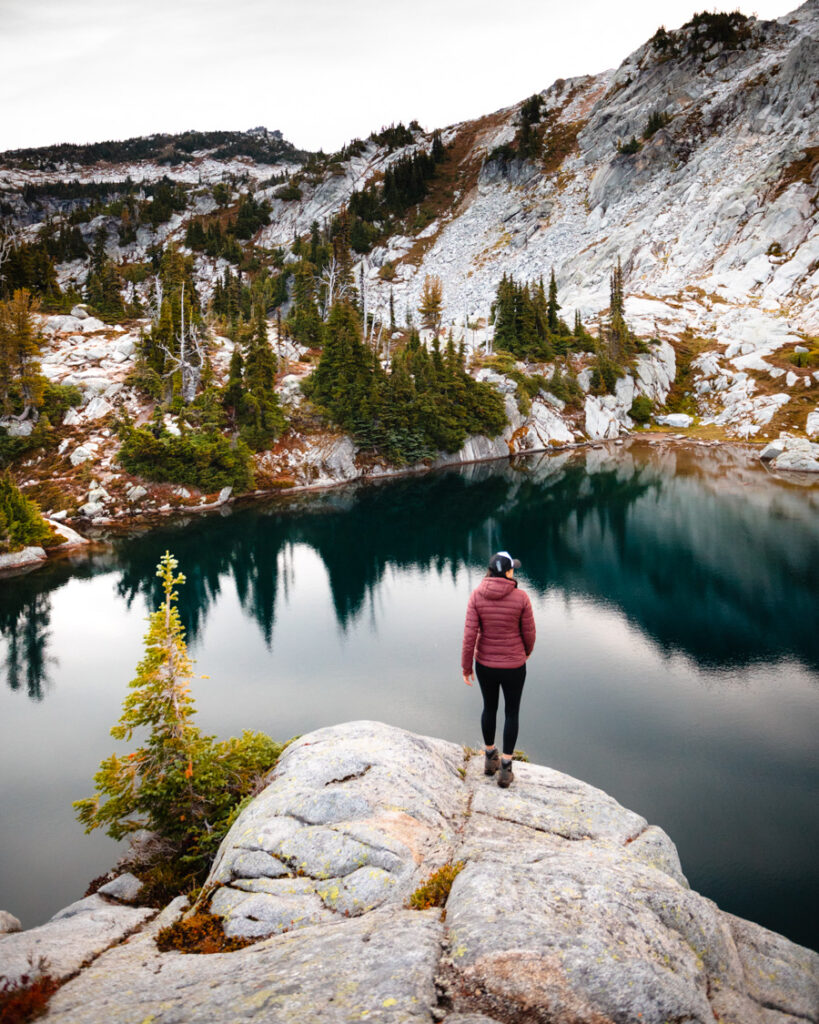
Just beyond the crowds at Snow Lake, Gem Lake lives up to its name—a quiet, crystal-clear alpine pool tucked into the mountains. The trail starts from the same busy trailhead, but once you pass Snow Lake and start climbing toward the ridge, the crowds thin out and the views get even better. Gem Lake appears like a secret—clear, cold, and perfect for a dip if you’re brave enough. It’s the kind of place that makes you want to stay a while, perched on a rock in the sun with your feet in the water. If you’ve got extra time (and energy), a quick hike up Wright Mountain gives you the full panorama—jagged peaks, endless ridges, and a bird’s-eye view of the lakes below.

Pro-tip: There are campsites by the lake, but the best ones are on the east side, with lake views and easier access. Plus, you’ll catch the most amazing sunrises and sunsets from there!

High Divide Seven Lakes Basin
Location: Mount Baker-Snoqualmie National Forest
Distance: 19.1 miles
Elevation Gain: 5,387 ft
Difficulty: Hard
Parking Pass: National Park Pass / Overnight Permit
Trail Guide: High Divide Seven Lakes Basin
Seven Lakes Basin isn’t easy to get to—and I don’t just mean the hike. Permits go fast, and getting the right camps lined up can feel like a game of Tetris. But if you pull it off, it’s so worth it. Big alpine views, quiet lakes, and a real sense of being out there. Mt. Olympus shows up above Heart Lake like something out of a storybook, and you might spot a bear or two snacking on berries along the way (they’re usually not interested in people—just give them space). Bear canisters are required in Olympic wilderness — I use the BearVault BV500, which fits a weekend’s worth of food.
We did it in 3 days and 2 nights, which felt like a sweet spot—enough time to take it in without rushing. Starting counterclockwise gave us early views and saved our knees on the way out. The trail begins in classic Olympic rainforest: mossy, green, and soaked in waterfall sounds. Sol Duc Falls is an early highlight and kind of sets the tone—lush, wild, and deeply Pacific Northwest.
Camping up in the basin is something else. Quiet mornings, cold lakes, and peaks that catch the light just right. It’s not the easiest trip to plan, but once you’re out there, it’s exactly where you want to be.


Permits go fast for this area — understand how Olympic’s permit system works before you apply. Planning a longer Olympic trip? Check out my Weekend in Olympic National Park Guide for more ideas.
Pro-tip: There are several campsite locations along the loop to book but I found Lunch Lake and Heart Lake to take the cake! You have to book the specific campsite and stay at these designated sites.

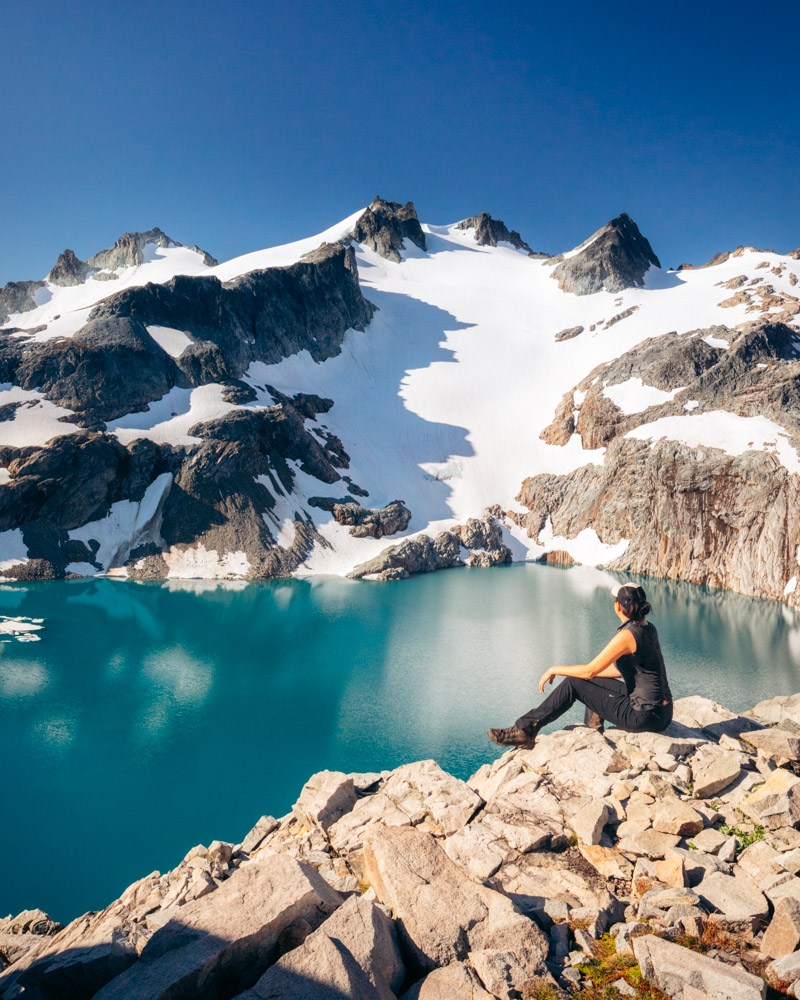
Thunder Mountain via Tunnel Creek Trail
Location: Okanogan-Wenatchee National Forest
Distance: 12.6 miles
Elevation Gain: 3,940 ft
Difficulty: Hard
Parking Pass: Northwest Forest Pass
Trail Guide: Thunder Mountain
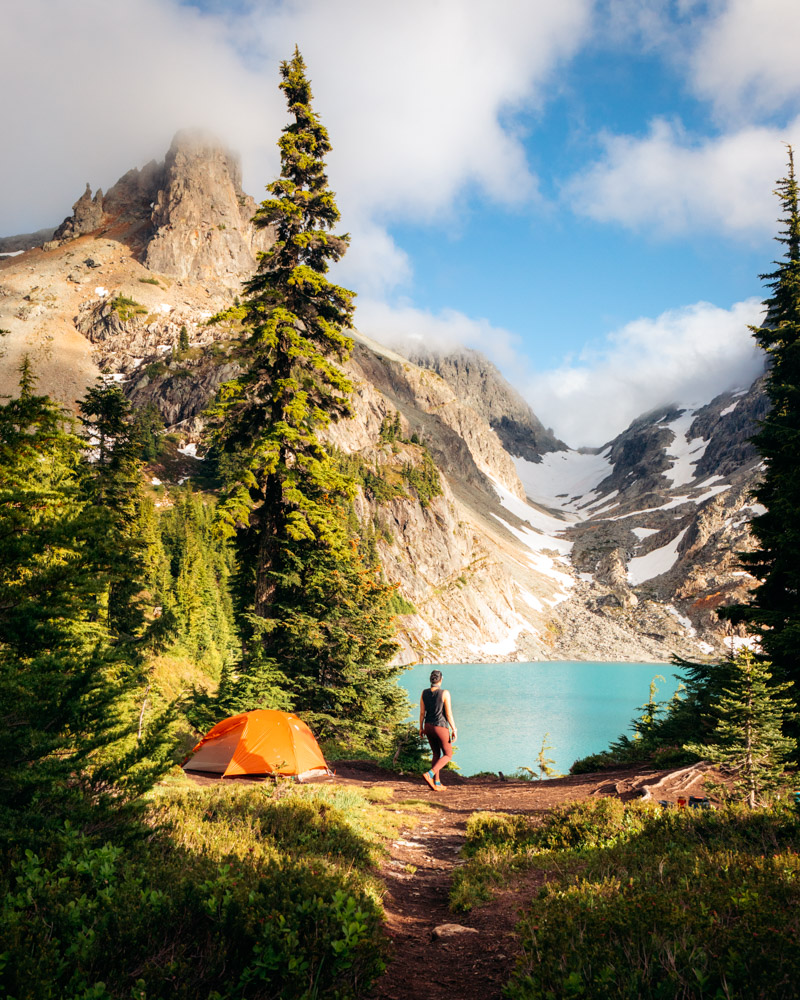
Thunder Mountain feels like discovering a hidden oasis. Just as you’re wondering, “Where is this place?” you round a corner to find a stunning blue lake cradled by rugged peaks. Unlike most trails, parts of this route aren’t clearly defined—you might scramble over rocks or weave through small trees, but you’re still on track. Much of the hike follows the heavily traveled PCT, contrasting with these wilder sections.
Starting at the Tunnel Creek Trailhead, the trail climbs steadily through dense forest. Though relentless at first, it rewards persistence. You’ll reach Hope Lake before continuing north on the PCT, where steep, rocky terrain offers jaw-dropping views of surrounding peaks. After about 3.5 miles, take the junction to Thunder Lakes, nestled in an alpine basin surrounded by cliffs and meadows. It’s pure magic.
As part of the fragile Alpine Lakes Wilderness, this area deserves your care— please stay on the trail and avoid trampling plants to help preserve its beauty.
Pro-tip: You have many options here, on the lake, above the lake, its really hard to go wrong. I stayed down by the lake but if I could do it again I would sit up a little bit hight to enjoy the sunset just a little longer.
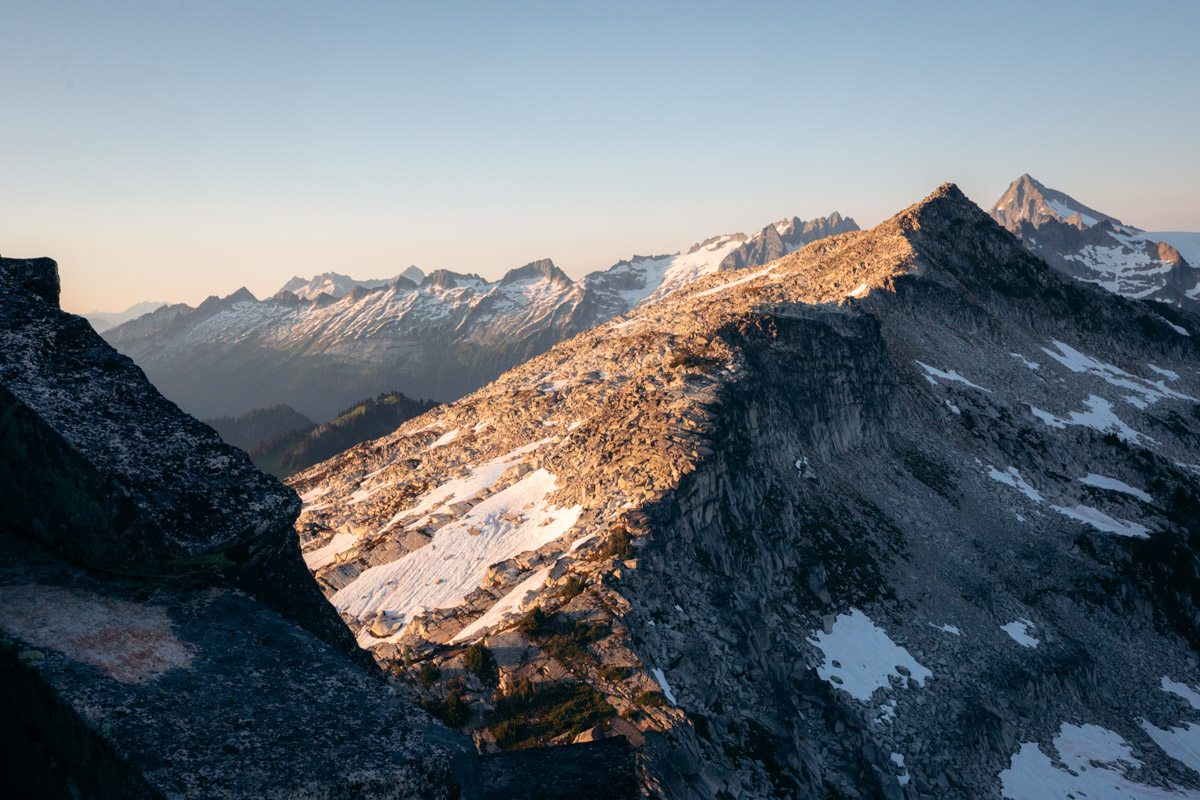
Cascade Pass / Sahale Arm Glacier
Location: Okanogan-Wenatchee National Forest
Distance: 12.1 miles
Elevation Gain: 5,029 ft
Difficulty: Hard
Parking Pass: Northwest Forest Pass
Trail Guide: Cascade Pass
If you’re building a Washington backpacking list, Sahale Arm needs to be on it. It’s one of those hikes that just keeps getting better the farther you go—switchbacks, meadows, glaciers, and finally, a ridgeline that feels like you’ve stepped into another world.
The day starts with 23 switchbacks (yep, I counted), but they’re shaded and steady, and once you hit Cascade Pass, the views start showing off. Good trail runners make a huge difference on sustained climbs — I wore my La Sportiva Bushido III trail runners on this one. there, it’s all alpine—open meadows, jagged peaks, and if you’re lucky, a bear or two doing their thing way off in the distance. I once turned a corner and came face to face with one—about 14 feet away. Heart-pounding and totally unforgettable.
As you climb higher toward the glacier, the trail gets steeper, but so do the views. The real magic kicks in at Sahale Arm. If you can get a permit, camping up there feels unreal—perched above it all, with stone-ringed tent spots, sweeping mountain views, and mountain goats that occasionally wander through like they’re checking in. Sunset hits different up there, and morning light? Forget it. You’ll never want to leave.
It takes effort to get there, but trust me—this one stays with you.


Pro tip: If you don’t win the lottery, try for a walk-up permit at the Marblemount Ranger Station. Same-day and next-day spots pop up, and it’s worth checking Recreation.gov too. I slept in the parking lot and was second in line at 7am—it worked. Waking up at Sahale Glacier under the stars was one of the most unforgettable nights I’ve ever had in the mountains.
This hike is one of the crown jewels of North Cascades National Park. For more trip planning and other hikes in the area, see my Complete Guide to North Cascades. Need help navigating the permit lottery? Check out my Washington Permit System Guide.

Robin + Tuck Lakes
Location: Alpine Lakes Wilderness
Distance: 12.7 miles
Elevation Gain: 3,389 ft
Difficulty: Hard
Parking Pass: Northwest Forest Pass
Trail Guide: Tuck and Robin Lakes
If there is a destination that really make you work for it, this is it. Getting to Robin Lakes with a pack is no easy feat. It is at times a haul that makes you grab onto whatever you can find to hoist yourself up the next rock. But that is part of the fun and the reward. You gotta love Type II fun. Always.
The sunrises and sunsets up at Robin Lakes are unbeatable. And the views of Mt.Daniel just as epic. Remind yourself of this when the going gets tough. It helps.
The good thing with this one is that there is Tuck Lake down below Robin Lakes. And if you think the climb is too much, set up camp at Tuck, go for a swim, (the lake is amazing) then day hike up to Robin. Leave the pack and all the heavy stuff behind. Its an option lots of people take.
If you do make it up to Robin and are craving more, hike up Granite Mountain. Its a fun small scramble that has large views all over the cascades including Mt.Rainier. Its worth every step.

I wrote a detailed trip report with campsite recommendations, route beta, and what to expect on the climb: Backpacking to Robin Lakes: Two Nights, One Perfect View of Mount Daniel.
Pro-Tip: If you hike up to Granite Mountain, don’t take the same trail down. There is an AWESOME boot path the heads around the East side of the lake which has stunning views of Mt.Daniels. And in the fall it’s ALL RED! And a pretty easy and more mellow way down.
Jade Lake
Location: Alpine Lakes Wilderness
Distance: 20 miles
Elevation Gain: 4,400 ft
Difficulty: Hard
Parking Pass: NW Forest Pass
Trail Guide: Jade Lake via Deception Pass
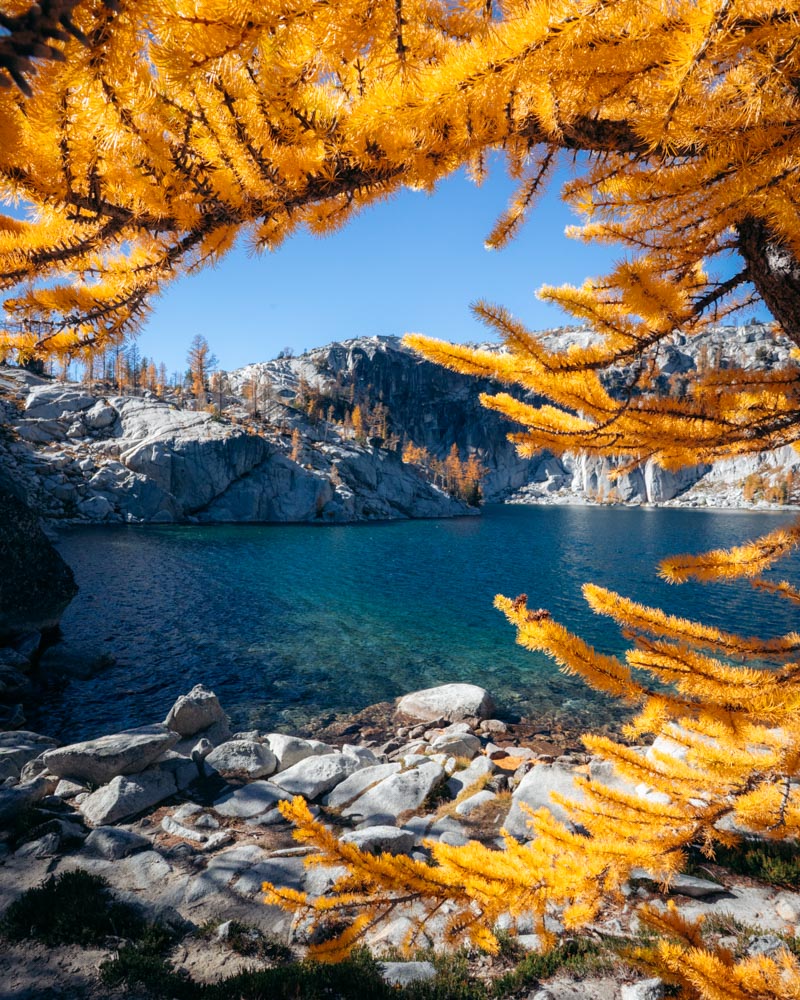
Jade Lake is one of those places that doesn’t feel real. Tucked high in the Alpine Lakes Wilderness, the water is an almost unbelievable turquoise—glacial runoff from Lynch Glacier gives it that color, and when you finally see it after miles of trail, it hits different.
The hike starts easy enough from Tucquala Meadows, wandering through forest past Hyas Lake before the climbing begins. You’ll gain elevation steadily up to Deception Pass, lose some on the way to Marmot Lake (annoying but unavoidable), and then gain it all back and then some on the final push to Jade. The section between Marmot and Jade is where things get real—scrambling over roots and rocks, following cairns, navigating terrain that feels more like an adventure than a trail.
But that’s the point. Jade Lake earns its reputation as one of the most beautiful and challenging backpacking destinations in Washington. Camp at the lake, take a dip if you’re brave enough, and if you have an extra day, hike up to Dip Top Gap for views of Pea Soup Lake—another stunner hiding just over the ridge.
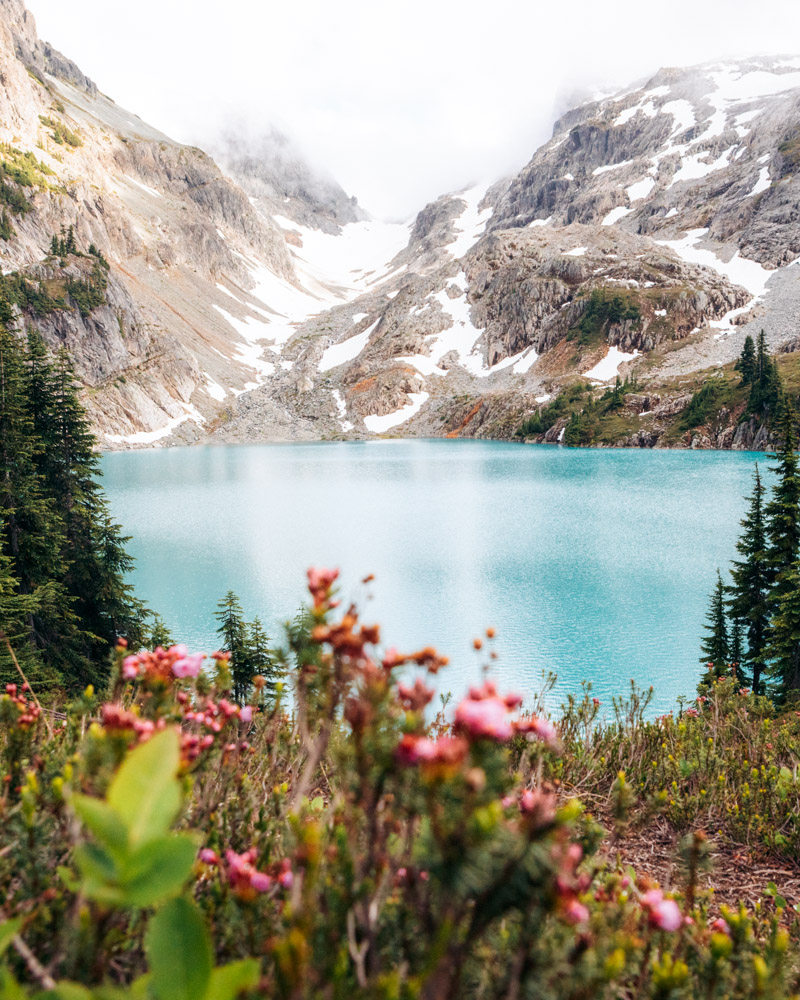
Pro-Tip: Marmot Lake makes a great base camp if the climb to Jade feels like too much with a full pack. Set up camp there, then day hike to Jade with just water and snacks. Also, BRING BUG SPRAY. The mosquitoes here are legendary.
Spectacle Lake
Location: Alpine Lakes Wilderness
Distance: 19 miles
Elevation Gain: 2,600 ft
Difficulty: Hard
Parking Pass: NW Forest Pass
Trail Guide: Spectacle Lake
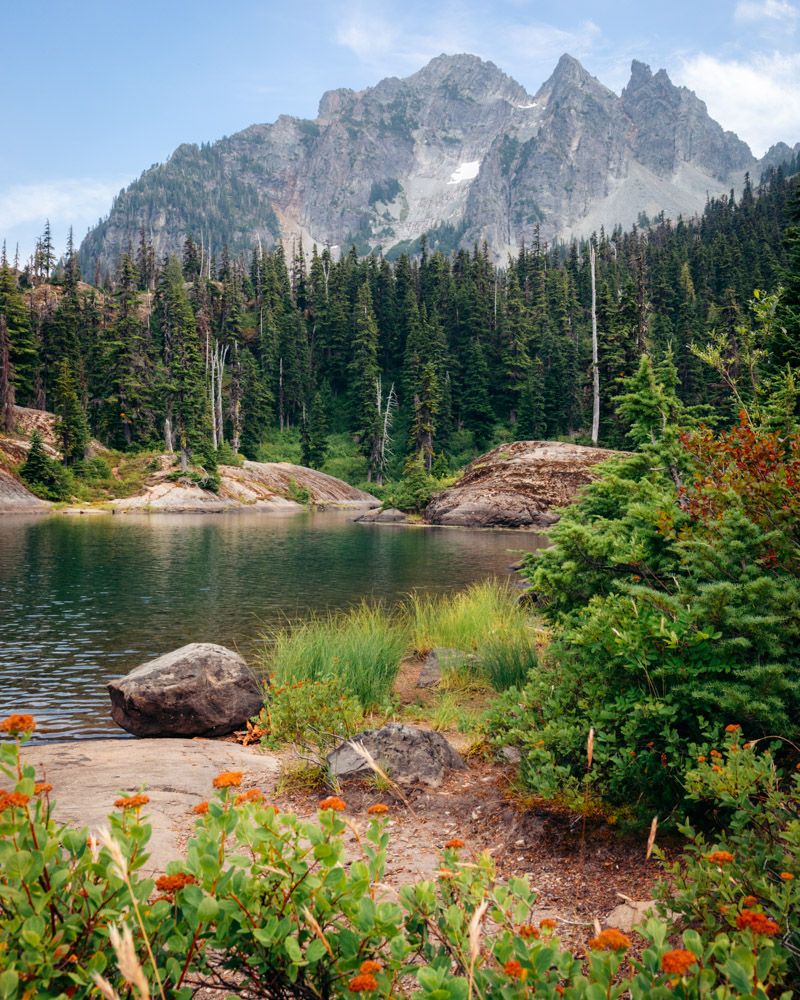
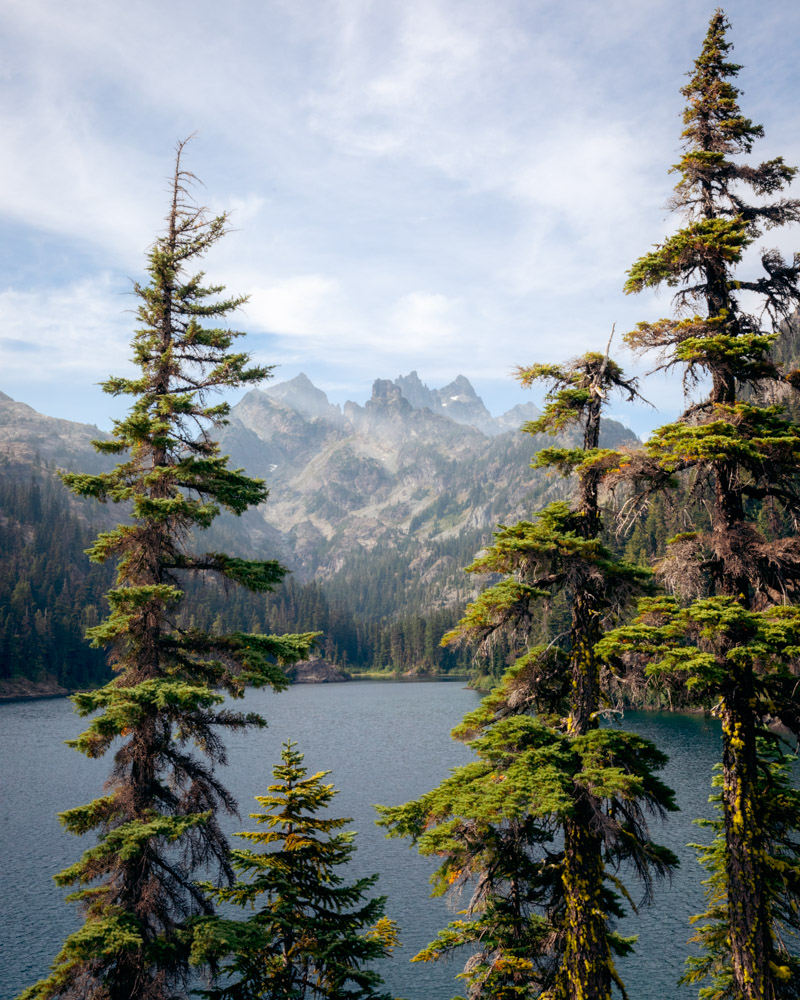
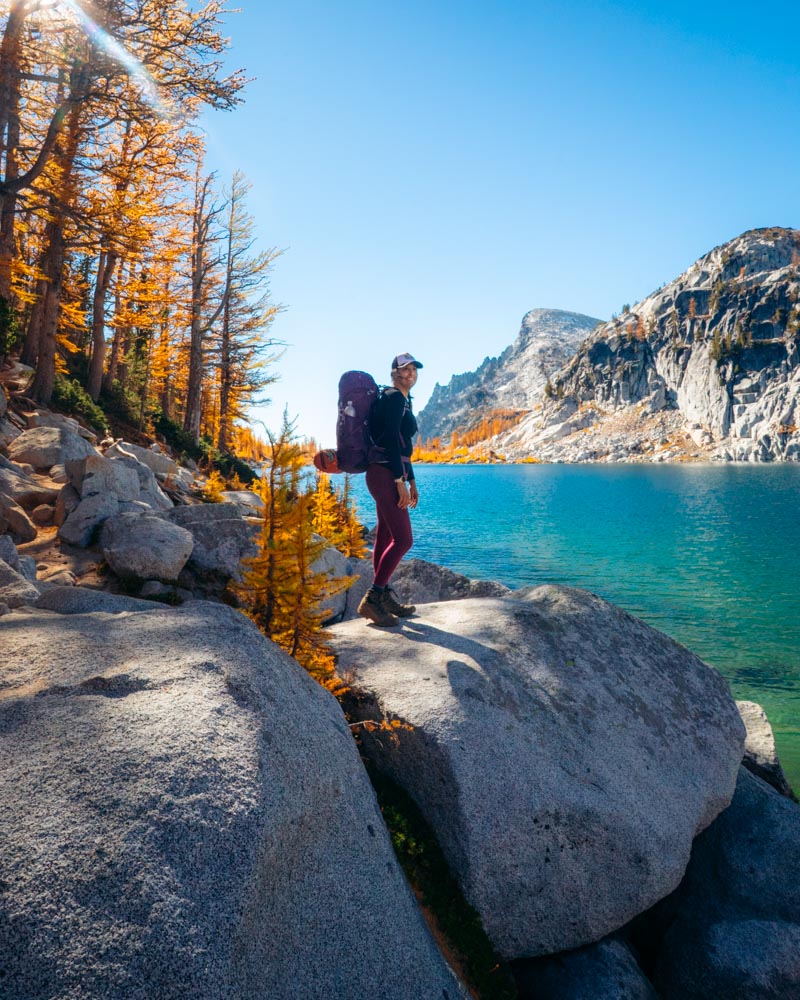
Spectacle Lake lives up to its name. Nestled beneath Chikamin Ridge with clear water and views in every direction, it’s one of the true gems of the Alpine Lakes Wilderness—and one of the more accessible ones if you don’t mind putting in the miles.
The trail starts near Cooper Lake and stays mostly flat for the first four miles to Pete Lake, which makes a great overnight option if you want to break up the trip. From there, things get more interesting. You’ll cross Lemah Creek (check conditions—it can be tricky early season), pass through a burn area from the 2009 fire, and then hit the switchbacks. Nearly all the elevation gain happens in the last mile or so before you crest the ridge and drop down to the lake.
Once you’re there, it’s worth every step. The camping spots on the peninsula have views in every direction, the water is perfect for swimming, and if you time it right, you might have the place mostly to yourself. The lake connects to the PCT, so you’ll likely see thru-hikers passing through—always fun to swap stories.
Pro-Tip: Pete Lake works great as a base camp if you want a shorter first day. Set up there, then day hike to Spectacle with a light pack. The peninsula has the best campsites, but they fill up fast on weekends—get there early.
The Enchantments (Core Zone)
Location: Alpine Lakes Wilderness
Distance: 19-20 miles (thru-hike)
Elevation Gain: 6,000 ft (via Aasgard Pass)
Difficulty: Very Hard
Parking Pass: NW Forest Pass + Overnight Permit (lottery required)
Trail Guide: Enchantments Thru-Hike
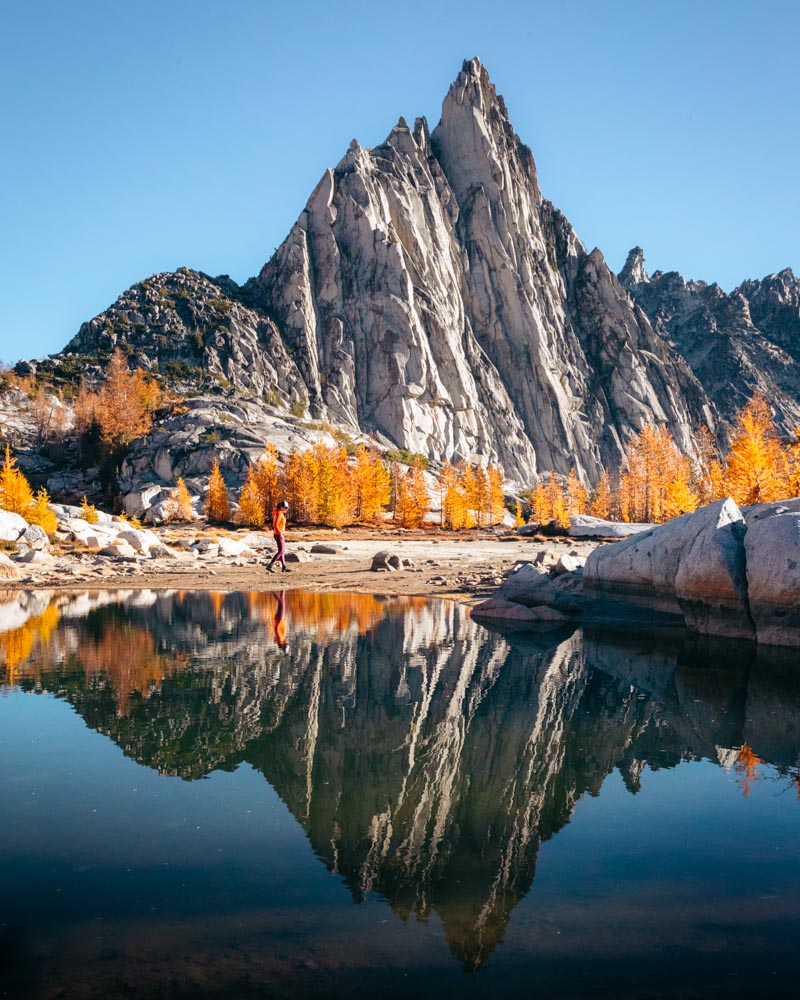
If you’ve heard of any backpacking trip in Washington, it’s probably this one. The Enchantments is the crown jewel of the Alpine Lakes Wilderness—turquoise lakes, golden larches in fall, mountain goats that wander through camp like they own the place (they do), and some of the most dramatic alpine scenery you’ll find anywhere.
The catch? Getting a permit is genuinely like winning the lottery. Thousands apply, only a few hundred get Core Zone permits. Learn how the permit system works and strategies to improve your odds.
Most people do the thru-hike starting at the Stuart Lake Trailhead and ending at Snow Lakes. That means tackling Aasgard Pass early—2,200 feet of elevation gain in less than a mile. It’s steep, it’s rocky, and it’s relentless. But once you crest the pass and drop into the Core Zone, you’ll forget all about your legs. Lake after lake unfolds in front of you: Isolation, Tranquil, Perfection, Inspiration, Leprechaun. The names match the vibes.
Fall brings golden larches that transform the entire basin — check my Larch Timing Guide to plan your trip for peak color.
For complete logistics, gear recommendations, and my personal experience doing both the thru-hike and overnight camping, see my Complete Guide to Thru-Hiking the Enchantments
Pro-Tip: If you don’t win the lottery, try for a walk-up permit at the Leavenworth Ranger Station—same-day and next-day spots do come up. Or apply for Snow Zone or Colchuck Zone permits and day hike into the Core. Not the same as camping inside, but you’ll still see the magic.

What’s the best beginner backpacking trip on this list?
Gem Lake via Snow Lake or Ptarmigan Ridge + Goat Lake are the most accessible options here. But honestly, most trips on this list are intermediate to advanced. For true beginners, I recommend starting with my 8 Easy Overnight Trips Near Seattle to build your skills first.
Do I need a permit for these trails?
Most require a Northwest Forest Pass for parking. Overnight permits are required for Cascade Pass/Sahale Arm, High Divide/Seven Lakes Basin, and The Enchantments — all through competitive lottery systems. See my Complete Guide to Washington’s Permit System for lottery dates, tips, and walk-up permit strategies.
When is the best time to do these hikes?
July through early October for most trails. Wing Lake and the Enchantments are spectacular in late September/early October for larch season — the golden needles are unforgettable. See my Best Fall Hikes in Washington for timing tips across all the best larch destinations.
What’s the hardest trail on this list?
The Enchantments via Aasgard Pass is the most demanding — 6,000+ feet of elevation gain and 19 miles if you do the full thru-hike. Robin Lakes and Jade Lake are close seconds, both requiring steep scrambling with a heavy pack. Read my Enchantments Guide to know what you’re getting into.
What gear do I really need for overnight trips?
Start with the Ten Essentials listed above, plus: tent, sleeping bag, sleeping pad, stove, cookware, and enough food. For a complete breakdown, see my Beginner’s Guide to Backpacking. Heading out in fall? Check my Fall Backpacking Gear Checklist for cold-weather additions.
Can I do these as day hikes instead?
Several work as long day hikes: Cascade Pass (without Sahale camping), Snow Lake to Gem Lake, and Goat Rocks to Snowgrass Flats. The Enchantments can be thru-hiked in a single (very long) day without a permit — see my Enchantments Thru-Hike Guide for how to pull it off.
Can I bring my kids on these trips?
It depends on your kids honestly. For family-friendly backpacking, check out my 9 Easy Backpacking Trips with Kids in Washington or Chain Lakes Loop — one of the best beginner family backpacking trips in the state.
In conclusion.
Washington has endless backpacking potential—this list just scratches the surface. Whether you’re a seasoned hiker or just getting started with overnights, these trails will blow you away.
🏕️ Ready to Plan Your Next Epic Backpacking Adventure?
Build Your Skills:
- Beginner’s Guide to Backpacking — Master the fundamentals before hitting the trail
- Solo Backpacking for Women — Build confidence for independent backcountry trips
- 8 Easy Overnight Trips Near Seattle — Perfect first backpacking adventures
Navigate Permits:
- Washington Permit System Guide — Lottery dates, strategies, and walk-up tips
Plan Your Timing:
- Best Fall Hikes in Washington — Larch season destinations and timing
- Larch Timing Guide — When to go for peak golden color
- Fall Backpacking Gear Checklist — Pack right for cold nights
Detailed Destination Guides:
- Thru-Hiking the Enchantments — Complete logistics, gear, and what to expect
- Robin Lakes Guide — Trip report with campsite tips
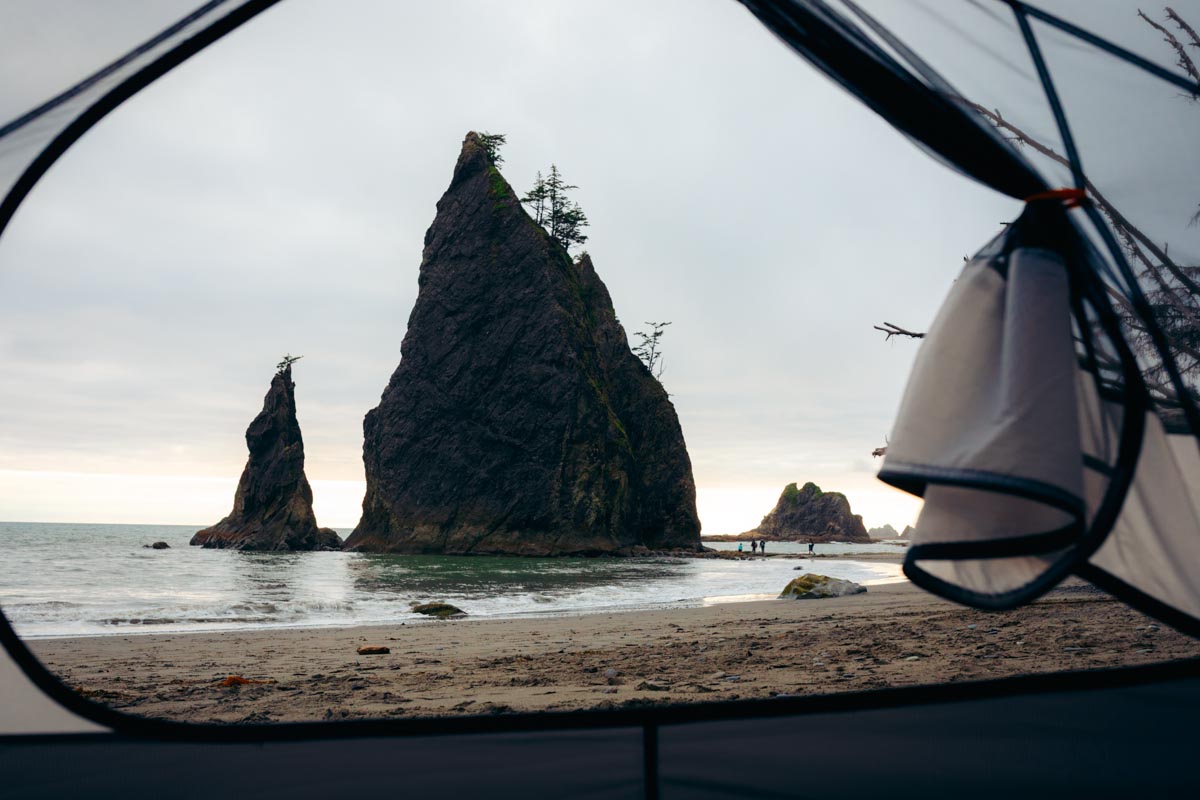
- Backpacking Shi Shi Beach — Epic Olympic coast overnight
- North Cascades Complete Guide — Plan your park adventure
Family Adventures:
- 9 Easy Backpacking Trips with Kids — Family-friendly overnights
- Chain Lakes Loop — Best beginner family backpacking near Mount Baker
- Backpacking with Kids Survival Guide — Tips for trail success with little ones
More Adventures:
- PCT Section J — 90 miles through Washington’s best alpine terrain
- Best Hikes in Mount Rainier — Day hikes and backpacking routes
Conquered one of these epic backpacking trips? Share your photos @the.trekking.mama on Instagram – I love seeing these incredible Washington adventures!
⛰️ Pro Tip: Start with the easier trips on this list to build skills, then work your way up to the more challenging routes – each adventure will prepare you for the next!